We remain fully operational. Our teams are working around the clock to ensure your deliveries continue safely.

DOWNLOAD THE APP


Customer Services
Copyright © 2025 Desertcart Holdings Limited
DOWNLOAD THE APP

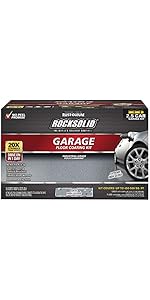
🛠️ Transform your garage into a showroom masterpiece—fast, flawless, and built to last!
Rust-Oleum RockSolid Polycuramine Garage Floor Coating is a high-performance, two-part concrete coating designed for interior surfaces like garages and workshops. It offers 20 times the strength of epoxy, a high-gloss terrazzo finish, and quick cure times—walk-on ready in 8-10 hours and vehicle-ready in 24. The kit covers up to 500 sq. ft., resists chemical spills, cracking, peeling, and hot tire pickup, and includes all necessary components for professional-grade application with low odor and VOC.


| ASIN | B077YVHVL2 |
| Batteries Included? | No |
| Batteries Required? | No |
| Best Sellers Rank | #3,393 in Industrial & Scientific ( See Top 100 in Industrial & Scientific ) #6 in Industrial Coatings |
| Brand | Rust-Oleum |
| Color | Dark Gray |
| Coverage | 500 sq. ft |
| Customer Reviews | 4.0 4.0 out of 5 stars (3,774) |
| Date First Available | November 15, 2018 |
| Dry Time In Hours | 10 |
| Finish | High-Gloss |
| Finish Type | High-Gloss |
| Full Cure Time | 24 Hours |
| Included Components | 2 Polycuramine Burst Pouches, Foam Roller, Concrete Etch, Decorative Color Chips, Stir Stick, Instructions |
| Indoor/Outdoor Usage | Indoor |
| Is Discontinued By Manufacturer | No |
| Is Waterproof | True |
| Item Form | Liquid |
| Item Package Quantity | 1 |
| Item Volume | 500 Milliliters |
| Item Weight | 17 pounds |
| Item model number | 317284 |
| Manufacturer | Rust-Oleum |
| Model Name | Rocksolid Polycuramine |
| Package Information | Can |
| Paint Type | Oil |
| Part Number | 317284 |
| Pattern | Coating |
| Product Dimensions | 13.25 x 8.25 x 8.25 inches |
| Size | 2.5 Car |
| Special Feature | Crack Resistant |
| Special Features | Crack Resistant |
| Specific Uses For Product | Interior |
| Style | 2.5 Car Kit |
| Surface Recommendation | Concrete |
| UPC | 020066349929 |
| Unit Count | 1.0 Count |
| Water Resistance Level | Waterproof |
M**I
Use Double the amount of Product to get a beautiful result. Divide space by the number of pouches
I, like everyone else, researched this process for weeks before deciding on the Rest-Oleum Rock Solid Garage Kit (the 20X version) in light gray. After reading many many reviews about the problems where people ran out of product or the coat was too thin or they could see color of the concrete below due to being too thin of a coat, rollers falling apart etc., I decided I did not want those issues so I started doing some math. My 2 car garage is exactly 410 Sq feet. There are a couple of nooks so it is not exactly square but I meticulously measured everything to make sure I had exact sq. ft. numbers I was trying to cover. From the comments of others, I deduced I would need two full 2.5 garage kits (4 burst pouches) to get the coverage I wanted. Preparation was a bear for me. The concrete is almost 60 years old and there were plenty of cracks and a lot of the rocks in the old cement that were just under the surface popped so I had significant pitting. They must have used a percentage of an inferior type of stone that was black and very soft. When I was doing my prep, the pitting was all because of these softer stones that seemed to have just turned to a black dust when I scraped during my process of fixing and leveling. To make matters worse, 20 years ago, I used an epoxy paint so I had that to deal with. I did not want to go thru the process of grinding the entire floor so I used my portable hand grinder with a grinding wheel and then really tuff sanding disks (about 40 grit I would say) to grind out the cracks and pits as best I could. I used self-leveling cement primed with the Self leveling solution that is supposed to help the cement adhere to existing cement in the cracks and pits then sanded that cement work when it dried using the grinder to get everything level. Perfect is the enemy of good so I decided I would use the Rust-Oleum Re-Coat Primer, to save time. I degreased the rest of the floor with Simple Green and got on my hands and knees and scrubbed the heck out of it hard with brushes and sponges to get every trace of dirt, spider poops, any oil etc. off. When I was satisfied with the cleaning and restoration, I used about 1.75 gallons of the Re-Coat primer and followed the instructions and let that dry overnight. In my mind I wanted to use 100% of the 2 Epoxy Kits that I bought the next day. I wanted a surefire method to evenly coat the floor with my 2 kits so I used a pencil to split and clearly mark my 410 Sq ft int 4 exact 103 Square foot sections. My thinking was I would use 100% of a burst bag in each quadrant area. This worked great for me so you might want to consider doing something similar. I used the foam rollers that came with the kit and had no trouble with them. In fact, I used the same roller for all 4 burst bags with no issues until literally the last 3 square feet where it started to come apart but it finished like a champ. That roller gave its all for me. I had gone out and purchased a 3 pack of top quality purdy 3/8 inch nap rollers just in case the foam rollers were really the disaster everyone claimed but I never used the nap rollers but I will for future painting projects. In my case the temperature was about 55 degrees so that may be why the epoxy never even came close to getting tacky. I used a 2 ½ inch brush to cut in the edges. I basically followed the Video instructions, kneaded the burst bags for a good 3 minutes, cut the pouch corner and poured directly from the pouch in 2 or 3 inch ribbons. The rollers basically pushed around a “puddle” of Epoxy. It filled in 95% of the imperfections as I went and used up the entire pouch in that 103 square foot section. As I was rolling my goal was to do more pushing and pulling of the puddle than “painting” and there was no roller noise one gets when painting say a wall where you hear the paint “ripping” off the roller. It was mostly silent so keep that in mind. I was not sure how heavy a flake I wanted but I did read this stuff is not designed for a full flake or even a heavy flake but I was clueless how much I would actually need and the last thing I wanted was to run out of flakes and have 80% flaked one way and the remaining looking like I ran low etc... So I purchased 2 more pounds of the Black and White flakes, took all 4 bags of flakes from both kits and emptied the blue and grey chips from the kits and my black and white extra chips and mixed them all together in a 12 x 12 box. So my flake is a custom blend of the kit flakes with the black and whites mixed and its awesome. I think each blue flake bag in the kit was ½ pound so I had a total of about 4 pounds of flakes total to use. I ended up with about 3/4 pound extra at the end and I got the exact flake density and colors I wanted as I went. For me, since the air temperature was on the lower range for the application it worked out pretty good. I got a nice slow cure. For a hot minute I actually got a bit nervous it was not going to cure correctly. I finished at 6 PM and checked it after 2 hours, 4 hours, 6 hours and even at 6 hours it was still like I just rolled it out so I was having a heart attack something went wrong. I went to bed and the low temperature that night was 49 degrees and got up and checked it at 8:00 AM (14 hours post completion) and it was still slightly tacky but firming nicely. Certainly, no way was I going to walk on it per Rust-Oleum’s claims of walking on it in 10 hours… No way for me. It warmed up to the mid 70’s during the day and by about 11AM it seemed much firmer but I could still take my fingernail and push into it and it was soft yet. By 4 PM it seemed set up pretty good. I made the mistake of walking on it with my socks and I noticed that the moisture from my feet was actually leaving like ghost prints on the shine and I have about 3 foot prints where the gloss is slightly marred with the outline of my foot and toes. Fortunately, I detected this right away and let it cure overnight again in the warmer temps before messing with it any further. Next day it was truly “Rock Solid” this stuff is tuff as nails hard and you cannot even scratch it but don’t under estimate cure time in cooler conditions or you will damage all your hard work. I think it turned out awesome and I enclosed a couple pictures. The wife and I had two other couples over last night for dinner and everyone was in awe of my project. I can truly say this is one of the most satisfying projects I have done in a long time.
P**C
Prep is king. Application easy and sufficient
As all other reviews have said - prep is most important. My garage was polished concrete 28 years old. Some oil stains and very few minor cracks. Lots of shiny surfaces. I have a 4 car garage and used 2 boxes of 2.5 glossy gray polycuramine. I was so paranoid about usage from other reviews, I could have and should have put on a little heavier in the beginning. I had 1/4 of the fourth bag left over. Total of 720 sq. feet. I power washed, grinded the floor with a 4 1/2 hand masonry wheel on oil and shinny spots. Spent several hours doing this. Then I acid etched and power washed again. I still had a few spots that needed grinding and did them and then power washed again. I used a blow dryer to remover the fine concrete dust from tough up spots. I had 4 fans going x 48 hours to ensure that concrete was dried out properly. Definitely have attest one other person to help with application - their job - paint 3" trim strips around perimeter and snowflake the chips ( meaning literally throwing the chips up in the air - not outward - but upward and allowing them to float - snowflake - back to the concrete surface). Easy to do and fun. Think fairy dust! This is happening while the other guy (me) pours 2" strip across the 4'x4' working space and then rollers it in. The included rubber rollers worked fine. I used purdy 3/8"nap rollers for clear coat - these worked well also. I used one rubber roller per bag - they usually started coming apart at the end of the bag. The 2 of us finished application in 2 hours. Had plenty of time for application. I did set timer on my apple watch for 3 minutes for the mix and then set timer for 1 hour for application. Usually done in 35 minutes per bag. Once I saw how much application covered per bag and realized we had plenty of time - low stress once process got going. . I had no bubbles and only 5-6 quarter sized voids in whole garage. Didn't see until next morning when polycuramine was hard. Definitely ok for foot traffic next morning. Temperatures ranged 60-78 degrees over the 24 hour period. No car parking until 48 hours. Then when I backed out - where tires sat - some cloudy tread marks that did not wipe away. At 48 hours applied clear coat with anti-skid - one bag covered whole 4 car garage - stirring every 10 minutes to keep mixed. Next morning saw where I missed some spots - very hard to see unless have right angle. Really need to move around to see shiny vs cloud clear coat surface. Be diligent about this. I had to do a second coat the next day (which was fine with me) to cover missed areas. No missed areas this time. Overall, prep was most work. Application fun and easy with a buddy to help. Looks amazing.
ハ**ト
暑くなる前にと、今朝ガレージの塗装をしました。少し広いけど一台分のスペースだからと送って貰った2台のキットの内1パックを使うつもりでした。厚めに塗っていると足りないことに気づき、慌ててもう1つを開封。たっぷり余裕を持って塗った分、重厚な仕上がりです。光沢があり表面はツルツル。完全硬化を待って2日後に入庫予定ですが、ショウルームで愛車に出会って時の再現となりそうです。
M**L
I love this product. It goes on easy and looks great. This box claims to cover 500 sqft but it barely did mine at 220 sqft. This is because the concrete is porous and absorbs the epoxy quickly. I can't stress enough that you must thoroughly clean the concrete and use the supplied etch. Do not put the epoxy down if there is any moisture in the concrete at all. Also, I bought another 2 bags of paint chips to throw down because I didn't feel like there's enough included to give me the look I wanted.
J**R
Ordered Rustoleum Rocksolid 317284 Dark Gray AUG & FEB 2025. 1 was DARK GRAY correct per #317284, 1 BLACK NOT CORRECT. Sent pictures showing one side of garage Gray the other side BLACK. Nelson Life acknowledged the problem and apologized “we would like to sincerely apologize for the situation but says” and at the same time says “From our side, we do not see any problem” NEVER buy from Nelson Life!
Trustpilot
2 days ago
2 weeks ago