Desert Online General Trading LLC
Dubai, United Arab Emirates
Desert Online General Trading LLC
Dubai, United Arab Emirates


🏡 Your outdoor storage solution just got a stylish upgrade!
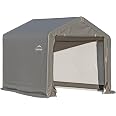
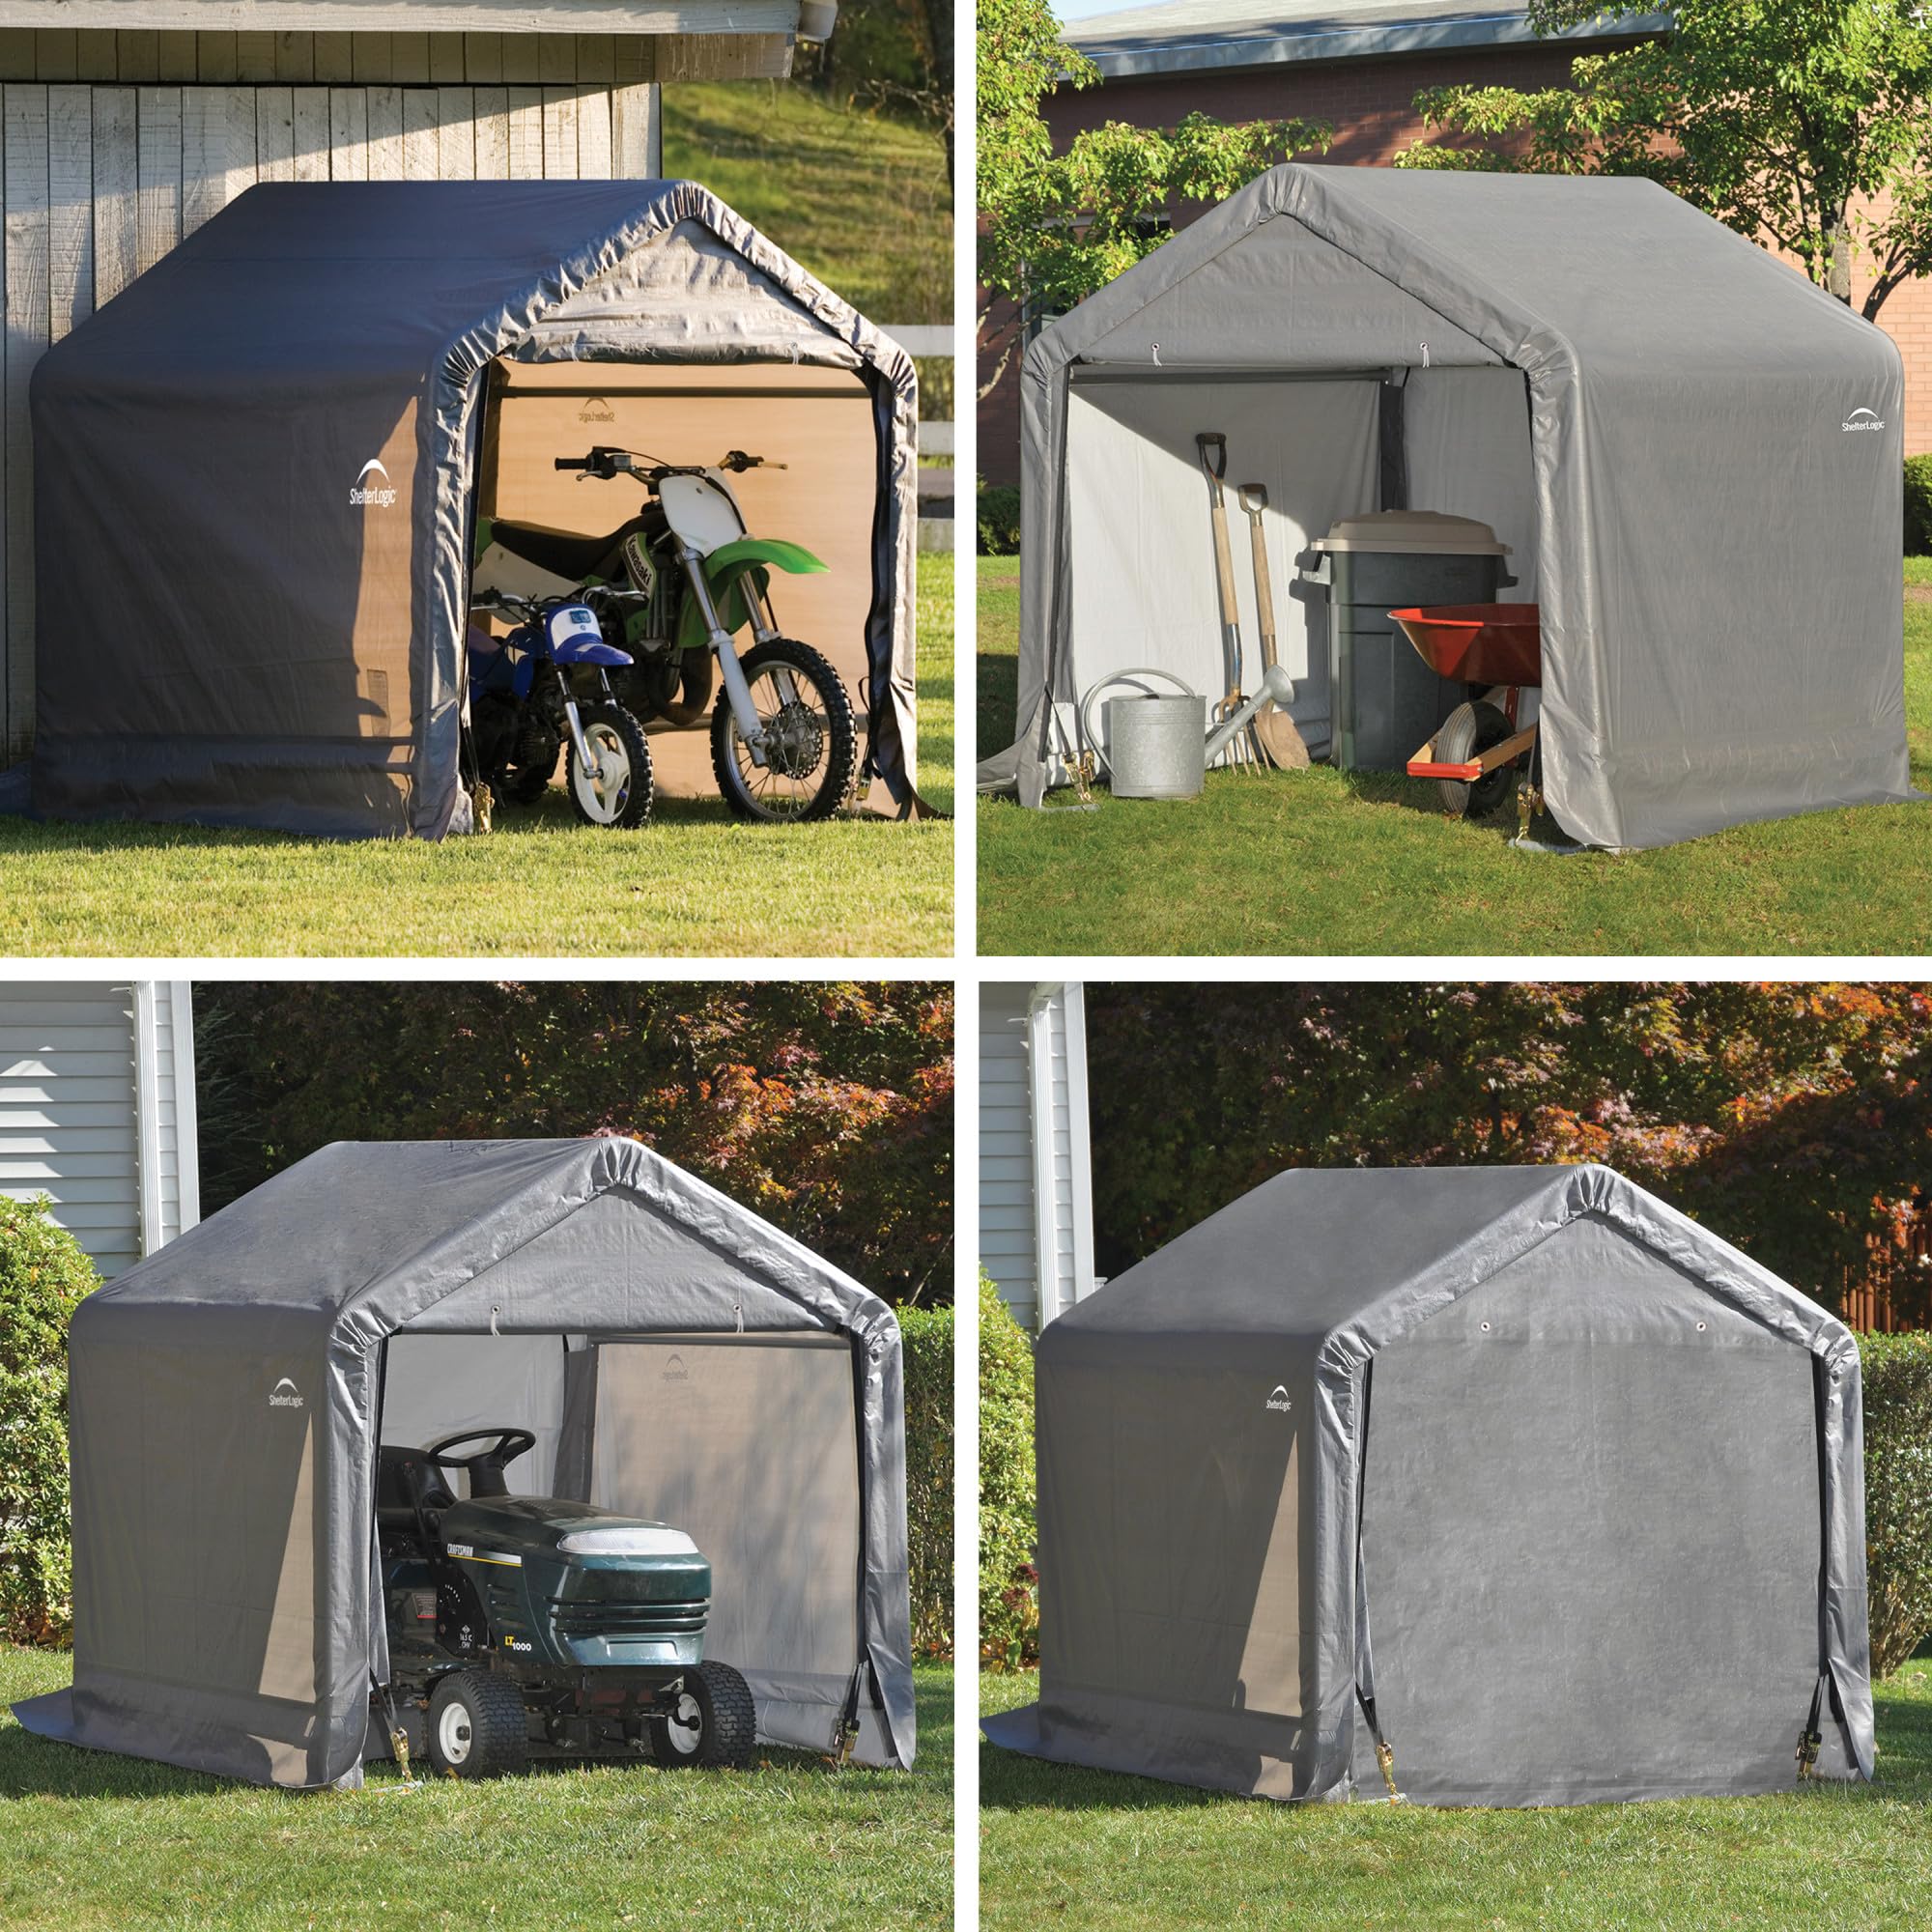
The ShelterLogic 6' x 6' Shed-in-a-Box is a durable outdoor storage solution featuring an all-steel frame and a waterproof, UV-treated cover. Designed for easy assembly and long-lasting use, it’s perfect for storing camping gear, sports equipment, and more.


| Brand | ShelterLogic |
| Color | Gray |
| Material | Alloy Steel |
| Item Weight | 25 Grams |
| Style | Peak |
| Base Material | Alloy Steel |
| Top Material Type | Alloy Steel |
| Water Resistance Level | Waterproof |
| Chamber Depth | 6.2 Feet |
| Frame Material | Alloy Steel |
| Door Style | Sliding Doors |
| Ultraviolet Light Protection | UV Protection |
| Assembly Required | Yes |
| Manufacturer | ShelterLogic |
| Door Width | 55 Inches |
| UPC | 677599704017 |
| Global Trade Identification Number | 00677599704017 |
| Item Package Dimensions L x W x H | 40.75 x 17 x 6 inches |
| Package Weight | 23.07 Kilograms |
| Item Dimensions LxWxH | 72 x 72 x 72 inches |
| Brand Name | ShelterLogic |
| Warranty Description | 1 year limited |
| Model Name | All Season Steel Metal Peak Roof Outdoor Storage Shed with Waterproof Cover and Heavy Duty |
| Suggested Users | sports |
| Number of Items | 1 |
| Part Number | 70401 |
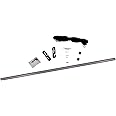
| Included Components | (1) Steel Frame(1) Gray Fitted Cover(1) Double Zippered Door Panel(1) Back Panel(4) 15-Inch Auger AnchorsEasy Step-by-Step Instructions |
| Size | 6' x 6' x 6' |
| Sport Type | Camping & Hiking |
S**.
Assembles fine, sure to last a long time!
Frist off, it’s a well-constructed unit with good quality parts. And assembly is straight forward; I did it myself in a few hours. The concern about it constantly falling apart during assembly was not my experience even though I did follow some of the recommendations to ‘tie’ it together. Was clear to me that these temporary ties were not needed due to the sung fit of the tubing.Here are the tips I suggest based on my experience in installing this at my seasonal campsite.Step 6: post squaring up the frame in Step 5, mark where to place the anchors inboard a about 4 inches from the corners at a 45-degree line from the comer. This way the anchors will (when attaching the securing lines) both ‘pull’ the frame side to side and front to back. Then move the fame over a couple of feet to install the anchors.New Step 6A: place back the frame and square it up again. Now take 4 spikes (not included) and drive them thru part 800361 which is the ‘foot’ of the frame. There are holes in this part including one at the top and bottom that will accommodate this spike and still allow the rachets in later steps to attach. The spikes will now hold the frame in place nice and square while installing the canvas. Given this you can skip over (not do) the loose wire ties to the anchors in steps 6a thru 6e.Note that I consider the supplied anchors more then adequate for my conditions.Step 7, 8 and 9: the “i” are simply telling you to NOT put the poles inside the sleeves and to NOT pull out the strap. The canvas ‘wraps’ around the frame and when you pull on the straps as you cinch it up. It will make sense once you do one panel.Step 8 and 9: you will need to pull apart select tubing joints for the straps. Having a rubber mallet will both help to get them apart and put the back together again.Step 11: the supplied rachets, while adequate, are fragile and finicky. One of mine was bent up (due to shipping damage?) so I had to pull it apart and straighten it out. Also, if needing to release the strap once tightened you may have to assist it to unwind. A screwdriver in the ‘slot’ of the wrapper core will assist in that. Additionally, the straps are too long (better then too short!). I found that cutting off about 6 inches per end left enough to properly wrap around the rachet but not fill it up to the point of overflowing and binding up. And do not forget to use a lighter to melt the end so it does not unravel.Step 11a. the hook of the rachet goes into the hole in the foot on the interior. The outside holes are for the large tarp that is installed in starting in step 12.Step 14: when placing the overall tarp and starting to tie it down, it is easy to have it too far forward or backward, so take your time and adjust as you go along. I measured the amount of ‘warp’ on the front (both left and right side) and same on back and got it as even as possible. Was about 5”.Step 14a: when putting the 2 tubes together pay attention to the holes on each end. They need to line up. While this is shown in the diagram, was not an obvious highlight.Step 17a. while the measurement shown is about correct, understand that the height and position of these cross beams dictate the both the location and the tightness of tarp. If one crossbeam is too high the other too low will result in an uneven wrap of the tarp. Once I centered the tarp, I loosened the clamps (part no. 13202) slightly and then tapped down the crossbeams with a rubber mallet to get the necessary tension.Step 18: I snaked the wire tie between the end of the crossbeam and the upright pole fishing it thru the clamp (there is room). By doing this the hold down wire is ‘trapped’ vs. being able to slide along the cross beam as it is shown in18e. Also, I fed the wire differently thru the wire clamp; i.e. instead of it being as shown in 12d. I fed the bitter ends in thru it in opposite directions. Then, after slightly tightening the nuts and using Vice-Grips, I was able pull it tight and then fully tighten the nuts. And this is where, if the anchors are at that few inches of kitty corner, it really holds the whole shelter in a good and tight fashion. And key to this are the spikes in new Step 6A, i.e. the spikes will keep the frame from pulling in when attaching the wire ties.Post all of this, need to check to ensure the door zips up without stress or being too loose. If so, pull out the spikes in the front and adjust as needed. I also when around and readjusted the rachets as needed.Overall, as great product that I expect will last a long time!UPDATE:Follow up after a couple of months, but it’s been like a couple of years! This was installed at my campsite in the Adirondack mountains in upstate NY where, like the rest of the country, we have been experiencing extreme weather conditions. Like those labs where they test things under extreme conditions to evaluate how it will hold up in the long term, we have had extreme winds as well as rain and unseasonably cold conditions this summer.How's it doing?Short answer: it like the day it was installed! Still sturdy, no rips, still taught and zero water inside (the ground can get wet from water running under it via the rocks). Recall also that I used the supplied “temporary” anchors > they were just fine for my soil conditions, but I did use spikes in the tubes as part of the set-up process and left them in.Updated from 4 to 5 Stars as a result!Door Tip.I continue to enjoy this shed but found it a little awkward to roll up the door and bungee it open > it simply does not roll up too easily. Fortunately, the bottom of the door has a pocket and a 1” PVC pipe fit it like it was made for it. And Presto! Now rolls up like a dream and easy to put on the bungees. I put end caps on the pipe after cutting it to length to keep out the critters. Note of caution: when unrolling it, guide it down to preclude it from falling and jerking the door which may eventually damage it. I used schedule 40 PVC but would have preferred schedule 10 as its slightly lighter but there was no availability in my area.
M**E
Not the easiest to set up, but solid and lasts for years.
This is my third Shelter logic shed. The last one I bought in 2008, gave to bro in 2012 and he's still using it. It's very faded, has some mouse holes in bottom, but he lives on a farm, and it's in direct sunlight most days. So based on that, when I needed a temporary shed for new mower while waiting on garage build...it was a no brainer.Again, instructions aren't the clearest, it's a PITA to put up (especially solo), you'll swear at it....but once up, you'll swear by it. Bro looks forward to getting this, new to him, shed in a few years :) I'll probably keep this, build it on a concrete base with a 4x4 bottom frame, 2 layers high, and keep it til I leave this blue marble. PS 6x8 would have been plenty for a lawn tractor.
T**D
Cheap garbage with a bait n switch
I purchased this unit about a year ago now. Assembly, as others mention, is a nightmare. It comes in a box about the size of a golf bag and you get to make a huge tent out of it.Once it was assembled however, it just worked and it did it's job well. It lasted through all the winter storms, 60mph wind etc. But then, 10 months later, it ripped.I contacted the factory because it's under warranty. They replied, weeks later, just to offer me a few options. The email is quoted verbatim:"The cover you have now is 6.5 Oz PolyethylenePrice of cover: $139.99 (we would send cover free of charge) Unfortunately this option is out of stock until late spring.14.5 Oz HD Poly- Vinyl- Green, Gray, Tan, or WhiteWarranty: 10-year pro-rated on cover; 3 years pro-rated on end panelsCover $389.99 -$139.99 = $250.00 + shipping and tax21.5 Oz ULTRA DUTY Poly-Vinyl - Available in Green or White ONLYWarranty: 15-year pro-rated on cover; 3 years pro-rated on end panelsCover kit: $529.99 - $139.99 = $390.00 + shipping and tax"So basically, yes it's under warranty, however we don't have those so here's your options that you can pay for. I tend to think that's borderline illegal. Of course offering an upgrade isn't illegal, but forcing the upgrade because you "don't have any in stock". I don't buy it. There's plenty for sale all over the internet including on Amazon.Additionally, they want you to pay for shipping if you upgrade, but if you don't upgrade, then you don't pay for shipping... Oh wait, silly me, you kinda have to upgrade.Stay away, this is garbage with scummy bait and switch tactics to boot. If the assembly wasn't so bad I might just buy a new one every year, but spending an entire day assembling one of these is not my idea of fun.
Trustpilot
2 days ago
3 weeks ago