🎨 Unlock your inner artist with every print — don’t just wear fashion, create it!
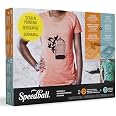
The Speedball Intermediate Screen Printing Kit is a comprehensive starter set designed for fabric printing enthusiasts. It includes two 4oz fabric inks (black and red), a 10" x 14" printing screen, professional-grade emulsion and cleaning supplies, and all necessary tools like a squeegee and brushes. With a tri-lingual instruction booklet, this kit makes it easy to produce vibrant, durable custom textile prints, perfect for DIY t-shirts and gifts.
M**N
Excellent Quality – Highly Recommended!
The Speedball Intermediate Screen Printing Kit is a comprehensive, high-quality set that takes your DIY t-shirt and textile prints to the next level. With everything you need—from inks and emulsion to frames and tools—this kit makes it easy to create professional-looking prints at home. The instructions are clear and beginner-friendly, while still offering plenty of room for intermediate users to improve their skills. Whether you're printing for fun or working on a small business, this kit provides the tools and creativity you need to succeed. A must-have for anyone interested in screen printing!
F**D
Great starter kit!
For the price, this is a great screen printing kit for beginners.My kit arrived Sunday, two days ahead of schedule... I was amazed! I am lucky that everything arrived safe and sound; no open jars. I delved head in, and used the photo emulsion for my project.I am posting some photos of my silkscreen project, so don't forget to take a peek.This is what I did:1. Went out shopping for a bug light, t-shirt (washed - no softener), pane of glass and had my art printed at FedEx Office.2. Cleaned the silkscreen with Dawn and dried with a hair dryer.3. Coated the silkscreen with the Diazo photo emulsion and let dry (4 hours+). Done in a dark room only lit with a bug light.4. Taped my artwork to the bottom of the silkscreen and held it flat with the glass pane. Kept in box, away from light.5. Took the box outside at noon and exposed for 2 minutes 50 seconds. Closed box and ran to the sink.6. Lightly sprayed both sides of the silkscreen with water and waited two minutes. Then sprayed water at full blast to remove emulsion. Patted dry and took outside to post harden for 5 minutes.7. Did the Balki Bartokomous happy dance.8. Used painters tape to close gaps around emulsion on silkscreen.9. Printed t-shirt and quickly cleaned tools and silkscreen.10. I heat set the ink with an iron. Five minutes on front and 5 on back.11. I washed the t-shirt again to test for proper heat set. It passed!12. Wore the t-shirt and fooled my friends into thinking I had bought it. :-D
P**Y
Everything you need to get started. Esay and fun.
If you have never done screen printing, this kit is for you. I had a small project that would have cost more to order than this kit costs. I have a vinyl cutter so I didn't think that I would be using the photo-emulsion. After your first project you look for things you want to screen print.Unlike old school printing inks that get everywhere and are impossible to remove, the new water based inks clean with soap and water. This is something you can do in your kitchen and not have worry.The photo emulsion is the scariest but required for fine detail. Don't let youtube videos scare you. What you need to know. The bottle of photo emulsion is not a one time use. It will store in your fridge for up to 4 months after being mixed. It becomes light sensitive when dry. This means you don't have to buy a dark room light to apply it to your screen. Simply dry your screen in a dark room (interior closet works just fine. After 4 hrs you can use the screen or you can store the screen in a dark box or garbage bag to be used in the next couple of wks. If you have everything ready, you have enough time to place your image and glass on the screen in visible light. You can expose your screen with a normal light source, including sunshine. The book has a chart for exposure times.Heat setting can be done with parchment paper and a normal clothing iron.Last, Speedball screens are made so you can easily replace your screen. You will only require one or 2 frames and from there just buy screen. This way if you have a design that you know you want to do again you don't have to clean the screen or buy a new frame to do other things, you can simply replace the screen in the frame and keep your other one for later.
L**T
Good enough for home use.
The starter kits Speedball produces have all you need to screen print things fairly easily. The instructions are simple (too simple) and all the products are work-horse quality, meaning that they are not fancy and may take some adaptation but function as they should. This kit gets 3 stars because I recieved both the original kit and the replacement kit damaged due to very poor packaging on Speddball's part. The first kit had the photo-sensatizer (which is needed to make the emulsion 'cook' when exposed to light, allowing you to create a stencil) open and both dry and spilled down its side. One of the inks had cracked and started to leak but that was minor. The worst of it was that the screen filler jar was open and spilled over everything (including the screen) esesntially making the kit useless. The second kit had minor issues with the sensatizer (which I decided not to use since I ordered a separate emulsion kit anyway) and the paintbrush had its cover put on wrong, pinning about a fifth of the bristles to the side of the handle. I found this to be good enough and have overall enjoyed using the kit. the polyester in the screen is kind of cheap though, and if not taken care of extremely well it will start to haze up and will take on a bit of the ink each printing uses, leaving shadow images in the screen. The screen is also starting to sag after only 5 prints or so, and will have to be tightened soon. I wouldn't start a business with this, but for teaching the basics it works well, if you get it without damage.
Trustpilot
1 week ago
1 month ago