


🔋 Power Up Your Adventures with Solar Energy!
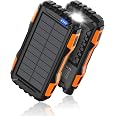
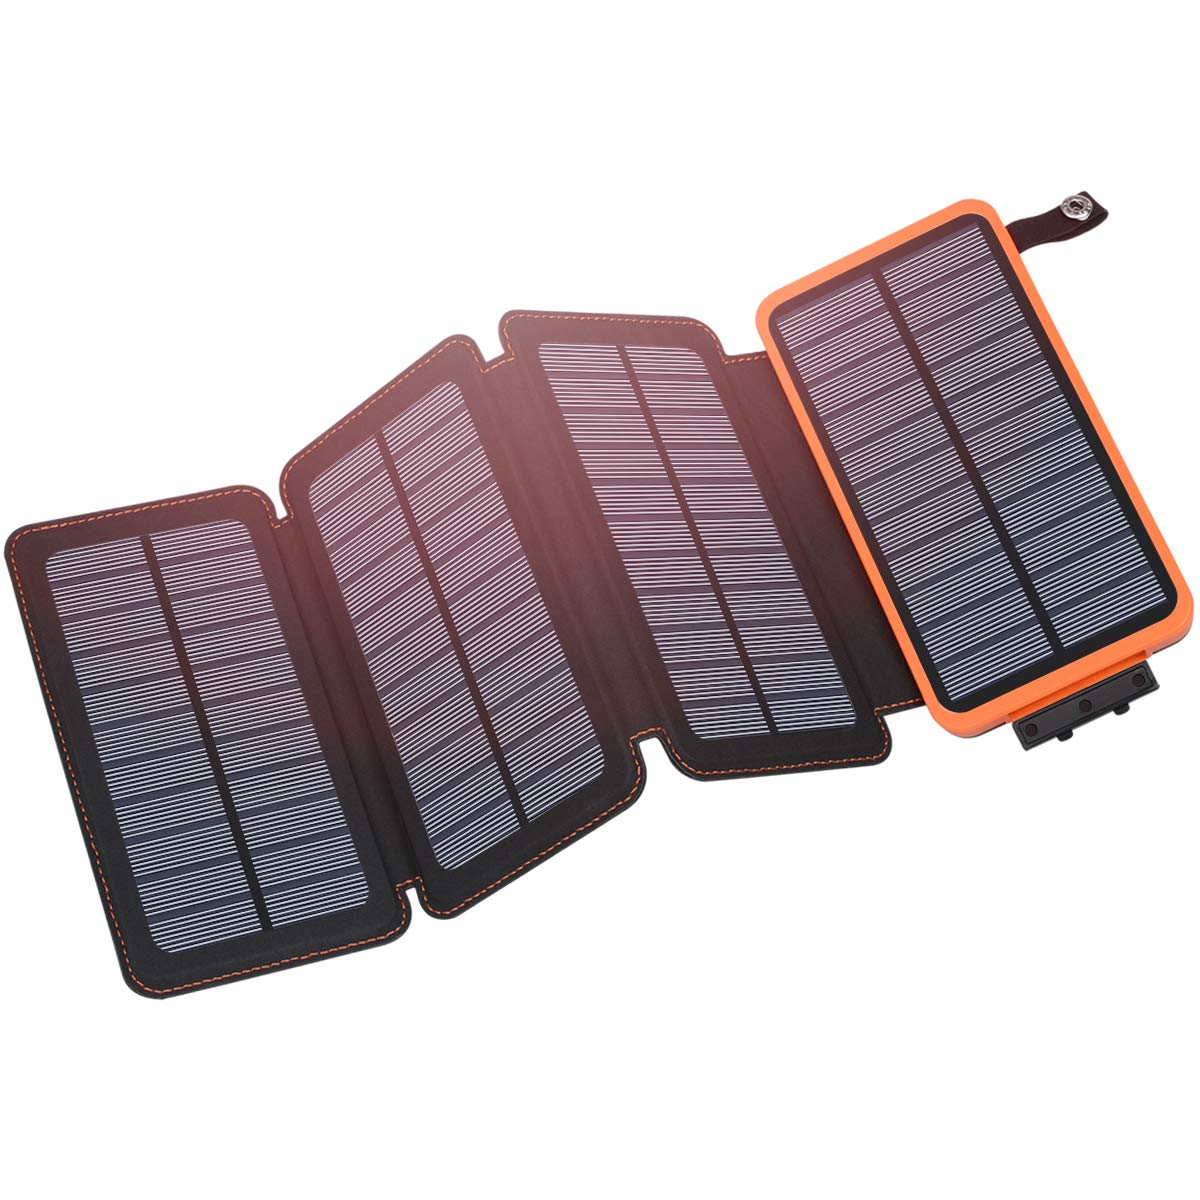
The Hiluckey Solar Charger is a high-capacity 25000mAh portable power bank featuring four advanced solar panels for efficient charging. With 3A fast charging capabilities, it can charge multiple devices simultaneously and includes a built-in flashlight for outdoor use. Designed for durability and safety, this power bank is perfect for outdoor enthusiasts and travelers.


| Unit Count | 1.0 Count |
| Item Dimensions L x W x Thickness | 6.18"L x 3.54"W x 1.38"Th |
| Item Weight | 1.2 Pounds |
| Battery Cell Type | Lithium Polymer |
| Color | Orange |
| Recommended Uses For Product | Phone, Watch, Tablet, Camera |
| Is Product Cordless | No |
| Output Current | 3 Amps |
| Compatible Devices | Samsung Galaxy S23 Ultra/S23+/S22/S22 Ultra/S22+/S22,Galaxy S21 Ultra/S21+/S21/S20 Ultra/S20+/S20/S10e/S10+/S10/S9+/S9/S8+/S8/S7/S7 edge/S6 edge+/S6 edge/S6/S5/S4. Samsung Galaxy Note series, Nokia/Google Pixel/LG/Motorola, etc., iPhone 16/16 pro/16 plus/16 Pro Max 15/15Pro/15 Pro Max 14/14Pro/14 Pro Max/13/13 mini/13 Pro/13 Pro Max/12/12 mini/12 Pro/12 Pro Max/11/11 Pro/11 Pro Max/X/XR/ /XS/ XS MAX/8/8 Plus/iPad series |
| Portable | Yes |
| Voltage | 5 Volts |
| Power Source | solar powered, corded electric |
| Amperage | 3 Amps |
| Number of Ports | 3 |
| Connector Type Used on Cable | USB Type C, USB Type A |
| Battery Capacity | 25000 Milliamp Hours |
| Additional Features | 4 Foldable Solar Panels, 3A Fast Charging, Short Circuit Protection, Built In Flashlight, Over Charging Protection |
C**S
Charges phone and solar works
A perfectly grilled steak is a rewarding experience! Here's a guide to help you achieve steakhouse-quality results at home:**1. Choose the Right Cut:*** **For Flavor and Marbling:** Ribeye, New York Strip, Porterhouse, T-bone are excellent choices. The marbling (intramuscular fat) renders during cooking, adding flavor and juiciness.* **For Tenderness:** Filet Mignon is incredibly tender but less fatty, so be careful not to overcook.* **Consider Thickness:** Aim for at least 1-1.5 inches thick for better searing and even cooking.**2. Temper the Steak:*** **Bring to Room Temperature:** Let your steak sit at room temperature for 30-60 minutes before grilling. This helps it cook more evenly from edge to center.**3. Season Generously:*** **Simple is Often Best:** Kosher salt and freshly cracked black pepper are often all you need to enhance the steak's natural flavor.* **Season Early:** For deeper flavor, season the steak at least 30 minutes before grilling, or even up to a few hours (dry brining). The salt draws out moisture, then gets reabsorbed, seasoning the meat from within. Pat the steak dry before grilling.* **Consider a Rub:** If you like, use a steak rub, but make sure it's not too heavy on sugar, which can burn on the grill.**4. Prepare Your Grill:*** **Clean the Grates:** A clean grill prevents sticking and ensures good sear marks.* **Oil the Grates:** Lightly oil the grates with a high-smoke-point oil (like canola or grapeseed) to prevent sticking. You can use tongs and a paper towel dipped in oil.* **Get it Hot!** Preheat your grill to high heat (450-550°F or 230-290°C). A hot grill is crucial for a good sear.* **Create Heat Zones:** For thicker steaks, set up two heat zones: a direct heat zone for searing and an indirect heat zone for finishing. For a gas grill, this means having some burners on high and others on low or off. For charcoal, pile the coals on one side.**5. The Perfect Sear:*** **Don't Move It Too Soon:** Place the steak over direct heat and let it sear for 2-4 minutes per side without moving it. This develops a beautiful crust.* **Get Those Grill Marks (Optional):** For those classic crosshatch marks, rotate the steak 45 degrees after the initial 2 minutes on each side.**6. Cook to the Desired Doneness:*** **Use a Meat Thermometer:** This is the most accurate way to ensure your steak is cooked to your liking. Insert the thermometer into the thickest part of the steak, avoiding bone.* **Temperature Guide:*** **Rare:** 120-125°F (49-52°C)* **Medium-Rare:** 130-135°F (54-57°C) - Often considered the ideal doneness for flavor and tenderness.* **Medium:** 140-145°F (60-63°C)* **Medium-Well:** 150-155°F (66-68°C)* **Well-Done:** 160°F+ (71°C+) - Generally not recommended as it can make the steak tough.* **Indirect Heat for Thick Steaks:** For steaks thicker than 1.5 inches, after searing, move them to the indirect heat zone to finish cooking to the desired internal temperature without burning the outside.**7. Rest is Key:*** **Let it Rest:** Once the steak reaches your target temperature, remove it from the grill and let it rest on a cutting board for 5-10 minutes (or about half the cooking time). Tent it loosely with foil. Resting allows the juices to redistribute throughout the meat, resulting in a more tender and flavorful steak. If you slice too soon, all those flavorful juices will run out.**8. Slice and Serve:*** **Slice Against the Grain:** Identify the direction of the muscle fibers (the "grain") and slice perpendicular to it. This shortens the fibers, making the steak more tender to chew.* **Enjoy!** Serve your perfectly grilled steak immediately. You can add a pat of butter, a drizzle of olive oil, or a sprinkle of flaky sea salt for extra flavor.**Key Takeaways for Grilling Perfection:*** **High Heat is Your Friend:** For searing and creating a flavorful crust.* **Don't Overcrowd the Grill:** Cook steaks in batches if necessary to maintain high heat.* **Resist the Urge to Flip Constantly:** Let a crust develop.* **Trust Your Thermometer:** Don't rely on guesswork for doneness.* **Rest is Non-Negotiable:** It makes a huge difference in the final tenderness and juiciness.With these tips and a little practice, you'll be grilling perfect steaks that will impress everyone! Enjoy the process!
E**T
Keep one ready for emergencies
I am a member of a Federal Disaster Response team and as such may find myself deployed to areas that have had power knocked out. I carry high capacity power packs but of course you need power to recharge those. This item was purchased for its solar charging capability.This is a much bigger and heavier unit than I expected, so it's not something I will carry in a pocket, but based on my testing I will carry it in my go bag. The attached pictures can give you an idea of the dimensions.To test the performance I fully charged the unit using a wall plug and then used it to charge my Samsung Galaxy S-7 until the power pack was fully drained. The nutshell report is that I got about 5 full recharges before the power pack was drained.1st - phone from 7% to full in 1 hr 40 min2nd - from 3% to full in in 1 hr 46 min3rd - from 0% to full in 1 hr 45 min4th - from 1% to full in 1 hr 54 min while using the phone to surf the web5th - 0% to 45% in 42 minutes at which point the pack was drained.I then took the depleted pack outside and opened the solar panels to indirect sunlight and connected my depleted phone to it. That took my phone from 0% to 6% in one hour.I moved the pack into direct sunlight and the phone went from 6% to 13% in one hour.I then disconnected the phone and left the pack in direct sunlight for an additional 6 hrs and noted that the pack was displaying 1 light of charge capacity, (about 25%). Clearly, charging the pack by solar power alone will take several days to go from empty to full. However, since in the course of a normal work day my phone rarely falls below 50%, I feel comfortable that this unit will give me 9 to 10 recharges before running out of juice. If I set the unit into sunlight during the day and charge my phone in the evening, I imagine that I'll never be without power.The caveat...if deployed to a disaster, most of my phone use is accessing disaster related apps a few times per day, using GPS with pre-downloaded maps, and if lucky, phone or text with family and teammates. I might listen to stored music during downtime, but not streaming anything.My bottom line is that this item will go out the door with me, maybe as soon as this weekend with Hurricane Dorian on the way. I would recommend it to anyone looking for an emergency power pack. It's way too bulky for a day-to-day carry power source, but if you are expecting or planning to be completely without any electrical power for more than a couple of days, then this may be the way to go.
Trustpilot
2 months ago
2 weeks ago