Desert Online General Trading LLC
Dubai, United Arab Emirates
Desert Online General Trading LLC
Dubai, United Arab Emirates


🔌 Solder Your Way to Success!
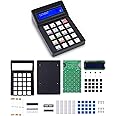
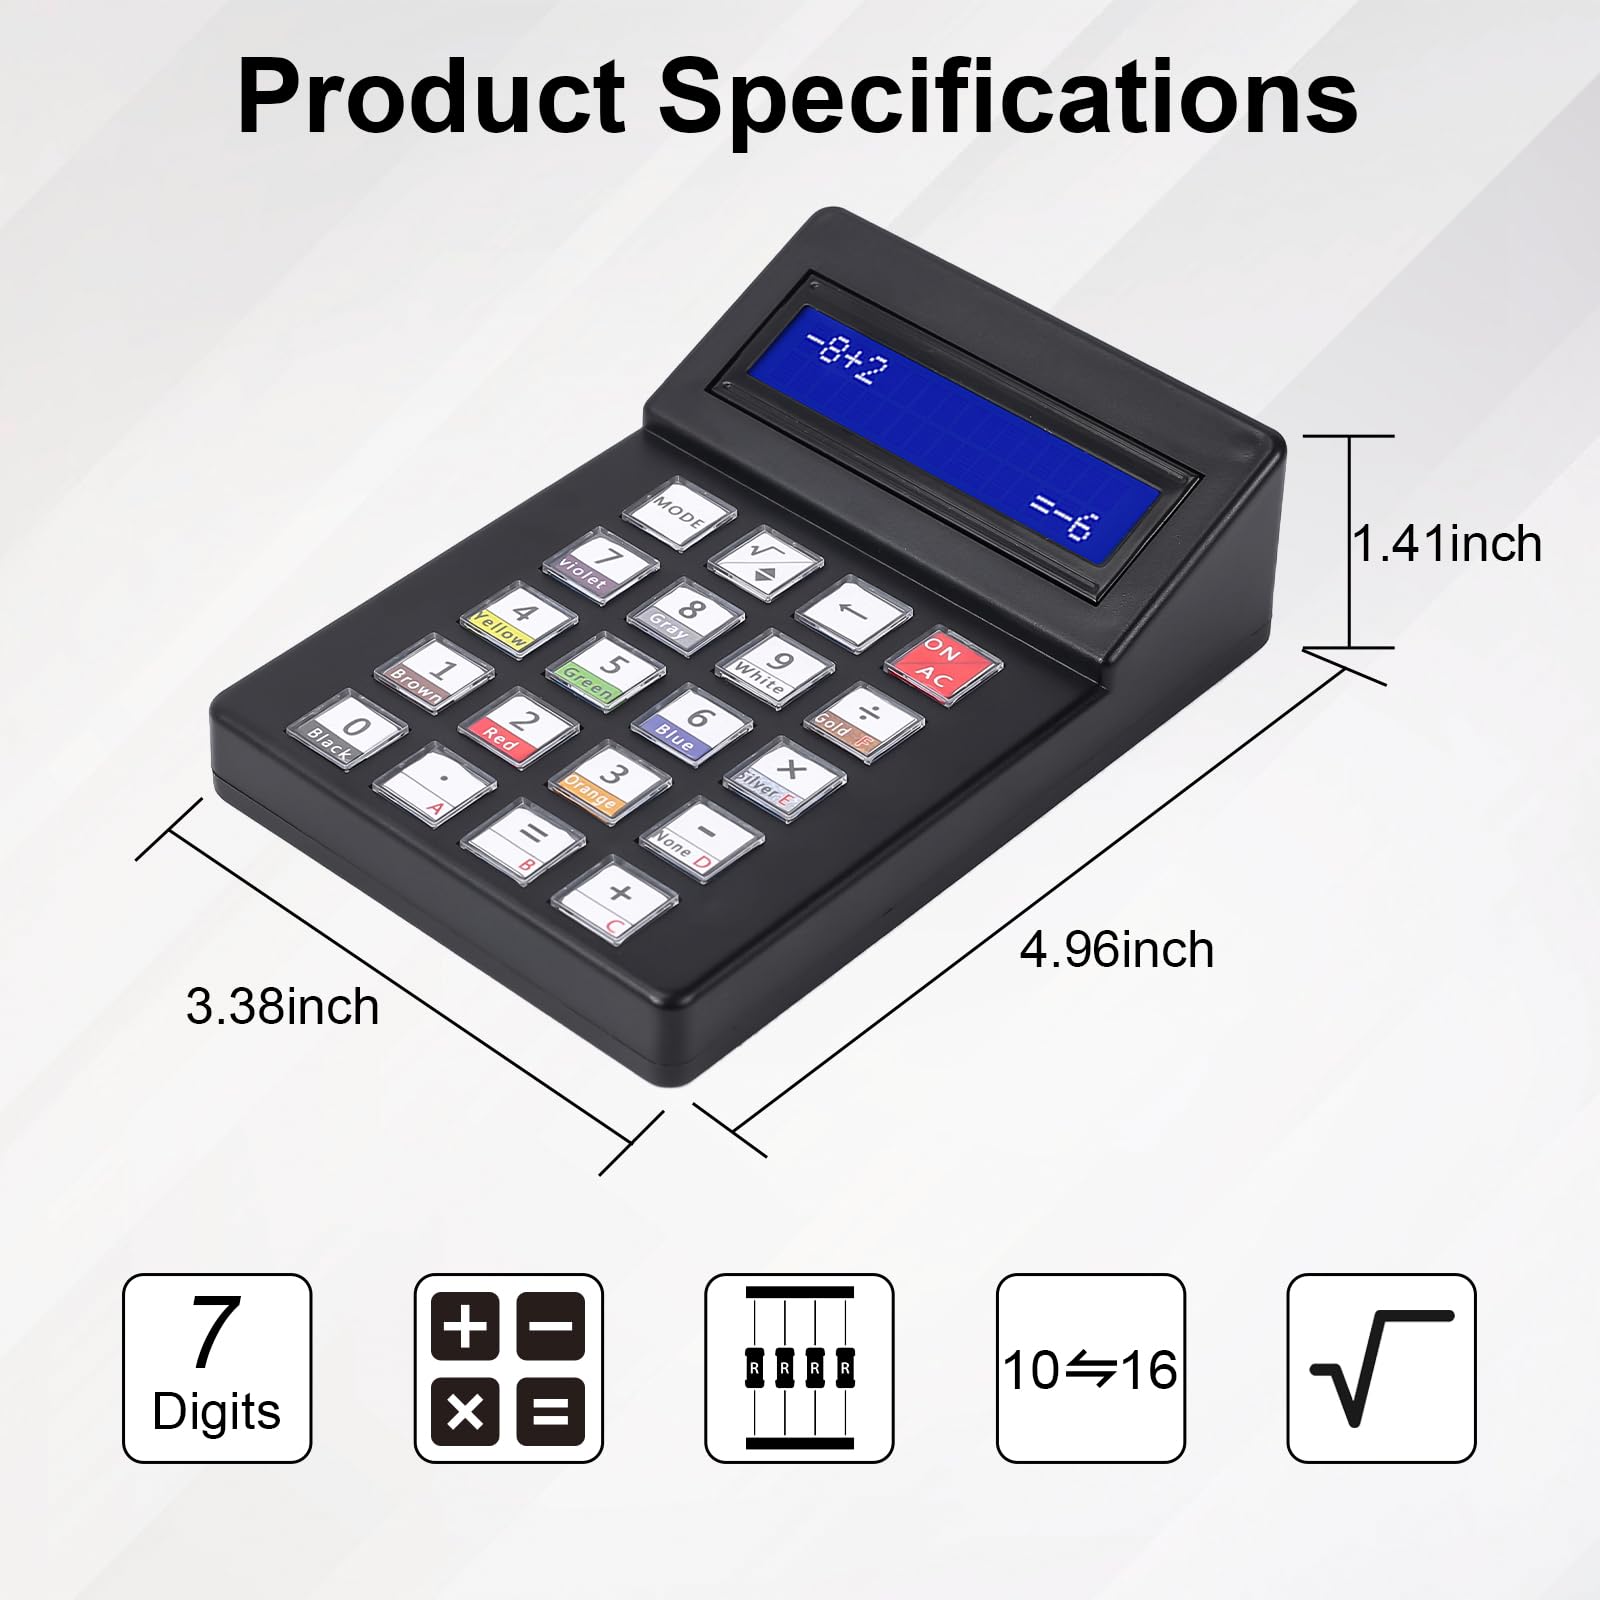
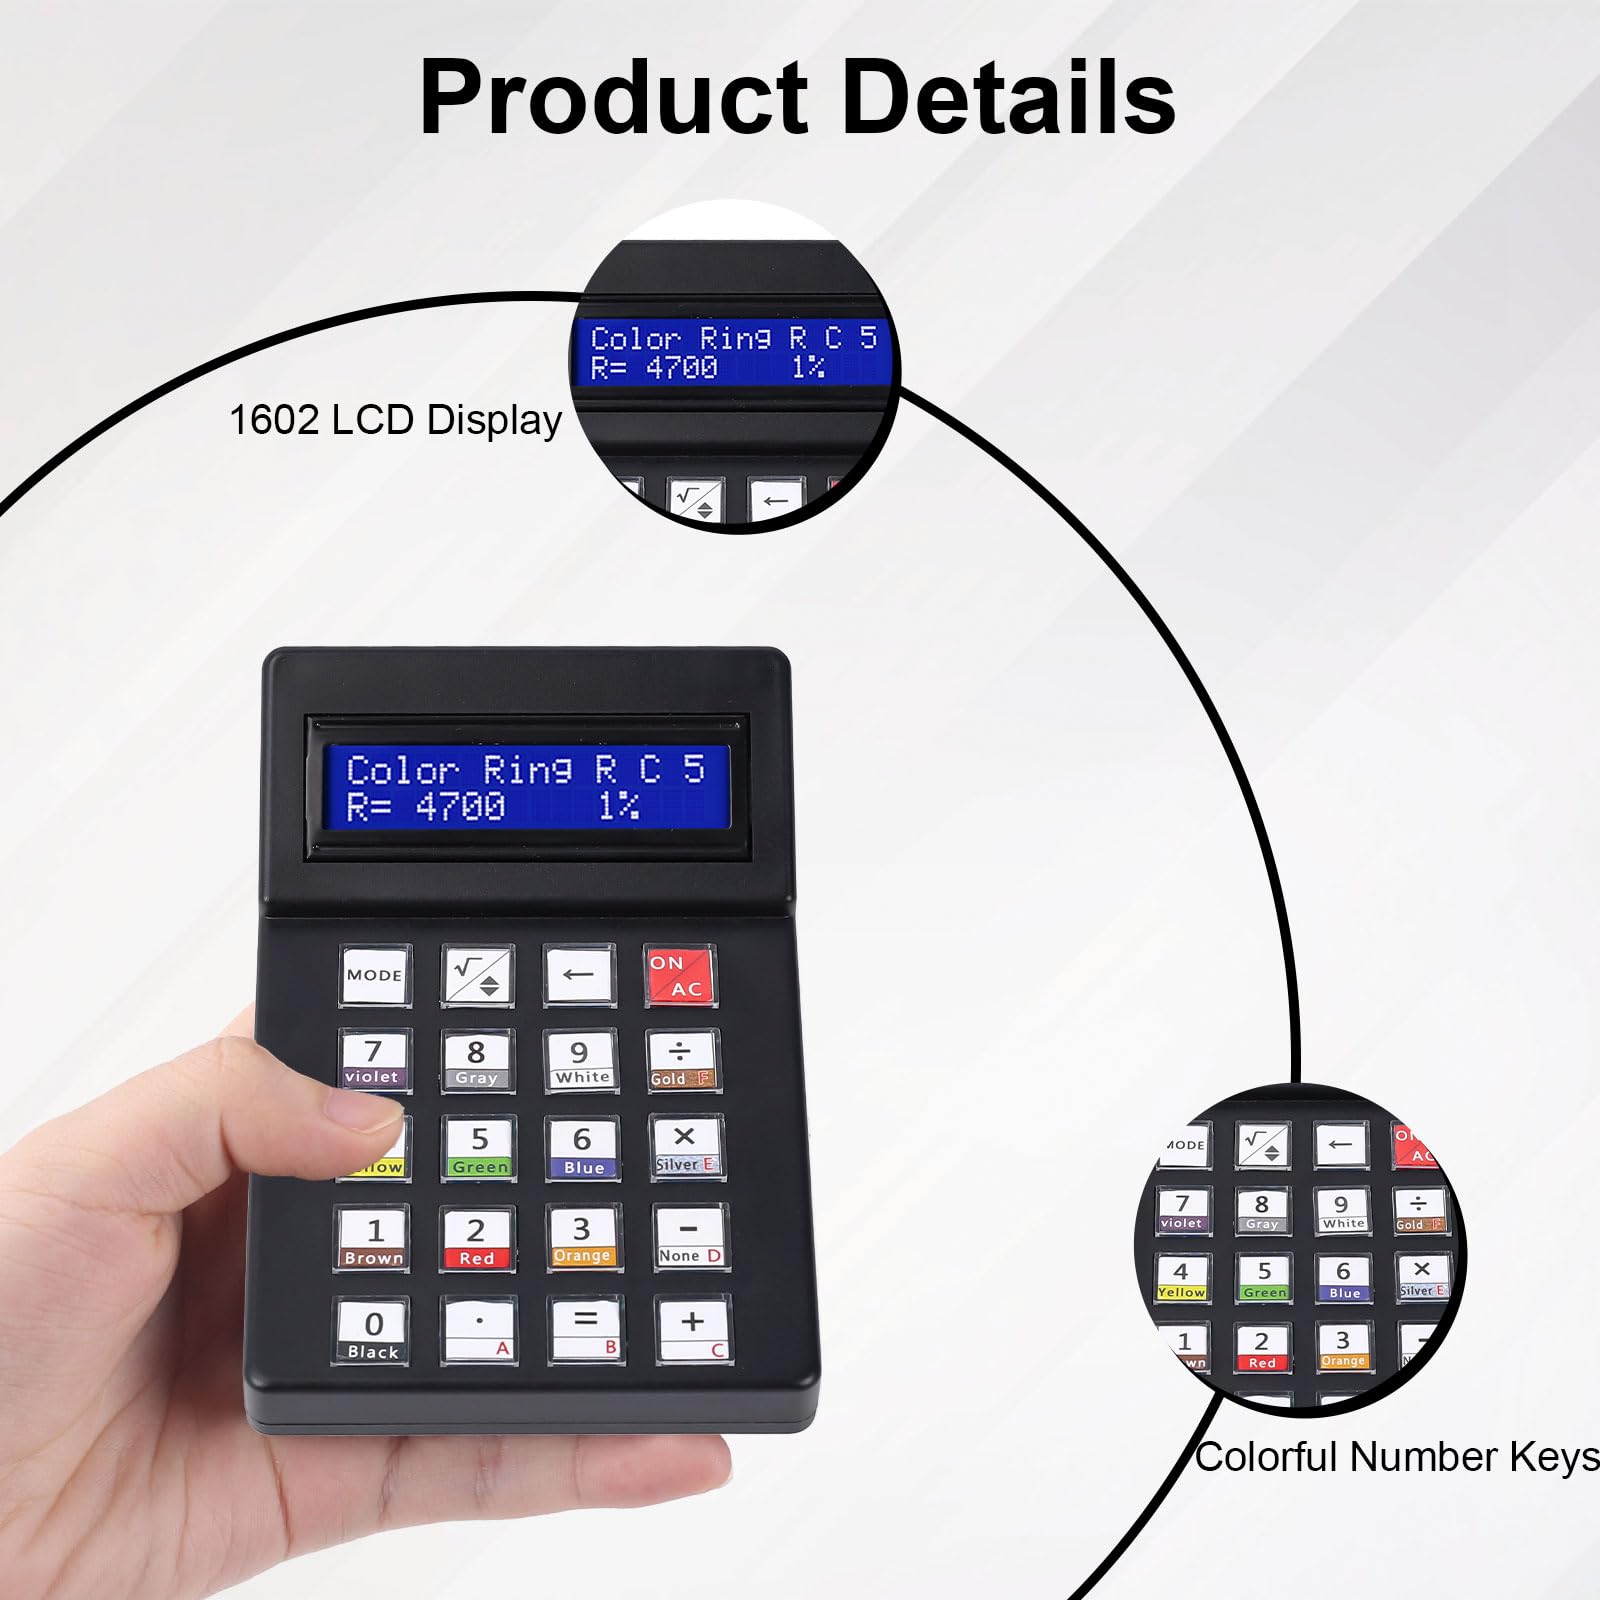
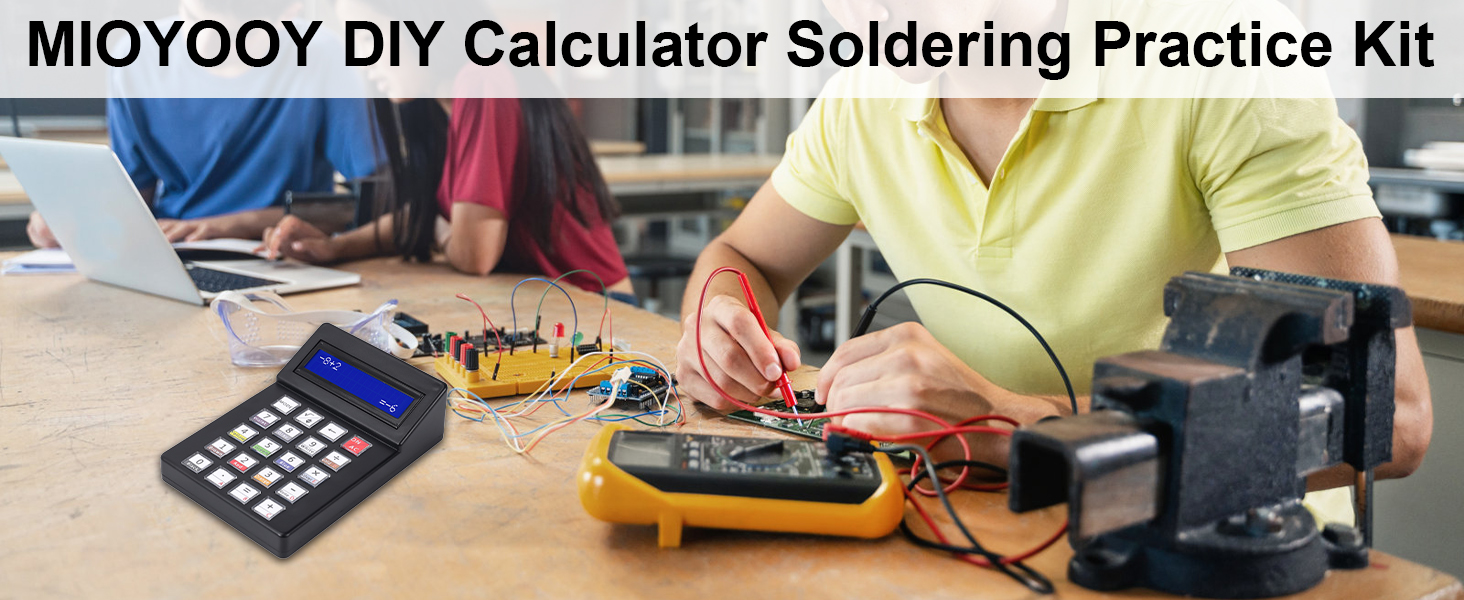
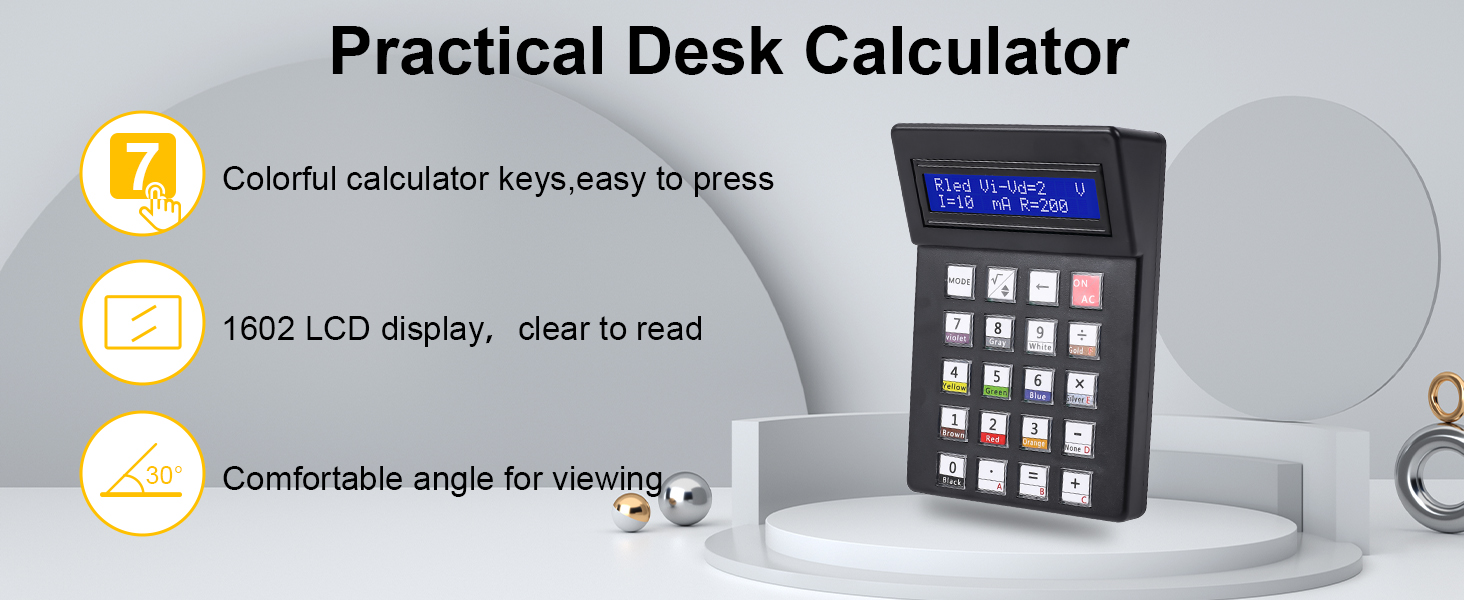
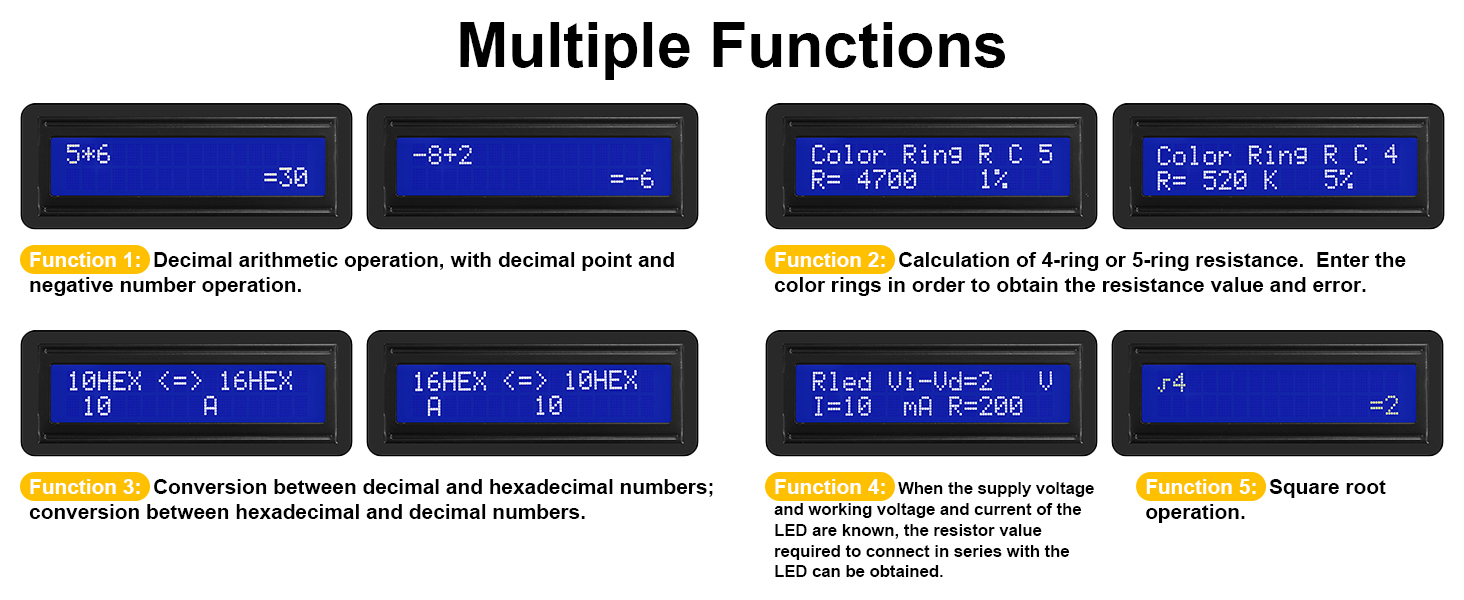
The MiOYOOW DIY Calculator Soldering Practice Kit is a hands-on electronic project designed for both educational and practical use. Featuring a 1602 LCD display, this kit allows users to build a functional desktop calculator while enhancing their soldering skills. With a straightforward assembly process and a variety of useful functions, it’s perfect for students, DIY enthusiasts, and families looking to explore the world of electronics together.

| Manufacturer | MiOYOOW |
| Part Number | GY21239-2 |
| Item Weight | 7.8 ounces |
| Product Dimensions | 4.96 x 3.38 x 0.75 inches |
| Country of Origin | China |
| Item model number | GY21239-2 |
| Batteries | 2 CR2032 batteries required. (included) |
| Material | paper |
| Shape | 7-digits Calculator DIY Kit |
| Power Source | Battery Powered |
| Display Style | LED |
| Included Components | circuit board and electronic components |
| Batteries Included? | Yes |
| Batteries Required? | Yes |
| Battery Cell Type | Lithium |
J**J
fun kit
Good kit and fun to put together. Try to bend the LCD display header so that it fits in the case with a little gap behind the case for the PCB header. I bent my pins on the table towards me and test fitted the lcd into the case until i got a proper gap. It is useful to do this and screw it in and then don't put the buttons together until after the PCB and case is put fully together. Otherwise you will have a pita of a time lining up the buttons into the holes on the case.
C**T
Almost perfect
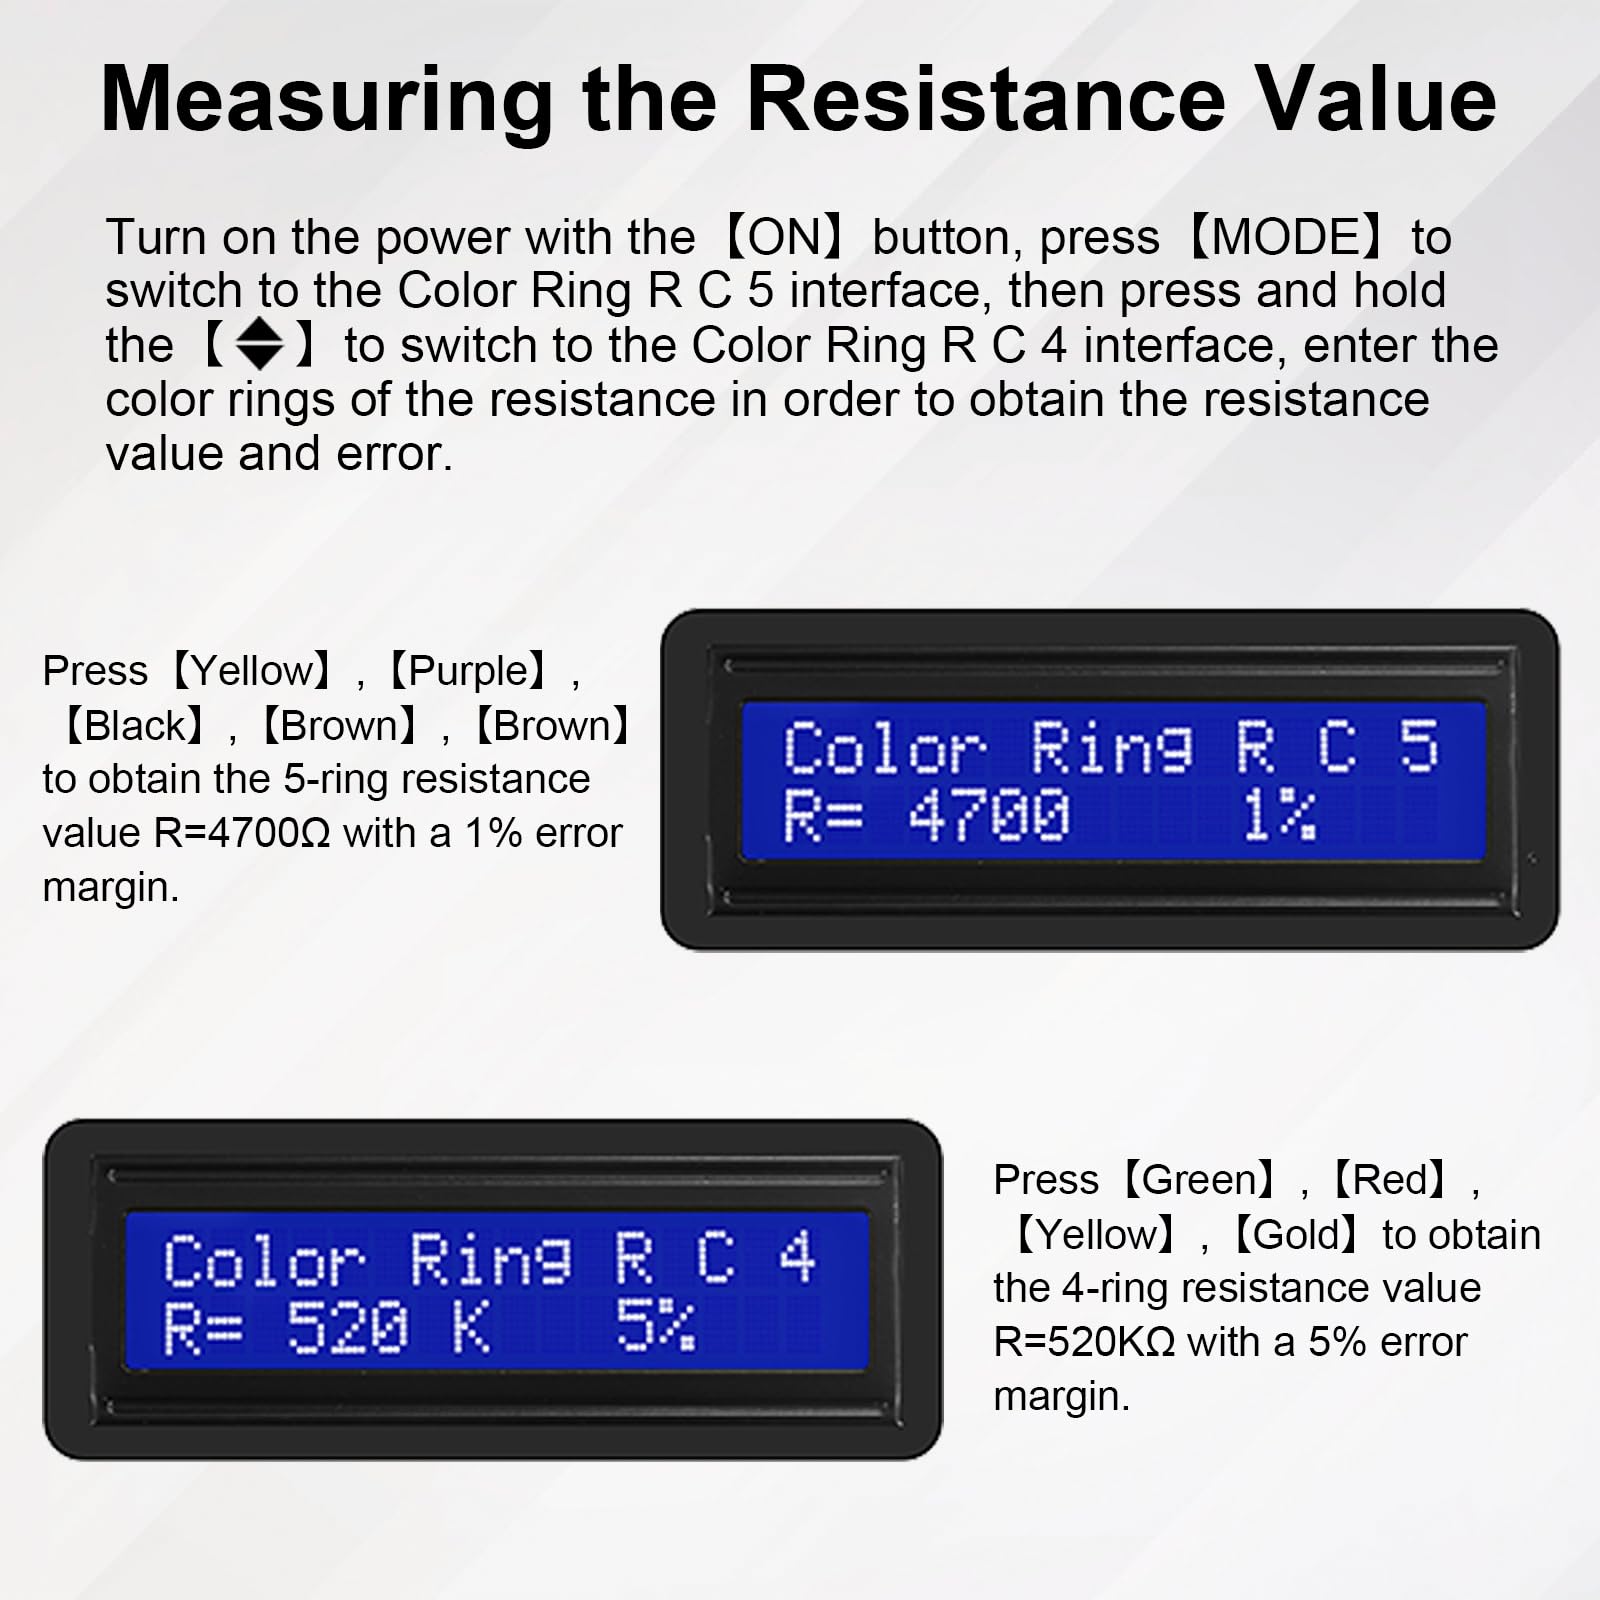
I'd love to give this a five star review but there was one problem that would have absolutely ruined the day of someone who was less knowledgeable or equipped.The kit itself is well designed and my 9-year-old son was able to actually solder the parts himself. But when we finally turned it on, the display had no backlight and was essentially illegible.The board is marked for 1k, 10k, and 330ohm resistors. The 1k and 10k resistors were correctly provided, but instead of a 330 ohm resistor the third type provided was *2M ohm*. Unsurprisingly a resistor that's almost 10000x stronger than intended affected the display. I removed it and dug in my spare parts and replaced it with a 470ohm (closest value I had) and the display immediately lit up beautifully.So all in all a great kit, but if possible check the resistor values with a meter (or by checking the color codes) before installing them.Ironically the calculator includes a function for calculating resistor values from color stripes! Maybe they should use that when picking parts. :)
A**R
Double check resistor values!!
Went together fairly easily, my only complaint is they sent the wrong value for the R5 resistor. It is supposed to be 330 ohms, the one they sent was 2.2k ohms. I had already checked and installed the other resistors so I assumed by the process of elimination the remaining resistor was 330 ohm. When I powered it up the first time the display was so dim I initially thought it didn't power up. The instructions do include a small trouble shooting section. It said to check the other resistors, which were in the right spot and measured correctly, or to check the batteries, both measured 1.5 volts. Checked R5 just because it located right beside the display mount, yup, almost ten times more resistance than the circuit called for. Fortunately this is my fifth or sixth kit so I had some extra parts from previous kits and luckily a 330 ohm resistor was one of the parts. I managed to get the resistor unsoldered and the correct resistor soldered back in without destroying anything. Had it not been for the wrong resistor it would have been 4 stars.
D**N
After completing board and kit, Calculator didn't power on. Disappointing.
I liked the detail instructions sheet, however after completion of the kit, the calculator screen would light up and nothing else would happen.Very disappointing.
M**O
Fun kit that is actually useful
I had fun putting this kit together. I've soldered many little kits like this and im happy to say I have been using the calculator on my desk for small calculations. To make something functional and useful and then actually use it in your daily life is a cool feeling. While this is no TI-84 the backlit screen and bonus functions make this a lot better than store bought calculators in the same price range ($10). The only downside is the batteries are really hard to access if they need to be changed - you need to take the back off and screen out to change them. I am thinking of soldering some wire to the leads of the battery connectors to move the batteries to a more accessible place. Overall, its a fun kit but I do recommend you have soldering experience before attempting.
N**N
Missing parts
This seems like a great kit however my purchase did not come with an IC socket. So I can’t finish building it.
J**S
Not just a calculator
These days, who needs a calculator when you've got one built into every smartphone? This one, however, does something no other pocket calculator does (at least not any I've seen): punch in the color bands on an electronic resistor and it will tell you the resistance value and tolerance. If you're an electronics hobbyist with a box of random resistors on hand, this thing is great. Assembly is a tedious process (since all of the key switches have to be soldered to the board in addition to the other components) but other than a minor bobble in soldering (bridged two pins on the IC socket, had to fix that) it went smoothly.
B**N
Works
Good practice. The additional features are a fun addition and have actually used them. Having to cut the numbers out by hand kind of annoying
Trustpilot
1 week ago
1 month ago