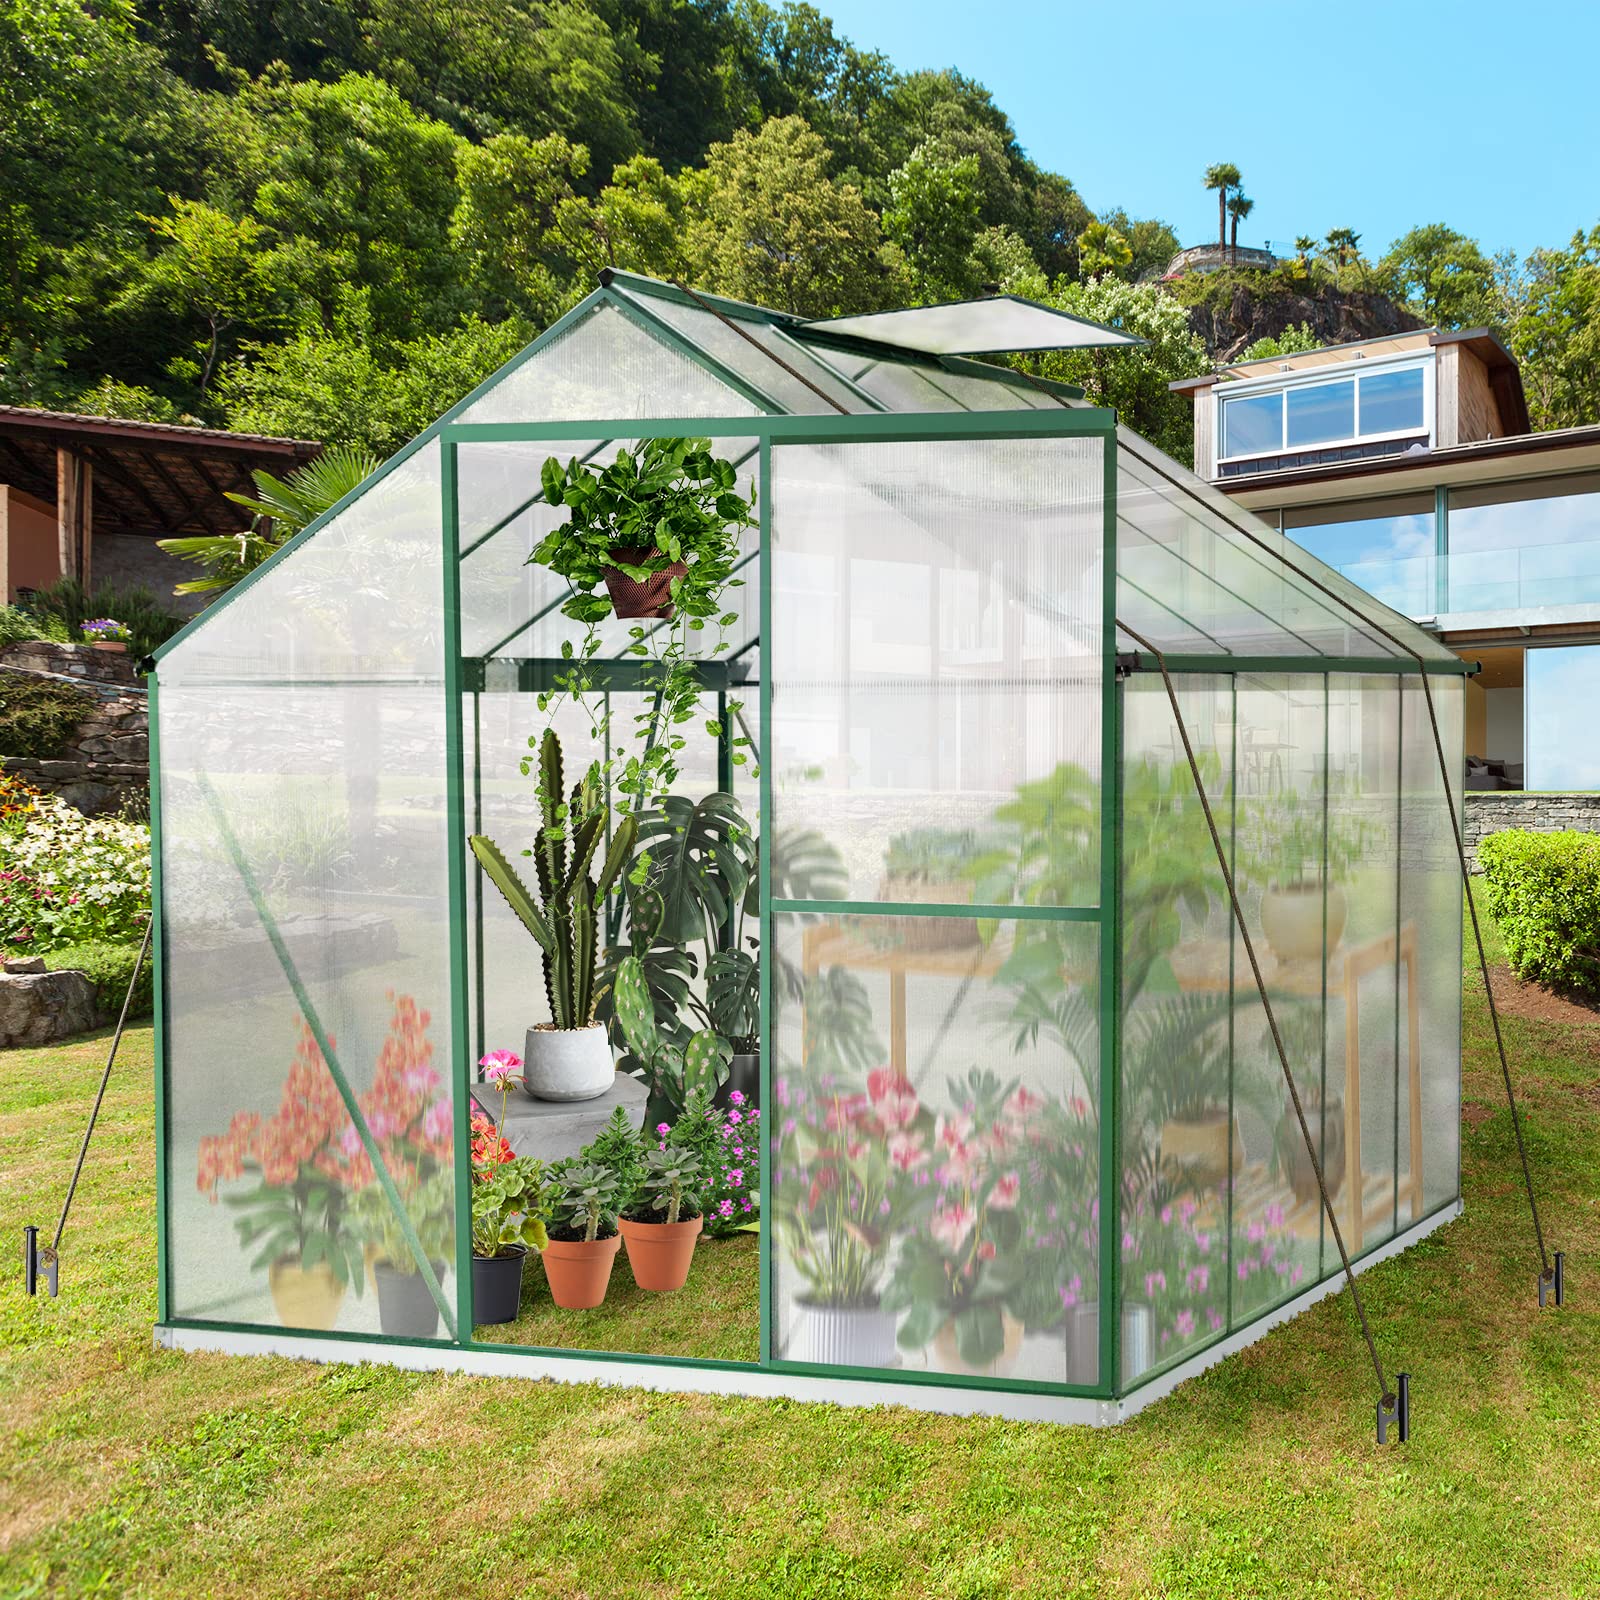


🌼 Grow Your Green Thumb with Style!
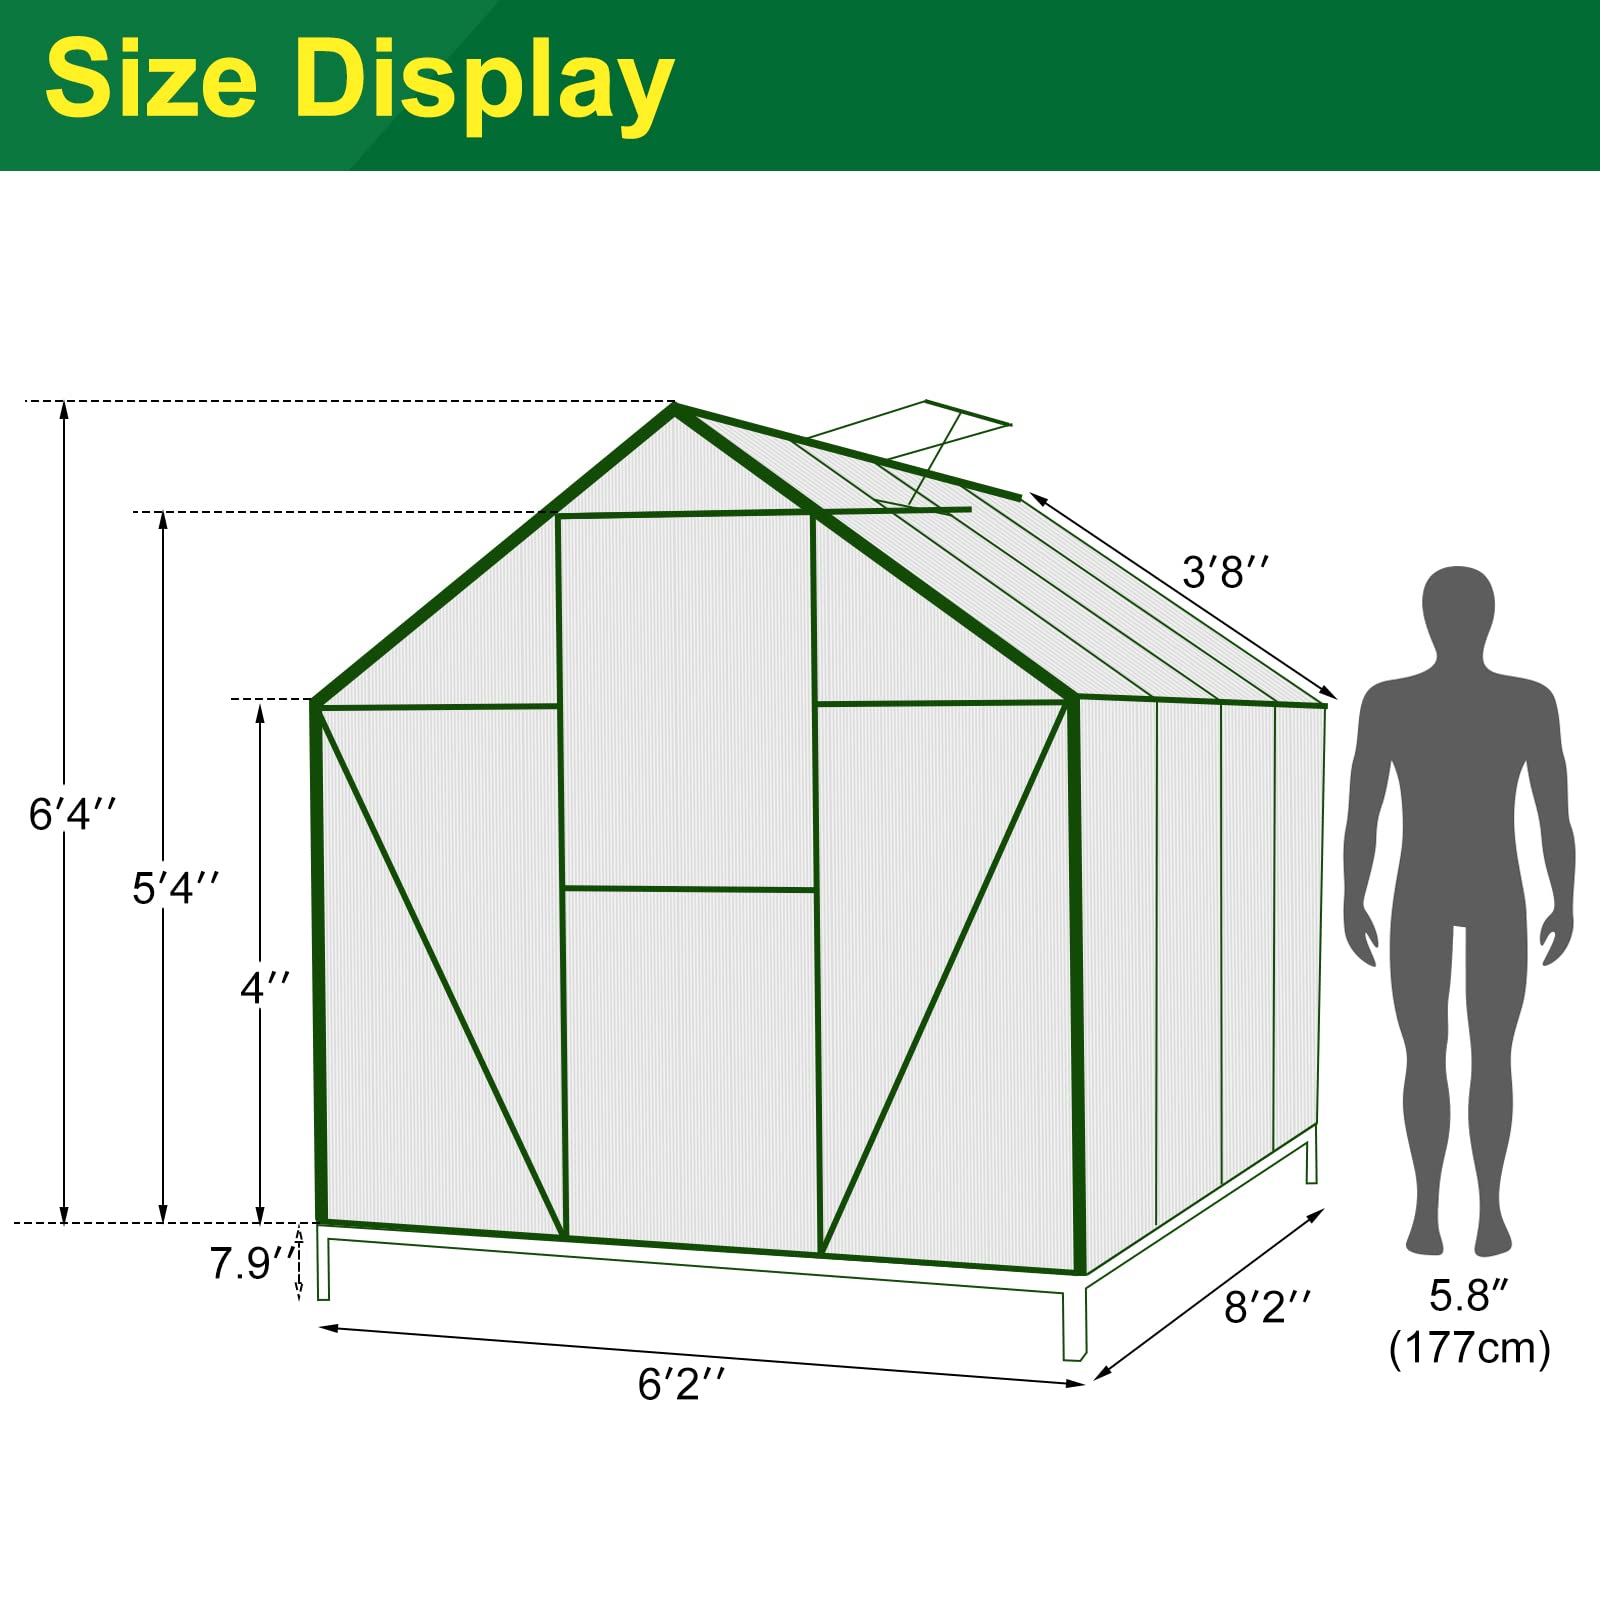
The WACASA 6' x 8' Polycarbonate Greenhouse Kit is a robust and versatile gardening solution, featuring heavy-duty aluminum construction, multi-functional design with sliding doors and ventilation, and a choice of three sizes to accommodate various planting needs. It ensures optimal plant growth by protecting against harsh weather conditions while providing effective drainage.
J**B
Amazing Greenhouse… if you assemble correctly
I did a ton of research before purchasing and the seller’s assembly video showing tight fitting pieces was the ultimate deciding factor.Pros:-No rattling of the Poly-carbonate sheets-Very see-through (clear) panels-Frame is very solid (if assembled correctly)-Metal base feet nice for securing into the ground or foundation-Compatible with 3rd party shelves and hooks-Can be mounted higher for more head-room-Fantastic Assembly Video (you can skip reading the instructions)- Every part was Labelled (very well organized)Cons:-The Sliding Door is the only part that makes noise-No handle on the door (fixable)-The poly-carbonate sheets were very difficult to slip into the aluminum slots (I didn’t use WD-40 as they recommended)-Water or condensation can get inside sheets, unless you seal the ends with silicone.-Three bolts were malformed and the threads stripped (luckily there were spares)From the start, the communication from the seller was great and they let me know that two boxes were coming and one was late. The parts were labelled clearly for each piece, including all poly-carbonate sheets. You will want to watch the assembly video over, and over, and over. (It also helps if you sing the song to the video in your head). Don’t use the free installation wrench supplied and get yourself a quality 1/8” ratchet with 1/8” extension bar and 10mm deep socket. You will thank me. You will may occasionally need a second 10mm scoket or wrench. The aluminum and polycarbonate sheets are sharp, so don't forget to wear some gloves.Watch the setup video over and over, as they assemble the greenhouse inside their office and pause frequently. This video has little tricks that the manual barely covered. Pretend you are an engineer and if something seems loose or not fitting, double check the piece and orientation, or rewatch the video, if you missed a step or grabbed the wrong bar.It took me 12 hours to assemble this greenhouse on a hot day with plenty of generous breaks while fasting. With two people, food, and water, one could get it up in perhaps 3 hours or less.You will need a foundation. Considering that we built this on exiting concrete and that wood can be expensive, I used concrete narrow cinder blocks (6” wide) and a narrow cap stone on top that lifted the entire greenhouse almost 9”, and raising the peak to about 7ft off the ground. We then installed a PCV water drain with a 3/4” pipe with 1/8" drill holes with small rocks (French drain) and the. placed about two 60lb bags of sand down around the inside perimeter, sloping it inward toward the drain location. (Note: Please do not buy General purpose sand (technically crushed gravel) that contains cancer causing silica dust, but washed real beach play sand). A poly/tarp sheet was then placed on top to guide water to the drain, and finally five bags of mountain granite pebbles were spread out on top, to make things flat flat with a nice looking ground cover. Using a waterproof tarp if you are over concrete, may helps to protect the foundation from insects, snails, ants, etc. and also guide the water to the drain to help prevent mold.It should be noted that the door is the weakest point and it can be mounted to slide open from the left or right side. It does rattle somewhat and probably needs weather stripping and a handle to improve the design a little.During construction, the biggest issue was getting the poly-carbonate sheets to slide into the aluminum channels. It was very tough and required rocking the panel slightly left and right while pushing with full body strength. I’m sure if we had used a lubricant like WD-40, it would have helped. The panels were so tight, I didn’t need the extra self-tapping screws to secure the panels.For exterior waterproofing, we went with cheap Alex Plus Clear silicone and sealed all the gutters, bottom of the roof panels, and the top of the panels just below the gutters, to prevent water from getting inside the panels. Plan on at least two to three tubes of silicone.Although this greenhouse is technically four stars, I raised it to 5 based upon the design, packaging, labeling, low-cost, quality engineering, and informative installation video.To make it nice inside for plants, we built two redwood tables and found that the 12ft lengths of 2x6 Redwood cut down for free to 6ft lengths at the hardware store were the cheapest and easiest to transport for quality wood.Other helpful hints: The base frame is not square, and two of the bottom frame rails are slightly longer, which correspond with two sides of this 6ft x 6ft greenhouse that are slightly longer. The true outer foundation base dimensions for this 6’x6’ are 74.5” long x 73.5” wide.During installation, there are several steps wherein you install bolts and then later un-tighten those bolts to add more parts, it’s odd assembly, but just follow along.Best of luck with your greenhouse adventures!
J**E
Nice greenhouse for the money.
The price on this greenhouse was excellent, construction was relatively easy. A part was missing which the seller quickly rectified. The situation was that we built it in the garage and constructed a dolly to move it into the back yard. The polycarbonate panels went in easily with a little vaseline. By spring we will have counters inside. Very much liking the vent and the gutters. Winters can be hard here in Northern Ohio so we will see how it handles the upcoming one. I would not hesitate to buy this one. I suspect it will be fine.
C**T
Looks Good for The Price
Had a little trouble putting it together. The panels don't slide easily. We are also worried this greenhouse isn't very sturdy, and may break in a windstorm. Only time will tell. Otherwise, looks good.
K**Y
Awful!
The directions were terrible. The panels would not slide into the slots on the frame. There is no way to secure the vent. The top panels for the roof have large gaps and don’t fit into the slot on the bottom because the side slots sit up to high. Every time the is a storm, we have to fix something. Even came off the bottom frame that it sits on. Piece of junk. Would not recommend.
Trustpilot
4 days ago
3 days ago
