Desertcart purchases this item on your behalf and handles shipping, customs, and support to Peru.
🚗 Tow Boldly, Tow Smartly — The Hitch That Works as Hard as You Do!
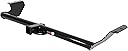
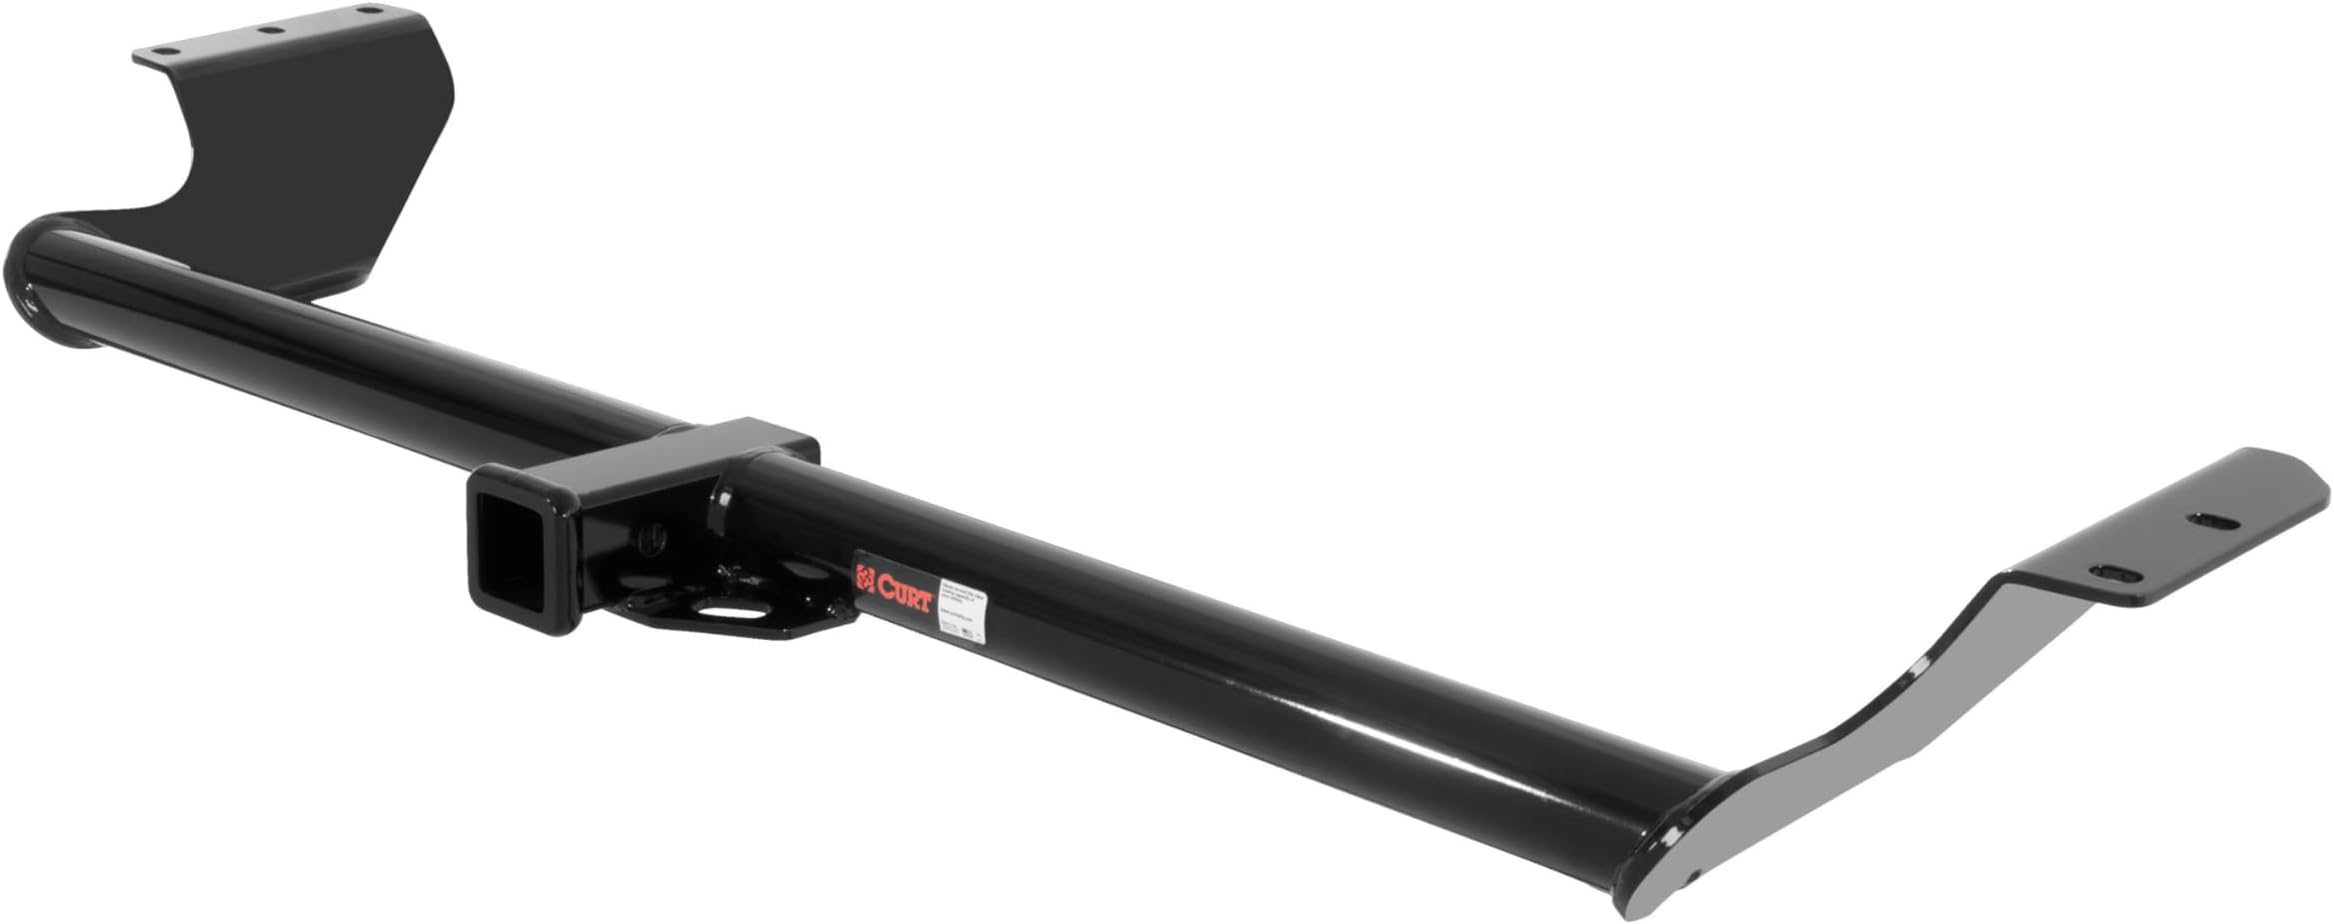
The CURT 13068 Class 3 Trailer Hitch is a rugged, vehicle-specific 2-inch receiver designed for the Honda Odyssey (2005-2015). Rated for up to 5,000 lbs gross trailer weight and 500 lbs tongue weight, it features a no-drill installation with included hardware, a durable rust- and UV-resistant powder coat finish, and has been rigorously tested to meet SAE J684 towing safety standards. Ideal for towing trailers, bike racks, and campers, this hitch combines strength, reliability, and ease of installation to elevate your towing game.


| ASIN | B004MDEV38 |
| Best Sellers Rank | #198,509 in Automotive ( See Top 100 in Automotive ) #543 in Towing Hitch Receivers |
| Brand | CURT |
| Brand Name | CURT |
| Compatible with Vehicle Type | ATV, Car, Pickup Trucks, Sport-Utility-Vehicles, Trailer |
| Customer Reviews | 4.6 out of 5 stars 2,498 Reviews |
| Finish Type | Powder Coated |
| Global Trade Identification Number | 00612314130689 |
| Included Components | Class 3 Hitch |
| Item Type Name | Honda Odyssey |
| Item Weight | 25 pounds |
| Manufacturer | CURT |
| Manufacturer Part Number | 13068 |
| Manufacturer Warranty Description | Limited Lifetime Warranty (One-Year Finish, One-Year Parts) |
| Material | Carbon Steel |
| Material Type | Carbon Steel |
| Model Number | 13068 |
| Number of Items | 1 |
| OEM Equivalent Part Number | 13068 |
| Pull Force | 5000 pounds |
| UPC | 612314130689 |
| Unit Count | 1 Count |
| Vehicle Service Type | ATV, Car, Pickup Trucks, Sport-Utility-Vehicles, Trailer |
C**D
AMAZING Hitch. Simple,
For less than $130 delivered I bought from Amazon Prime the Curt 13068 Class 3 Trailer Hitch for my 2013 Honda Odyssey EX-L. My decision was based on the 450+ Amazon customer reviews yielding 4.5 stars. The package arrived 8 days after ordering in a huge heavy duty box containing the undamaged, unscratched trailer hitch, all of the required hardware and a couple of pages of installation directions. I watched about a half dozen installation videos on YouTube and was convinced that I could easily install instead of paying our mechanic $225+ for installation. I was able to install without jacking up the van using about as half dozen typical tools: 19mm socket. 11/16” socket, ratchet, extension a couple of flat blade screw drivers, a can of WD 40, a borrowed torque wrench and a 12mm x 1.25 thread tap (Vermont American 21146 12MM-1.25 High Carbon Steel Metric Spark Plug Tap purchased for $8.38 from Amazon https://www.amazon.com/gp/product/B000K1LZVM/ref=oh_aui_detailpage_o01_s00?ie=UTF8&psc=1) I laid out a 8 bricks behind each back tire (1 layer, 2 bricks lengths wide and 4 bricks deep) and backed the van up on them and set the parking brake This safely provided an extra 2” of lift on our level and flat concrete driveway. After ensuring that the van was rock solid I began working underneath. The installation took me about 45 minutes but I just took my time. My thought is that the project is about 1.5 - 2.0 beards on the "Revzilla Motorcycle Parts" Beard of Difficulty Scale (1 beard = easy, 3 beards = maximum difficulty). Simple installation as follows: 1) REMOVED THE DRIVER’S SIDE PLASTIC PANEL. I removed all the pop-fasteners as suggested. Since the panel was to be discarded I merely broke the panel off of the rear 10mm screw and Philips head screw behind the mud flap ( which saved about 10 to 15 minutes.) 2) REMOVED 2 EXHAUST HANGERS: Sprayed the 2 exhaust hangers with WD 40 and then easily pried off the 2 exhaust hangers. 2) CLEANED THE WELD NUT THREADS: Using the 12mm x 1.25 tap I begin cleaning out the 4 weld nuts holes. It was difficult to get the tap started so I used one of the bolts to clear out the first few threads and then used the tap. Unfortunately I thought the square end of the tap would fit in one of my 12 point sockets but none worked so I had to use an adjustable wrench which would only make about 1/3 revolution before readjusting. This took about 15 to 20 minutes. Even the threads beneath the old plastic panel needed cleaning. 3) FISH THE CARRIAGE BOLT & FLANGE THROUGH THE DRIVER’S SIDE FRAME RAIL: This worked like a charm. Threaded the fish wire to the bolt, added the rectangular flange, double-crimped the fish wire to keep the bolt and flange close together, fished the surplus wire through the larger hole through frame rail and out the target hole, pushed the flange into the larger hole, then the bolt with the attached fish wire, pulled the entire assembly through and out the target hole; left the fish wire attached to the in-place bolt for further use. This literally took about 2 minutes. 4) LIFTED THE HITCH INTO POSITION FOR BOLT INSTALLATION: Using my motorcycle floor jack I lifted the hitch into position, first sliding the passenger side of the hitch above the exhaust pipe and then after pulling the still-attached fish wire through the target hinge flange hole completed lifting the other side with the jack until I was about 1/2” from the weld nut holes. Starting with the exhaust pipe side I loosely attached 2 bolts and washers into the 2 corresponding weld nuts, attached the nut to the carriage bolt and then loosely installed the 2 remaining bolts and washers into the 2 corresponding weld nuts. After visually checking to ensure that everything was lined up properly I tightened all and torqued as suggested. The hitch looks like it was custom welded to fit my van. It bends around the exhaust pipe and gas tank and wastes no space between the top of the hitch and the bottom of the bumper. EVERYTHING lined up perfectly and easily installed as suggested. Curt really nailed this product! I would have paid twice as much for this level of quality and installation ease. A few observations: A) If you don’t have a can of WD 40 laying around, get one. This DEFINITELY made the job easier. B) Definitely temporarily unhook the 2 exhaust hangers. This makes the entire installation a breeze; it takes about 30 seconds to reattach both hangers. C) I wish that I would have bought the small, cylindrical brush to clean the weld nut holes. There was a lot of debris that impeded the tap and required removing and cleaning the tap. D) I wish that I would have popped off the plastic panel a few days before installation and soaked with WD 40 and wire brushed the weld nut threads a few times before my installation day E) Definitely watch some hitch installation YouTube videos for your vehicle. No need to reinvent the wheel here. A few installation photos attached Tomorrow I'll be installing the Trailer Light kit (about $40 on Amazon)
V**R
Quick easy install - great hitch for bike or other racks
Hitch purchased for a 2007 Honda Odyssey - was about $40 less costly than the Hidden Hitch and DrawTite counterparts. Fit and finish was excellent and it appears to be a well made and engineered product. Also Curt provided some of the best instructions I've seen on a product like this. Thorough, in well written English and with color photos to boot. As other reviewers have pointed out this Curt hitch only has 5 bolt points (4 into factory weld nuts and one more on the drivers side thru a frame hole) compared to the factory/Hidden Hitch/DrawTite hitches which use all 6 of the factory chassis weld nuts. Since this hitch does not use the two forward most weld nuts Honda builds into the chassis, it has much shorter mounting ears than the factory/Hidden Hitch/DrawTite versions making it a lot easier to maneuver into place, plus I found there was no need to unhook the tail pipe. As I am only ever going to use this as a mount for a bike rack I have absolutely no concerns with the 5 bolt points vs. 6, however if you are going to do a lot of heavy towing - even though this hitch is rated the same as the Hidden Hitch/DrawTite - you might want to consider opting for one of those versions which have the 6 bolt mount and spread the load out a bit more. In regards to the install it went extremely smoothly and I did not require any assistance. As many other reviewers have mentioned - get yourself a tap and clean out the weld nut threads first - do not skip this step!!! My 2007 Odyssey needed a 12mm-1.25 pitch tap for the weld nut thread clean out. I thought I was going to strike out finding one locally (no luck at Home Depot/Lowe's/Auto Palace) but found one at PEP Boys for under $5 and it even came with a drill bit (which of course you don't need for cleaning out existing threads). It was a Kawasaki brand model 840493. Again, do not skip this step! After lubing the threads and tap with some WD-40 or equivalent, it is easy enough to do - just be careful not to cross thread. I used a T-handle for the tap and found I had sufficient clearance, although on the passenger side the tailpipe needs to be pushed out of the way - I used a piece of rope to to tension the rubber mount and hold it out of the way while I ran the tap. On one of the weld nuts I neglected to drive the tap far enough and must have left some rust in there - this became obvious when I went to install the mounting bolt. It started easily but soon bogged down, and having seen my share of galled and broken bolts I could feel I was starting to risk a problem - out came the bolt and I re-ran the tap making sure to drive all the way through the weld nut well past the tapered area of the tap. After that all the bolts could be threaded into place by hand. So yet again I urge you to not skip this step! If you do you risk breaking the weld nuts and/or the bolts and causing yourself a great deal of hassle. Clean out those threads and make yourself a happy hitch installer. To mount the hitch there is no need to jack up the Odyssey. After cleaning out the weld nut threads, I started by hooking the passenger side flange up over the tailpipe. Then I rolled over to the driver side, lifted it into position, held up the hitch crossbar tube with my leg while I hand threaded in the two bolts finger tight. Returned to the passenger side and threaded in those two bolts finger tight. On the driver side, Curt provides one more bolt, nut, spacer and a special fish wire - just follow their excellent instructions and you will have no trouble with this. Finally, I torqued to specification - 72 ft-lbs on the weld nut bolts and 50 ft-lbs on the 5th bolt. Wow that was easy, all told I think it took 30 minutes or so. In summary, a very nice hitch with great instructions that's easy to install and IMO is perfect for light towing and especially ideal for bike or other racks.
T**X
High Quality Hitch- Several notes to make it easier....
The end result is a 5 star hitch- exactly as advertised. High quality, strong/sturdy, can be installed by one man. I gave 3 stars on the instructions and ease of install, because the instructions omitted some additional detail that would've helped, and I received a hitch that had to be hammered into the proper alignment. Minor adjustments to their documentation would make this an easy 30 minute install. It also saves time to take a tool inventory before it arrives. A couple things to note when you order: -You can technically install this without lifting your car, but it makes it easier if you can give yourself an extra couple inches. The easiest/safest way if you don't have a pro setup, it to set up a pad of bricks for the rear tires to park on- then block off both sides of the front tires and you're set. -Make sure you have a torque wrench that can be set from 70-86 ft lbs. They start around $25 on Amazon if you can't find one to borrow. It takes some strength to reach that level with a short torque wrench- most regular men can do it, but if necessary, find a longer one that'll provide more leverage. -You'll also need a stub phillips screwdriver or a phillips bit on a wrench (there's only a few inches to remove a screw between the fascia and the LR tire) -Need a regular 10mm socket and a deep 19mm socket. You can manage the 4 main bolts with a standard 19mm, but you'll need a deep socket for the 5th and final bolt (especially when torquing it). -You'll need at least a 6" extender for the 10mm socket -There are 5 fasteners connecting the fascia covering the driver's side rear frame that you need to access. 3 are those plastic push and lock fasteners along the rear half. Then there's one screw (need short phillips screwdriver noted above) and one hex screw (10mm socket and extender noted above); both of these are on the front end of the fascia right near the back of the LR tire. This is the only time you'll need to slide further under the vehicle. I broke the plastic fasteners trying to get them out, so I'd buy 3 extra ahead of time for when you reinstall the fascia. You'll need to trim the fascia when you're finished to reinstall it- so have some strong snippers ready to cut thick plastic. -When I first lined up the hitch, the holes in the hitch were too narrow to line up with the frame. This was an inconvenience but fixable. Have a 4+ lb hammer on hand to hammer the hitch into the correct width if necessary. Alternate hits on both sides, and hit it HARD. Took maybe 20 hits total to get me the extra 3/4" I needed to line up. -You don't need to detach your exhaust, but you'll need to force it out of the way when installing the two passenger side bolts. I could move it just enough to torque each one. -Not required if you torque properly, but you can use thread locker on the 5 bolts. I used purple vibra tite- very cheap for the smallest tube and a little easier to remove if I ever need to. -As they mention, start by inserting the hitch over the exhaust. You can rest it there. I used my leg to raise up the other end to make it a little more level. I started by hand threading one bolt on the exhaust side several turns so it could support the hitch. Then I did the same on the driver's side. That's the easiest way to do it quickly with one person. Once two bolts are in, it's cake. The fishwire technique for the last bolt is well described in the instructions. -Our van has about 80k miles on it, but the bolts all threaded easily into the frame with some WD-40. I tested all first. Others have noted that they needed a tap and/or thread cleaner before starting though, so keep that in mind.
M**T
Perfect item $100+ less than retail and labor....more from OEM Honda minivan
I put this off as long as we could now the kids bikes and ours have outgrown the van. First and foremost this is a high quality Made in the USA hitch, class 3 item. It arrived in a super sturdy box hardware securely tapes to the item so as not to float free in the carton and scratch the hitch( not that it would matter) great packaging. I dragged it out to the garage, it is large and heavy no surprise there. I matched up the holes and inspected the bottom of the vehicle before starting so I could dive right into the install. All was good and I sprayed a little wd-40 into the threads just to flush any unseen debris out. Mind you my van is an 02' 11 years and 160,000miles of road use. I have decent to above average mechanical skills, limited tools but a logical mind. That being said this is as easy a job as possible. I had a paint can handy to support the side of the hitch I was not bolting up. No need to jack up the car, or drop the exhaust, I did not have a 9" extension for my socket and it probably slowed my process. But it only took 30 minutes regardless. Step one-fillet the box flat, slide under back of car with hitch properly aligned under car...(kept me off the concrete and from scuffing hitch on pavement Step two-prop up driver side of hitch on paint can below holes in frame...scurry to passenger side maneuver hitch mount around exhaust and hand thread two bolts and washers... Step three- back to drivers side lift and tighten completely two bolts and washers... Step 4- fish included wire into the large hole adjacent to small hole aligned with hitch plate( so much easier than it looked and the wires included) thread spacer on to wire 90deg bend in wire, spigot into coiled end, and pull through. Unthread wire from bolt don't let the bolt go it will hide in frame, hand thread nut on. Step five- go back tighten everything to the specified torque for safety, Step six open a beer, except I did it at 7am so I had another cup of coffee. The hardware was exact, the manufacturing perfect, paint solid, and instructions well diagramed and photos to match each step. Why I waited to do this was besides me, Honda quoted $350 for this PepBoys $250 for the price of parts and my labor I cut those virtually in half. And this hitch is Made in USA and higher quality than their offerings. I think I spent more time reading the instructions than installing so as not to have to go back to read them again, there are only two sizes or socket needed and hardware was clearly packed with an inventory sheet as well. It also arrived a day earlier than promised, good for me but be aware these are prompt shippers.
T**N
Fits perfectly for Odyssey 07 but too heavy for my need.
After reviewing the videos and learned a few tips from the reviewer, I completed the job in 15 minutes by myself Luckily, my van is 7 years old but the threads are clean. Here are a few tips for you as I learned form the others. - Park the car in the garage and back up until the rear wheels are right at the edge of the slope. The slope of the driveway gives you additional clearance hence you may not need to jack the car up. - Have one end of the hitch rests on the muffler. No need to pry and move it out. (may be applicable to the Odyssey) - Use one hand to put up the other end and crew in the first bolt to hold it in place - Go to the the end , push up the hitch and install the second bolt so the hitch doesn't rest on the muffler for so long - Install the rest of the bolts on both ends - Use the wire to install the fifth screw. - Use the torque wrench to tighten it as specified torque. Other thoughts: although I know class III hitch is a bit overkill for attaching the bike rack and bikes, I went with it because many people installed it on the Honda Odyssey that I also have. Curt doesn't public clearly how much is the weight if each model/class. Amazon also does a good job in confusing me more as the class II hitch has the same weight or heavier than the class III based on the description. I wish they made lighter hitches just for bike transportation for those who never intend to tow a trailer. I don't want to waste the gas by hauling it every day. Another issue we ran into is that the van loses a few inches clearance. The hitch touches the ground when my wife exits her work place where there is a steep slope.
K**N
My wife says her Odyssey looks tough now
There's really not a whole lot that I can say. Amazon gave me a good price and Curt made an outstanding product that is a perfect fit for my 2016 Honda Odyssey. If I was to elaborate about the anything, it would have to be the installation. I consider myself to be like many husbands that want to impress our wives with our DIY abilities. We want to make them think the job is hard and they should really appreciate us for doing these things for them. I live in southern Arizona and it can get quite warm in the summer, so crawling around under a vehicle can be miserable in the heat. Well, that didn't happen. It was actually a cool morning when I went to work on this. No sympathy from her. Also, Curt produced a video on their website showing the installation. That means no guessing as to how to put it on. Which, in turn makes the job very easy and quick. Again, no sympathy from the wife. Seriously though, I truly like the hitch. It's made with what appears to be quality steel that is heavy duty. My van will break before this thing does. I will always keep Curt in mind for all of my hauling needs. If you are thinking of putting one on your vehicle, don't hesitate to buy this one. It's definitely a classy Class 3.
D**O
Great product and easy installation!
Installation was easy, as long as you follow the online videos.
A**H
I didn't want to put extra pressure on it) -- the first three were quite quick and easy (less than 10 minutes per)
I purchased this hitch for a 2001 Honda Odyssey, in preparation for a road trip where we needed to take 5 bicycles with us. In the past, when we've taken these trips, I used a hatchback mounted bike harness to hold three of them, and put two of them in the van itself (taking out the two middle seats). While this worked, it was extremely uncomfortable for all involved, but for ~1 hour road trips, we made it work. This time around, we were driving further (~5 hours), we needed to do something different. I decided to put them all in the back using a hitch and 5 bike harness (http://amzn.com/B00TRTT178), saving us the extra room in the car for people. I installed the hitch myself in a 14 year old Honda, in my garage, without a lift, all by myself, in about 2 hours. Some key points: - Watch the instructions on youtube (there are many of them, but I found this one -- https://youtu.be/tzI9FeUx-e0 -- to be excellent). - For an older car (like mine), the nuts in the car will be rusted. A wire brush will not be enough (I tried). A tap is the only thing that will work (I got mine from amazon - http://amzn.com/B000K1LZVM ) - It took me at least an hour, may be an hour and a half, to clean out all 4 nuts so the bolts will screw in, due to a combination of things: -- I didn't have the right handle for the tap (by mistake, I ordered a 1/4" handle rather than the 7/16 handle that's required, so I used a adjustable wrench, which made it harder). -- it was the first time I used a tap, was going slowly to make sure I did it right -- the nuts themselves being very rusty, took a while (and some serious elbow grease) to get the tap in there -- I didn't move the tail pipe out of the way, the space was tight but very workable (it's the original one, I was worried that it would fall off due to all the rust, I didn't want to put extra pressure on it) -- the first three were quite quick and easy (less than 10 minutes per), the last one didn't cooperate (of course, isn't that always the case!) Once the screws fit easily into the nuts, mounting the hitch itself was very easy, something I did easily by myself. The fish wire makes installing the 5th bolt trivial. I hooked one side of the hitch over the tail pipe, put the screws in on the other side (lifting the hitch using my knee to hold it in place, then I screwed in the passenger side, then I tightened everything by hand. I'll definitely get a hitch for the next car I buy -- but rather than paying a ton for the dealer to install it, I'll do it myself!
C**Y
It turned out to be an excellent choice. It fit perfectly on my 2012 Odyssey
I was a little worried about this hitch because two out of three people answered my question told me not to buy because it won't fit. I still gave it a try because it is less than half price than the Honda dealer. It turned out to be an excellent choice. It fit perfectly on my 2012 Odyssey. And toke me two hours to install. Easy! Great quality! Highly recommend it!
J**A
Muy bien
Muy fácil de instalar!
・**・
ラグレイト用なので、国産ホンダオデッセイの企画ではないです
取り付けられません
M**A
Cumple al 100% con lo publicado
100% recomendable, cómola mayoría de artículos que se venden por Amazon, el paquete llego en el tiempo prometido y muy bien empacado, en cuanto el artículo les comento que el enganche ajusto en mi Odyssey modelo 2012 perfectamente y es muy fácil de instalar, tan es así que la instalación la realice yo solo sin la ayuda de nadie más, creo que eligiendo el enganche correcto para tu vehículo no deberás tener problemas de instalacion.
M**L
Fits good
Very good
Trustpilot
2 months ago
2 weeks ago