Desertcart purchases this item on your behalf and handles shipping, customs, and support to Peru.
๐ง Silence your floors, not your style.
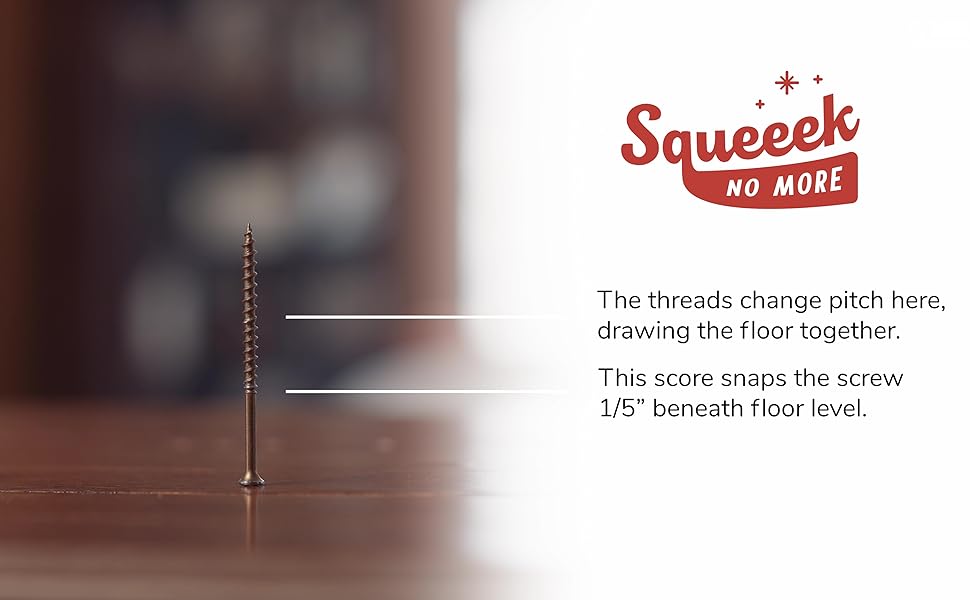
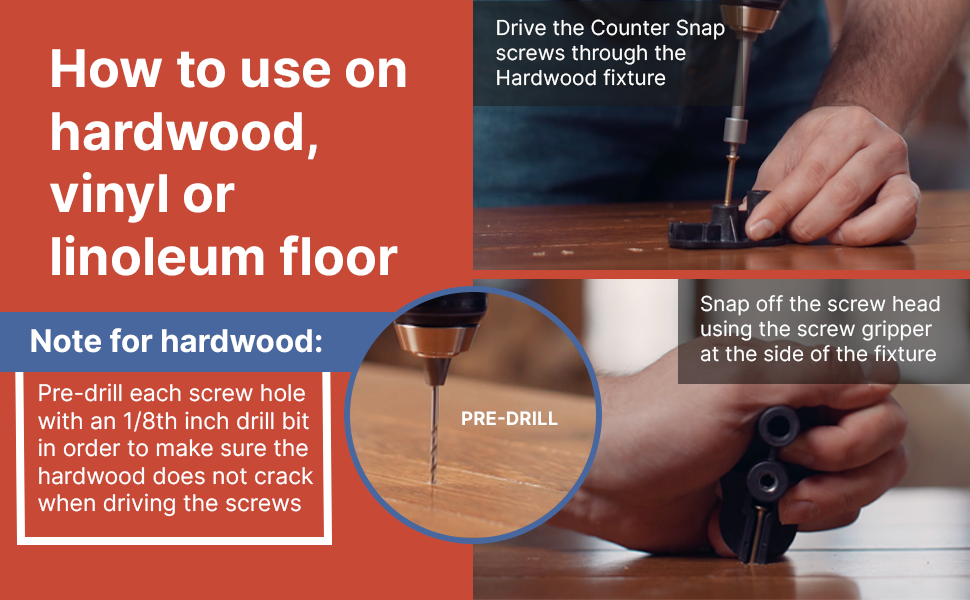
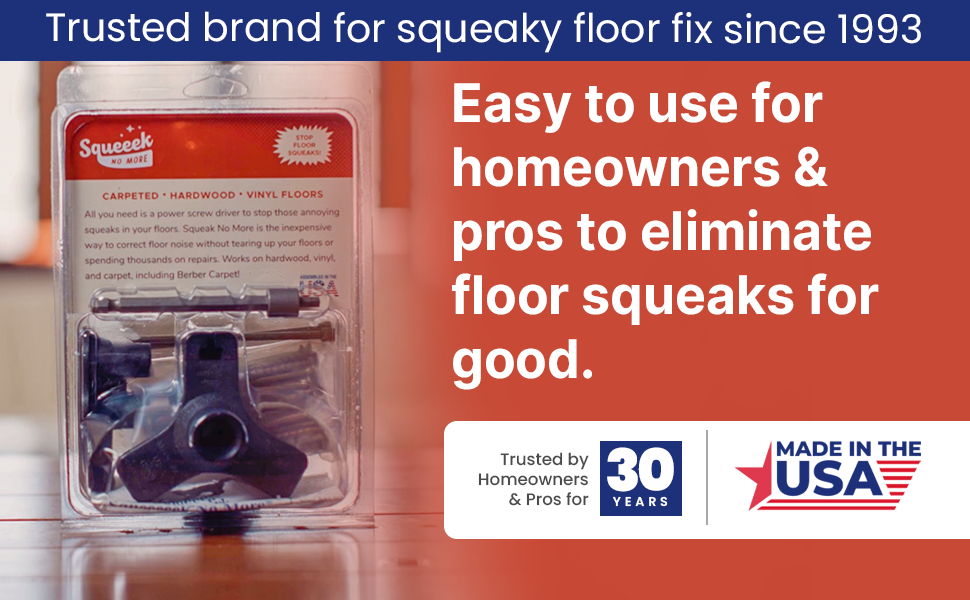
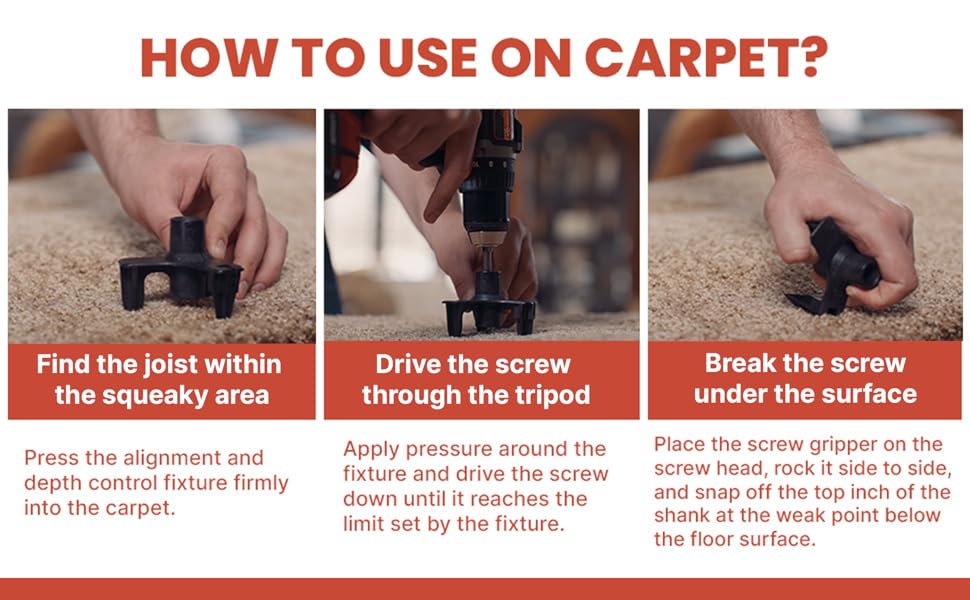
O'BERRY Enterprises 3251 Squeak Replacement Screws (50 Count) are zinc-plated, rust-resistant wood screws engineered to work exclusively with the SQUEEEK NO MORE Squeaky Floor Repair Kit. Each screw is designed to snap 1/4 inch below the floor surface, ensuring an invisible, damage-free repair on all floor types including carpet, hardwood, vinyl, and linoleum. Ideal for professional-grade squeak elimination, these screws provide a durable, clean finish that secures floorboards to joists without cracking or carpet damage.


| ASIN | B000H5WV1Y |
| Best Sellers Rank | #10,818 in Industrial & Scientific ( See Top 100 in Industrial & Scientific ) #102 in Machine Screws |
| Brand | Squeeeeek No More |
| Color | Yellow |
| Compatible Groove Diameter | 0.13 inches |
| Customer Reviews | 4.4 out of 5 stars 2,154 Reviews |
| Drive System | Square |
| Exterior Finish | Zinc |
| Fastener Size | No. 8 |
| Fastener Type | Wood Screws |
| Finish Types | Zinc Plated |
| Global Trade Identification Number | 00765806032517 |
| Head Style | Bugle |
| Head Type | Bugle |
| Included Components | wood-screws |
| Item Diameter | 0.13 inches |
| Item Dimensions | 7 x 3 x 1 inches |
| Item Type Name | O'BERRY ENTERPRISES 3251 Squeak Replacement Screw (50 Count) |
| Item Weight | 8.16 ounces |
| Item dimensions L x W x H | 7 x 3 x 1 inches |
| Manufacturer | O'BERRY ENTERPRISES |
| Material | Alloy Steel |
| Material Type | Alloy Steel |
| Maximum Shear Strength | Approximately 250 MPa to 700 MPa (36,259 psi to 101,538 psi) |
| Metal Type | Alloy Steel |
| Model | 3251 |
| Number Of Items | 50 |
| Number of Pieces | 50 |
| Part Number | 3251 |
| Point Style | Flat Point |
| Screw Head Style | Bugle |
| Screw Point Style | Flat Point |
| Set Name | Squeaky Floor Repair Screw Set |
| Set Screw Thread Type | coarse |
| Size Name | Pack of 1 |
| Thread Coverage | Fully Threaded |
| Thread Size | #00-90 |
| Thread Style | Right Hand |
| Thread Type | Unc |
| UPC | 765806032517 |
| Warranty Description | Warranty |
A**R
Out of limited options, it was the best I could find
After hearing some ridiculous contractor quotes, I went online looking for a solution to my impossibly squeaky floors. We have a cat and you could hear the thing walking they were so bad. The hardware store guys told me you just learn to live with it...after four years in this house I was going crazy. Saw this thing demo'd online and gave the starter set a try. They're not perfect, but when you can find a joist they work very well. Couple things: - if you have an older home with older hardwoods, the holes are nearly invisible among the other surface imperfections. Make sure you pick up a couple colors of wood putty, one darker than your floors and one lighter, so that you can mix them like play-dough and get your color right. - That's important because the screws do not always snap off - I'd say it works about 80-85% of the time. The little tool they give you does not snap the screws as neatly as they show in the video. And in working it around, you enlarge your holes a bit. Or sometimes the screw doesn't generate enough torque to snap before it just starts chewing through the wood and you're just spinning. Then you back it out and either put it in planning to snap it or just fill the hole you create during the mangling process to break it off. - I found these to be useless between joists. Probably a personal situation with our house and the old nails, but the only sound reduction came when the flooring was re-secured to the joists. - In an old house, not all of the joists are 16" apart. Fortunately our basement is unfinished and I was able to see a lot of the time where I was going wrong. Some areas were covered, however, and then it's hide and see. I looked far and wide for a good stud finder that could penetrate 2" of hardwoods and subfloor. Bosch has one that said it could but home depot had stopped carrying it at the store I tried. I found when hunting for a joist that normally the worst of the squeak was directly at the joist. If you can use a finger and create the squeak (vs. jumping on it), you're probably very close. I'm about 200 screws in at this point and have only had one pre-break below the surface but not at the 1/8" that they specify. I find that they torque up a little better if you're going slow so I have a reasonable speed going until I get close to the guard and then slow appreciably. At that point, I'm drilling no faster than I could by hand which seems to work the best. Overall, considering that I had no way to approach some of my floors from underneath, that even if I had, the option of nailing a 2"x4" to the joist and then angling up into the sub-floor sounded like a true waste of time, I think these are the greatest invention I could have asked for. Even using the square drill attachment (vs. say a Phillips) was genius as you never strip a screw. My entire toolkit for this is a set of vise grips, a long paperclip (bend it in half so you don't drop it), tape measure, putty, flashlight, some tape to mark the joist centers and a drill. I'd rate it very easy on the difficulty scale. It is time-consuming, however, and you go through screws like crazy. 6 joists per avg bedroom x 11 feet x 2-3 screws per foot and you're easily over 100 per room even if you're just attacking the squeaky spots (if your rooms are as noisy as ours were). Sweet bliss coming into the house now - I'm almost afraid to walk on them. Good luck! Update - 2 weeks later - couple hundred more screws in place. Still a fan - figured out two things: 1) they will quiet spaces between joists, just put in a grid, spacing them 4" apart, so in 1 sq. ft, you'll use around 16 screws to silence it. compare that to a joist, where you get about 3" of silence on either side when you can snug the floor back down to the joist. ups your total per room substantially. i picked up a 500 pack for the weekend. 2) resist the temptation to rock the screw head back and forth to minimize floor damage - hold the tool like an airplane thrust lever and push forward only. faster and less frustrating.
A**N
Thank you Saint O'Berry
These are a godsend. I really don't think I would have my sanity if it weren't for this product. My floors squeak! Oh boy do they squeak! As the years went by, the squeaks got worse. The squeaks were always louder and more prevalent in the winter time when the house was dry. We have carpet through much of the house so getting at the actual floor was an issue. A few years ago I decided to give this product a try, and to my amazement it works wonderfully! I went through the initial 50 screws in the set. I bought another 50 pack and went through all of those as well. I then said, "screw it" and bought the contractor pack of 250. The rate I'm going I'll need to buy another one here shortly. If you know how to find your joists, or spend a little time to find them trial and error then this will undoubtedly work for you. I even fixed a few mechanical squeaks with this. Our joists have metal X brackets that run from one joist to another, I guess to keep the joist secured or not warp. I was getting a metallic squeak where these brackets rubbed together that sounded like fingernails on the chalkboard. I was lucky enough to drive a screw in to bind against the bracket and move it aside just enough so it wouldn't rub against the other bracket. Some tips after using this for a few years: - I keep a slip of paper with my drill and when I know I find a joist in a room I'll write down the measurement (example: living room +2 inches off south wall baseboard). Then I can easily find other joists 16" off that measurement. - You don't need the special bit and tool set. If you're handy you can just buy the contractor pack, use a standard square bit, and then gauge where you need to snap the screw head off and use a pair of pliers or the claw of a hammer and pop it off. - It has been my experience that the squeaks will slowly come back over time in a few problem spots. I believe the threads aren't quite enough to keep the floor secured to the joist and as the humidity changes, kids jump around, or heavy foot falls will cause the floor to break free from the screw over time. If you drive a screw and fix a big squeak, drive a couple more nearby to help keep the squeak from coming back. I have driven in probably 500 screws (many of those I had to back out because it didn't fix a squeak, or I missed a joist) and not once has it affected the carpet. I have a pretty standard nylon 1" pile plush carpet and it has been fine. The only goof I ever had with this was when I snapped a head off the screw that wasn't screwed down as far as it should have been -- one of the drawbacks from not using the guide. So if you step barefoot just right in this one spot with your heel you feel a slight bump. Not enough to hurt, just enough to say, hmm, I should fix that sometime with a big hammer. I have not used this to try to fix squeaks on a hardwood floor or other surface, just carpet. Ultimately, the best way to fix it would be to rip up the carpet, and use actual flooring screws. I will be doing that next time the carpet needs to be replaced. In the meantime, Squeeek No More is the best solution. Thanks you O'Berry Enterprises!
B**E
The name says it al.
These are replacement screws for the OโBerry Squeak No More system of stopping floor squeaks. I had it use it on hardwood flooring where I had no access to the underside of the squeak. These variable pitch screws draw the joist, subfloor, and hardwood down tight and, in most cases, alleviate the squeak. The worst part, in my case, was trying to find the joists underneath in order to screw into them. Stud finders will not find the joists through 3/4โ flooring and 3/4โ sub-flooring so it comes down to drilling a few holes with the smallest drill bit you have to determine the joistsโ location. I know, drilling into your beautiful hardwood flooring isnโt something I like to do but, in this case, itโs a necessary evil. Once joists are located, a 3/8โ hole is drilled and you used these screws along with the appropriate guide from the Squeak No More kit to screw it down tight. Make sure youโre using a drill or impact screwdriver so when it reaches the proper depth, the screw shears off just below floor level. Repeat as necessary to rid your floors of those annoying squeaks. Once completed, fill in the holes with the appropriately colored wood filler stick (or crayon, actually), smooth it out and the holes are almost invisible. Anyway, these replacement screws work the same as what came in the kit. They worked for me.
B**T
Tricks of the trade...
These are a good solution for older homes that may have original hardwood floors where the nail holes holding the subfloor and joist together have become larger than the nails themselves over time due to expansion and contraction. Nonetheless, it's good to know how your floor was constructed to be able to maximize their effectiveness. If you can see the joists below on a 1st floor for example, it helps a lot. If you are on a second floor, you are trying to locate joists and sometimes it is impossible that you end up just putting in a bunch of these anyway. In my 100 year old house, the subfloor is actually comprised of 1 inch boards so there is more potential for squeaks to come from the hardwood floor and subfloor and the subfloor and joist. At the same time, depending on how thick the hardwood and subfloor are these may not be effective regardless. They are also hit or miss if they will break off as you torque them down. In my particular case, I gave up on using the "hardwood" slot in the tool and just used the "softwood" part. For my floors, I felt the "softwood" part wouldn't allow the screw to get deep enough so I would remove tool and tightened them down another couple turns. That seemed to help a lot for reducing noise while still being able to break them off manually. For some squeaks, you may end up making your floor look like swiss cheese if you really want to eliminate it completely. In many cases, the squeak will dampen a bit and that was good enough for me. If you find a good wood putty color match, the holes are not noticeable at all. I assume in many homes that would find these screws useful, the floors are going to have their own character from wear and tear from decades of use that it will just blend in anyway. They do make a longer version of these screws designed for decking, but I haven't been able to find a box of 250 of them like you can buy here. For the longer ones, it seems you have to buy the "starter kit" each time of 50 that comes with the breakaway die.
L**N
Works well
The heads consistently break off above the threads as they are supposed to. I have had good results with this brand.
T**B
Works to quiet squeeks. Find joists easily from ceiling below.
I live in the 1st floor of a 2-family house and the floor squeeks are horrendous. I found these screws do work though alot of them are needed. Most of them seemed to not go into the floor joists since the house is older and nothing was constructed using a tape measure it seems. I realized a good way to locate the framing is to use a thin drill bit and drill up into the ceiling from the floor below. My ceiling is the trowel looking plaster surface so filling in the holes afterwards was easy with some light weight spackle. Takes alot of trial and error to locate the joists but when you do just map it out, I measured from the walls and made a nice diagram showing where the joists were located. Then when upstairs just use a tape measure and measure off the walls and you should hit the joists. I must have used 3 of these 50 packs of screws and i just ordered another pack because theres more squeeks that have developed upstairs. I dont think you can use enough of these screws, buy extra because you will probably use them all. Installing the screws is super easy using the kit. Once the screw is in place I just use a large pair of pliars and snap the heads off. Cant even tell any work was done.
J**M
Works great follow couple minutes of pre prep
Couldnโt believe how easy and finally something works. Before starting take off baseboard locate stud and pencil lightly every 16โOC on reattached baseboard. This way 10 minutes of prep you can easily hit floor joist for securely making quieter floors. If you have basement drill very small hole next to floor joist through to floor measure 1/2 inch to locate center on joist an go from there.
L**0
What a disaster
First of all, the screws don't come with any instructions. I don't know why this company assumes that everyone knows how to use their product. I drove my first screw into the floor and it just stopped and started spinning. I couldn't back it out, the head wouldn't come off, and I gouged the floor trying to pry it out, so it's just stuck there for now. I resorted to reading Amazon to reviews to figure out how to do this, and I'm sorry that I did. My box of screws didn't come with the tool some reviewers mention...which is probably key. One review said to buy an extension drill bit, so I did. The bit promptly got impossibly stuck in my floor. I couldn't get it out to save my life AND it was sticking dangerously up 5 inches from the floor. I had to drill around it to dig it out and created a big hole in my floor. So, now I have one big ugly hole and one screw stuck in my still-very-squeaky floors. Disaster!
J**R
resolves the squeaks in hardwood.
Our townhouse rental had very squeaky hardwood floors. This product (we have ordered twice now and had purchased the previous set with the part that snaps the screw) resolved most of the issues. Itโs a quick learning curve. We found to have two drills handy cut a lot of time so we didnโt have to switch bits to drill and screw. Everyone sleeps better at night as there arereduced squeaks. There are a few areas that have either a metal beam or duct work that we didnโt do but overall those areas are muffled.
C**N
Highly recommend
Great - works well!
D**E
Needed a few extra screws for the job
Worked perfectly !!
D**E
Absolutely does what it should......
A brilliant product to use and very,very easy. We had to have our new (to us) static caravan moved from one part of a site to another and sometimes things don't go to plan when you have a static uplifted!! It was put on to its new pitch and looked lovely but as soon as we went in the floor started creaking and grinding as the joists sometimes do when any caravan is moved! The site owner was kind enough to say that he would do it but it would take a little time so we decided to look around for something that would help us do it safely and quickly ourselves and these are what we found,O'BERRY ENTERPRISES 3251 Squeak Replacement Screws. It took my husband and myself less than two days to mark out the floor inside the caravan with chalk,this is done on the actual carpet,then my husband got under the caravan and together we were able to work out where the joists were. I then used a re-chargeable drill to drill in first screw just to make sure the chalk marks were in the right position before screwing them down through the carpet (yes you read it right) and you will know you hit the joist by the noise the drill makes (just like a hammer drill). As soon as you hit and go into the joist with the screw all that's left to do is use the small plastic tool to snap off the head of the screw itself with just a slight twist and ,believe it or not,you have no marks or anything on or coming through the carpet at all,just carry on doing that. So it took us not long at all,one inside one outside,a nice sunny day and (now) an absolutely lovely,quiet floor. Don't hesitate,they work and we recommend them to anyone (even our site owner).
C**H
Just the job
Works when it finds a solid beam otherwise
Trustpilot
2 months ago
2 weeks ago