๐ Pocket-Sized WiFi Wizard: Power, Flexibility & Speed Wherever You Go!
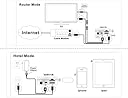
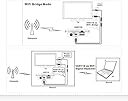
The Vonets VAR11N-300 is a professional-grade mini wireless router that combines router, bridge, and repeater functions in a sleek, ultra-compact design. Delivering up to 300Mbps over 802.11n with dual interchangeable LAN/WAN ports, it features innovative TAFC technology for stable connections and a smart two-in-one power and Ethernet cable for clutter-free setup. Ideal for business travelers and home users seeking reliable, flexible WiFi coverage up to 100 meters.


| ASIN | B01199OGK0 |
| Antenna Location | Home, Small Office, Travel |
| Antenna Type | Internal |
| Brand | Vonets |
| Brand Name | Vonets |
| Compatible Devices | Smartphone, Tablet |
| Connectivity Technology | Wi-Fi |
| Control Method | App |
| Country of Origin | USA |
| Coverage | 100 meters |
| Customer Reviews | 4.0 out of 5 stars 299 Reviews |
| Frequency | 2.4 GHz |
| Frequency Band Class | Single-Band |
| Is Modem Compatible | No |
| Item Weight Unit of Measure | 65 Grams |
| LAN Port Bandwidth | 10/100 megabits_per_second |
| Manufacturer | Vonets |
| Manufacturer Part Number | 001062 |
| Maximum Upstream Data Transfer Rate | 300 Megabits Per Second |
| Model Name | VAR11N-300 |
| Model Number | VAR11N-300 |
| Number of Ports | 2 |
| Operating System | RouterOS |
| Other Special Features of the Product | LED Indicator |
| Security Protocol | WPS |
| Special Feature | LED Indicator |
| UPC | 611517009341 714169875507 019005815151 803622981470 |
| Voltage | 5 Volts |
| Wireless Communication Standard | 802.11n |
| Wireless Compability | 802.11n |
E**S
Nice WiFi Bridge for Ethernet-Only Gadgets
I ordered this to use with my SolarEdge inverter. The North America models don't come with WiFi, so when it was installed, it got a cellular modem for monitoring. The cellular connection was spotty, since I live in a rural area, and it had only one bar of service at best. SolarEdge sells a "Wifi Gateway" for $300+, but since it has an Ethernet jack and a USB port, I thought that I'd give this a try. I set it up on my computer in WiFi Bridge mode and made sure it was working. The network speed on this isn't that high, but it's more than enough to handle the inverter monitor data. I installed it inside the inverter, and since it's so small, it was easy to find a permanent space for it. It's been working perfectly, and now my solar monitoring is stable and updates more frequently. This was a LOT cheaper than going with the OEM route, and I'm guessing that works just as well - if not better. I have had other travel routers like this one before, but I really like that the cables are permanently attached. I guess it wouldn't be great if you wanted longer cables, but for what I'm using it for, the short length is perfect. Don't expect this to perform as well as a full-size router or WiFi bridge. It's a tiny, low-power device, so expect it to perform accordingly.
S**N
Wireless connectivity
Great service came on time I installed and it's been working just fine
A**R
This Tiny Box Does More Than It Has Any Right To
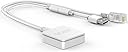
I first needed this to bridge a wired-only IP device to my wireless network, and I was skeptical a device this small could actually pull it off reliably. Turns out I was wrong. This thing is genuinely impressive for its size, which is about half a credit card. The VAR11N-300 operates in three modes: router, repeater, and WiFi bridge. The bridge mode is the most useful for connecting wired-only devices to a wireless network, which it handles without complaint. Setup is done through a web browser at a simple configuration address, and while the manual reads like it was translated through several languages before arriving in English, the actual setup process is straightforward once you know what you're doing. Range is practical rather than impressive at around 30 to 50 meters under real conditions, and it tops out at 100Mbps on the Ethernet port with 300Mbps theoretical wireless. That's plenty for cameras, printers, VoIP devices, and similar gear. Power comes from a USB source or the included DC cable, making it easy to deploy anywhere. The one thing to keep in mind is that this is 2.4GHz only, so it will not connect to or extend a 5GHz network. As long as your source network has 2.4GHz available you're good to go. For the price this little device is remarkably capable and has been running continuously for me without a single dropout.
T**.
Works Great - but has a backdoor.
NOTE: I had to remove all links from this review as I forgot URLs were not allowed - this means you'll have to do some googling to get the firmware and files. Device technically works perfect - and I would recommend it (it worked flawlessly for our needs and I have purchased a dozen with more on the way). However, the built in firmware does contain a backdoor user/pass that is a super admin account. SuperLogin=vonets SuperPassword=vonets26642519 As a result - I would NOT use the factory firmware. Luckily OpenWRT does support the device - and with help from their GitHub comments - this is how you correct this issue. (NOTE: do this at your own risk - it fixes it, but it is flashing the device and certainly isn't warranted by Vonets) Download - Google OpenWRT and you will get to the openwrt page - you can search for vonets in the supported hardware and find the download file. Download the firmware and rename the long *.bin file to fw.bin (makes it easier in the future). Download a TFTP server, you'll have google "tftp server" - I used one by jounin. Plug in the VONETS device to your USB and Network to bring it online. Go to the IP: 192.168.253.254 in your browser and login with the superuser login above On the Status page you will see SYSTEM UPTIME and the actual UPTIME Click SYSTEM UPTIME then the UPTIME time until you get a prompt that says "ATED START" - this hidden trigger enables the telnet client on the device. Telnet to the device, and use the username and password of admin | admin Back on your computer - start the TFTP client and set it to bind to your vonets ethernet port (lets say it is 192.168.253.100) Click BROWSE on the directory and make sure you put the fw.bin file you saved earlier in that directory. Back on the telnet session - type "tftp server: tftp -l fw.bin -r fw.bin -g 192.168.253.100" Press ENTER to load the firmware on the device Then write the firmware by typing "mtd_write write fw.bin /dev/mtd4" After it is done writing type "reboot" Upon rebooting, you will be part of the new subnet 192.168.1.* with 192.186.1.1 as the gateway/management IP. Login (no password by default) and you are now in with OpenWRT firmware. The built in Ethernet cable is the LAN, the port on the device is the WAN, and the AP is set to OpenWRT with a bridge to the LAN by default - you can change all of this and more - see openwrt for documentation. Enjoy!
P**L
Works great
Used this to add wifi to an OG Xbox. Setup was a little confusing and I had to guess the default password, but it wasnโt overtly complicated. No issues after the initial setup. :) Would definitely recommend. UPDATE: Default password is printed on the label on the adapter itself. Has started to heat up really bad under normal use and requires a power cycle every time I try to use the Xbox to connect to the network. Still working about 90% of the time. UPDATE 2: Constantly overheating and disconnecting from network. Have to reboot it every five minutes by disconnecting from power. Went from decent device to completely useless very quickly.
Trustpilot
3 weeks ago
2 months ago