Sobre nosotros
Servicios al cliente
Atención al cliente
Acceso Regional
Legales y políticas
Obtén la aplicación

Apunta tu cámara para descargar la aplicación
Copyright © 2024 Desertcart Holdings Limited


🔌 Power Up Your Life with Ease!
The BN-LINK Digital Timer Outlet is a versatile and compact solution for managing your electrical devices. With two programmable settings, a backup battery for reliability, and an energy-efficient design, this timer is perfect for busy professionals looking to streamline their home automation. Its sleek appearance and easy setup make it a must-have for any modern household.
| Operation Mode | ON-OFF-ON |
| Current Rating | 8 Amps |
| Operating Voltage | 125 Volts |
| Connector Type | Plug In |
| Brand | BN-LINK |
| Item Dimensions LxWxH | 1.93 x 3.35 x 4.09 inches |
| Actuator Type | Push Button |
| Number of Positions | 2 |
| Connectivity Protocol | X-10 |
| Color | Digital 2 Prong |
| Wattage | 1000 watts |
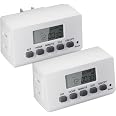
| Unit Count | 2.0 Count |
| Manufacturer | BN-LINK |
| Part Number | BND-60/U132 |
| Item Weight | 5.9 ounces |
| Product Dimensions | 1.93 x 3.35 x 4.09 inches |
| Country of Origin | China |
| Item model number | BND-60/U132 |
| Is Discontinued By Manufacturer | No |
| Size | 2 prong |
| Voltage | 125 Volts (AC) |
| Item Package Quantity | 2 |
| Number Of Pieces | 2 |
| Batteries Included? | Yes |
| Batteries Required? | Yes |
E**E
I still love it after two years. It's well designed and relatively easy to set up
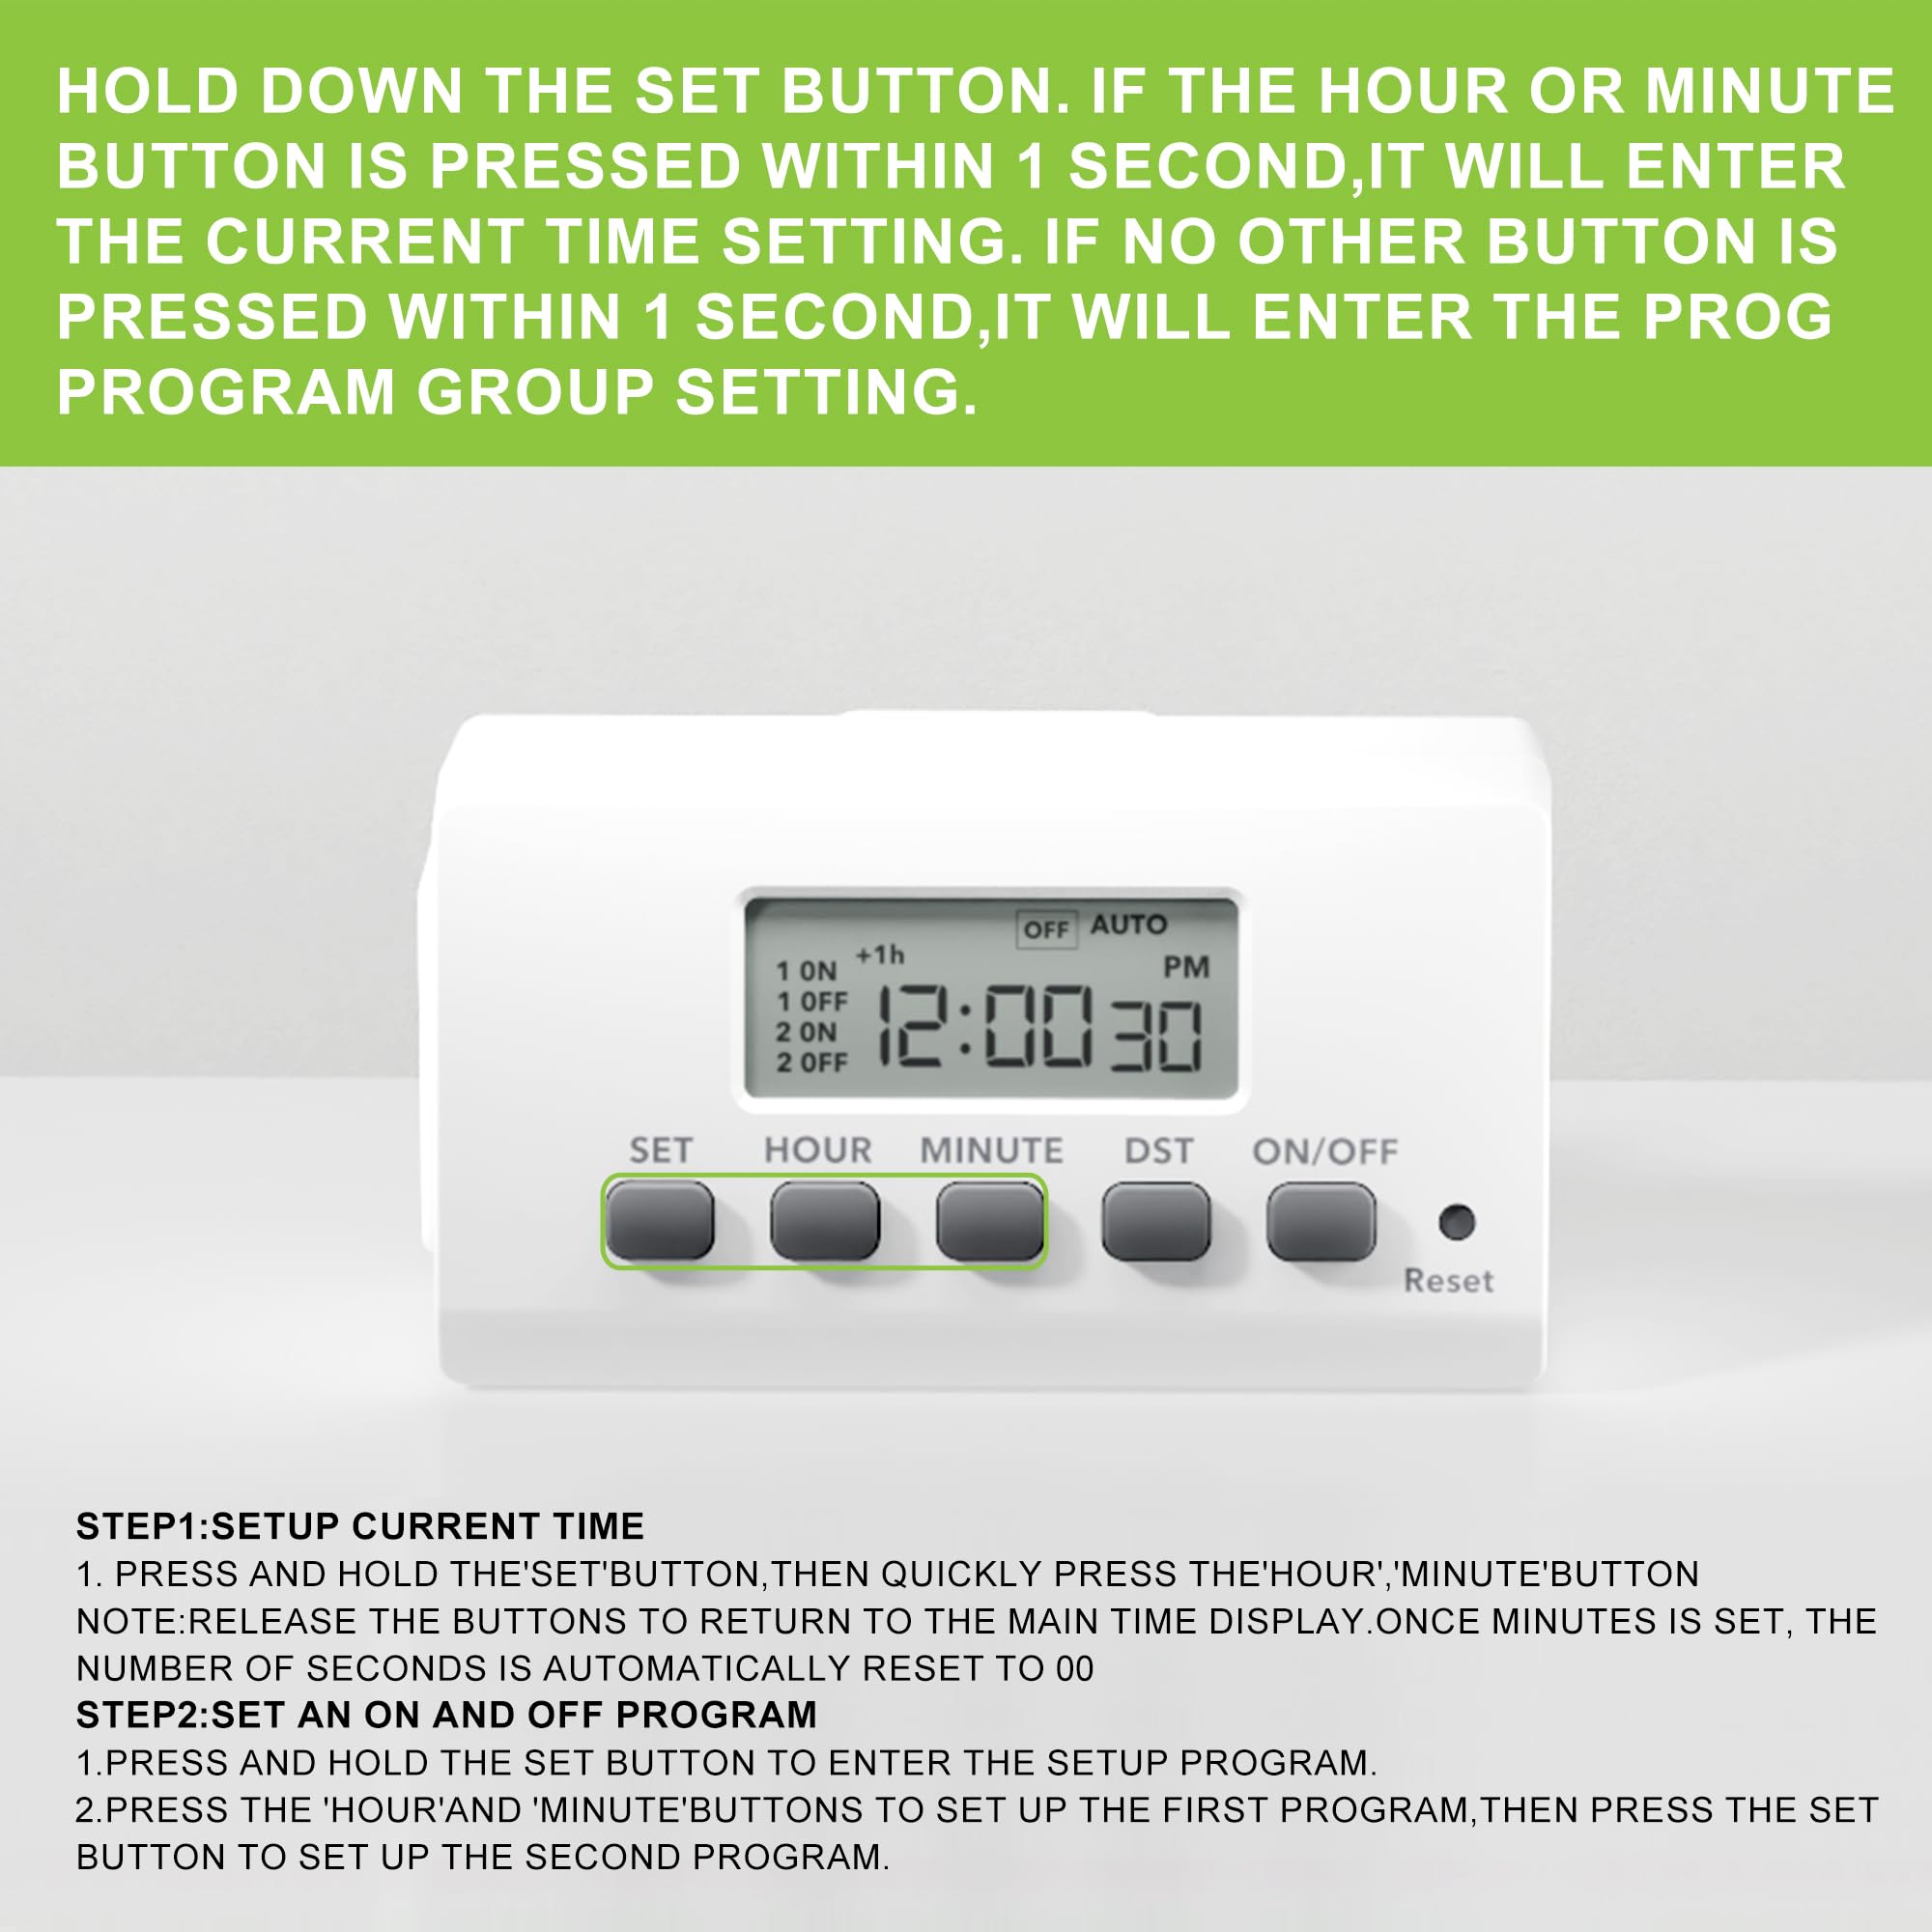
Two Year Update:After a little over two years, I still love this timer. It's worked flawlessly and has been a night-and-day improvement over the analog timers I used to use. I use it for setting a radiator-style space heater to run in the evening and early morning. Unlike the analog timers I formerly used, I never have to correct the time and I never have to worry about bumping it and changing the programming inadvertently.The main potential problem is that how to program it is not obvious. I keep the original instructions handy for when I want to change the schedule. It's not a big problem. After you've learned to program it initially, changing the programming is pretty easy, but it helps to have the instructions as a reminder. Overall this is a great timer that I recommend highly.Original Review From Two Years Ago:I’ve only had the timer for a day, so I can’t attest to its reliability yet, but I am impressed with how much of an improvement it is over the mechanical timers I’ve used for years. Set up is fairly easy, however many people may be confused by the setup and programming instructions, so here is how I did it.Setup=====Follow the instructions to initially set the day and time. Be sure to set it to standard time even if you’re currently on daylight savings time. If you’re currently on daylight savings time, then after you set the time, press the HOUR and MIN buttons simultaneously. The time will automatically advance an hour for daylight savings time. In the fall, to return to standard time, press HOUR and MIN again to set the timer to standard time.Programming==========This is the part that will confuse a lot of people. Here’s how I did it.There are 8 program settings, each of them with a separate ON-OFF setting. Each time you press the PROG button, it will advance. The first time you press PROG, it displays 1ON (1 + ON in smaller, raised letters). The second time you press PROG, it displays 1OFF, the third time it displays 2ON, the fourth time 2OFF, etc.The programming steps are:1. If 1ON isn’t displaying, press PROG until you get to 1ON. (1 + ON in smaller, raised letters)2. Press WEEK. You’ll see all seven days display. If you want the timer to turn on all seven days, then just go to step #3, otherwise press WEEK again until the days you want are displayed.3. Press HOUR until the hour you want the timer to turn on is displayed4. Press MIN until the minute you want the timer to turn on is displayed5. Press PROG once. It will now advance to 1OFF.6. Repeat steps 2 - 4 for the day, hour, and minute you want the timer to turn off.7. If you want to set another day and time for the timer to turn on and off, press PROG once and then repeat steps 2-6. Continue this process until you’ve set up to eight day-time combinations for the timer to turn on and off.8. To activate the programs you’ve just set, press ON/AUTO/OFF twice. It should now display AUTO. In the future, if you want to override the programming and force the timer to be either on or off all the time, press the ON/AUTO/OFF button until either ON or OFF displays.A red light on the timer will turn on whenever the timer is on. The light goes off when the timer turns off automatically or when you turn it off manually by pressing ON/AUTO/OFF.CAUTION about using this with a space heater====================================I’ve used 1500 watt space heaters on timers for decades, but YOU HAVE TO BE CAREFUL!Make sure the timer is rated for more than the wattage of the heater. This timer is rated for more than 1500 watts, so theoretically it is safe, but it nonetheless can still start a fire if you don’t take precautions (and even if you do take precautions).1. Never plug the timer into an extension strip or surge protector if you’re using for a heater.2. Never plug the timer into an extension cord that isn’t rated at least for the heater.3. Try to avoid running the heater at full 1500 watts. It’s easier for me to follow this rule because I don’t experience extreme cold weather where I live. On the rare occasions when I do run the heater a the full 1500 watts, I don’t leave it unattended.4. Periodically unplug the heater and examine the plug. Over time, the heater’s plug may deteriorate. I’ve thrown out several heaters when they’ve reached this point. Last week I threw out both my 30 year old oil-filled radiator heater and my last timer because the heater’s plug showed signs of deterioration and had visibly damaged the socket in the the timer. The timer still worked, but would have been unsafe to use. I’ve seen two forms of plug deterioration: the plug’s smooth plastic surface becoming rough around the metal prongs, and the metal prongs themselves showing signs of beginning to disintegrate.So far I'm really impressed with this timer. If something happens to lower my star rating, I'll update this review.
D**I
Pros, Cons, Details, & Verdict for the BN-LINK 7 Day Heavy Duty Digital Programable Timer
Average Reviews: The average reviews have been very good at 5 stars for this timer. A few people rated it low because they failed learn what each button was for and just pushed buttons instead.Pros: The device is very easy to program, easy to set and thus easy to use Read the directions in the instruction pamphlet provided or watch the video online It has an internal battery so it will still function and keep its memory during power outages or brief interruptions It is heavy duty and works great so do not worry about moving it or taking with you on trips Unlike mechanical timers that can have their timer easily changed by bumping into the knobs, this one is much less susceptible to pets or furniture resetting the times Two items can be plugged into each unit Up to 16 times can be programmed into the device, 8 to activate and 8 to turn off You can program it for daily use or scroll through a menu to select which days of the week the device is to functionCons: The timer is not as small as some mechanical units It is not water proof and cannot be used outside without protection The timer has many buttons that make it appear daunting to use but each button is labeled and once you understand what they are for it is logical and easy to use Not as simple to program as a mechanical unit for people with no experience in electronic devicesSummation: This timer works great, is easy to program, versatile in the days and time to be in use, is heavy duty and can be taken on cruises, vacations, RV trips, etc. The internal battery keeps the time and date even when unplugged or during power outages. The timer is about the size of an adult males’ fist. Use it on home lighting while away on trips to ward off burglars, to keep from overcharging batteries like on cell phones, use it on fish tank lights or even on an automatic door for your chicken coop. I have used this timer for months. One unit is used on my room air filter to get out dust and pollen and the other timer is used to recharge my cell phone hotspot throughout the day so the battery does not overheat. The timer has been flawless and the only reason I can see some people had trouble with it is that they may have failed to follow directions and confused the words used to show screen status with button use. The timer has three settings which must be activated by the lower right button as indicated: “ON, “AUTO” and “OFF”. The words written under the menu screen “ON”, “AUTO”, “OFF” are not for the buttons used, they are to highlight that the screen above each word will show “ON”, “AUTO”, or “OFF” status and make it easy to read. These three words are not even centered on any of the buttons. The description for what each button does is written below it, not above it.Verdict: I recommend this unit as it has been a delight and easy to use. If you want a programmable timer this is the one to get.Amazon has a great price on this product with plenty in stock for quick shipping.
K**E
Works great
Took a minute to figure out, but worked great after that. I liked that i could program for different days since it was used at work.
Trustpilot
Hace 1 mes
Hace 1 mes