
Descargar la aplicación


Servicios al cliente
Sobre nosotros
Copyright © 2025 Desertcart Holdings Limited
Descargar la aplicación


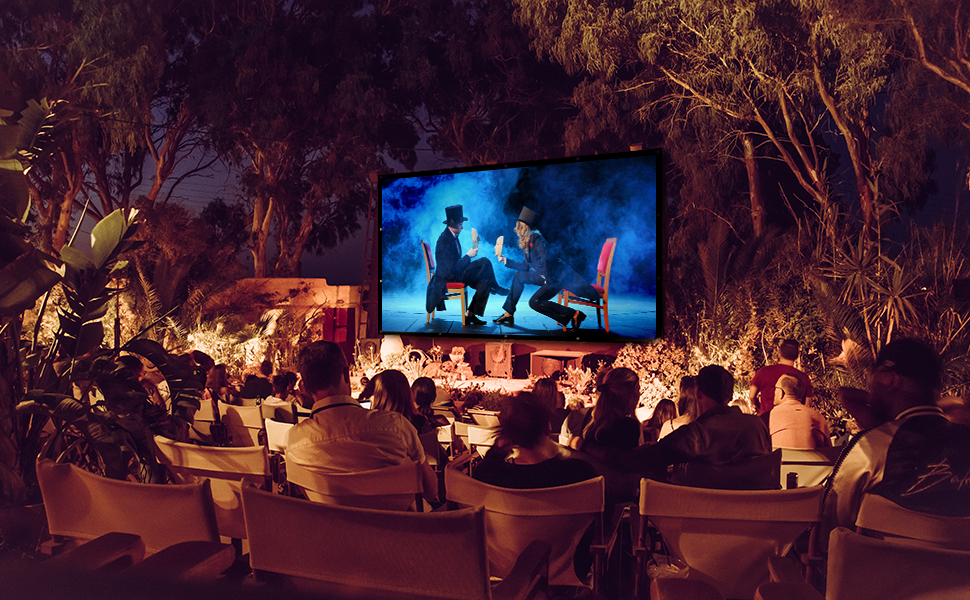
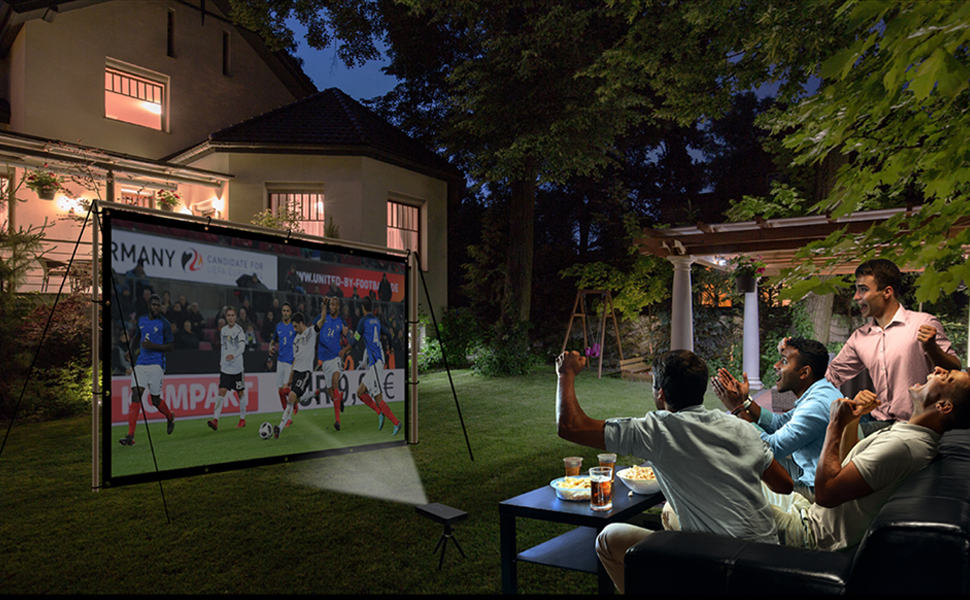
🎥 Elevate your viewing game—big screen vibes, anywhere you go!
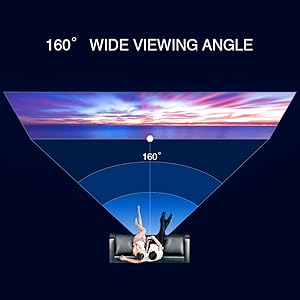
The NIERBO 100-inch portable projector screen delivers a professional-grade 16:9 viewing experience with a high-quality matte white canvas featuring 1.1 gain for vivid, uniform images. Its lightweight, foldable design and versatile hanging options make it ideal for home theaters, classrooms, and outdoor events. Despite compact packaging that may cause minor wrinkles, easy care instructions ensure a smooth, premium display every time.


| Brand | NIERBO |
| Model Number | CS2001-NIERBO |
| Color | white |
| Material Type | キャンバス |
| Product Dimensions | 35.56 x 10.16 x 22.86 cm; 3 kg |
F**E
Great product. Thick.
L**C
You will never be able to remove the wrinkles, I still have them 6 months later
L**E
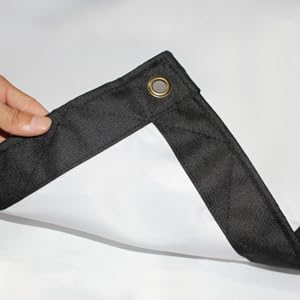
This is a good price for a 200 inch screen at less than $100. Screen is canvas but very white. The wrinkles weren’t a problem for me after I stretched it out over the frame. The grommets are good quality for attaching the screen to a frame. One negative is the loss of brightness due to the amount of light that penetrates the fabric. My projector is powerful enough to overcome this but may require a more powerful projector than other screens. It seems that pvc frames are most popular but I used ¾” emt conduit. It’s plenty strong, light weight, and easy to use. Get 7 10’ lengths plus fittings. I ordered fittings from makerpipe.com. The drawing shows the dimensions and fittings I used. The 3 vertical poles are used full length. Cut the 4 remaining pieces to equal lengths to make the upper and lower cross pieces about 185”. I had to cut each piece again to get to the proper length. The final length was 88 ¾” each but this will depend on the dimensions of the fittings you use. Use a conduit cutter for smooth and easy cuts. When attaching the lower cross piece to the poles, use fittings that allow the pole to pass through without cutting so the cross piece can be raised or lowered to match the screen attachment method you use. To make attaching the screen quick and easy I attached a Velcro strip to each screen grommet. Cut a short slit in one end of the strip with scissors, and thread the strip through the grommet and then through the slit. No more threading bungee cords through grommets each time. Attach one of the left-over pieces of emt to the end of each pole using a “T”. Stand the frame up and rotate the feet out to support it. Be sure to attach strings to the top of each end of the fame for additional support. It doesn’t take much of a breeze to blow it over. I noticed that the center pole was visible during use due to the amount of light it reflected so I sprayed it with flat black paint, which fixed the problem. I'm very happy with the combination screen and frame. I leave the frame assembled and leaning against our camper so set-up is a breeze. I figure if it takes more than 30 minutes to set it up we wouldn't use it as much as we do.
J**E
Very good quality. I used a clothes steamer to get most the wrinkles out. Amazing picture quality even with it not being completely dark outside. Even better image when it’s dark and the stars are out. I am going to get a lot of use out of this.
G**D
A fantastic screen for movie night! Recently purchased NIERBO 200 Inch Large Huge Projector Screen for our movie night on our house. Screen came packaged very well, in its own zipper-carry case. Easy to unpack, and spread out. Comes with detailed care and usage instructions as well. Very quality material, canvas was thicker than other screen I have seen. Double-stitched border with metal eyelets was strong and sturdy. The screen itself was very bright, and definitely had a little bit of reflection to it, which made the screen images pop out. The material was thick enough to prevent any bleed through from behind during projection at night. Did not iron or steam out the wrinkles, however after attaching the screen to the frame and pulling it taught, most of the wrinkles disappeared, and the ones that remained did not affect picture quality at all. Built a frame for it that attached directly to the front of the house. (see images) Used 7/8" strut for the frame body, 1/4" strut-nuts with hooks on them to attach bungees to the eyelets. Points of attachment were behind the shutters so no visible holes in the siding. Came out great!
Trustpilot
Hace 3 semanas
Hace 3 semanas