We remain fully operational. Our teams are working around the clock to ensure your deliveries continue safely.

Descargar la aplicación


Servicios al cliente
Sobre nosotros
Copyright © 2025 Desertcart Holdings Limited
Descargar la aplicación


Buy anything from 5,000+ international stores. One checkout price. No surprise fees. Join 2M+ shoppers on Desertcart.
Desertcart purchases this item on your behalf and handles shipping, customs, and support to Peru.
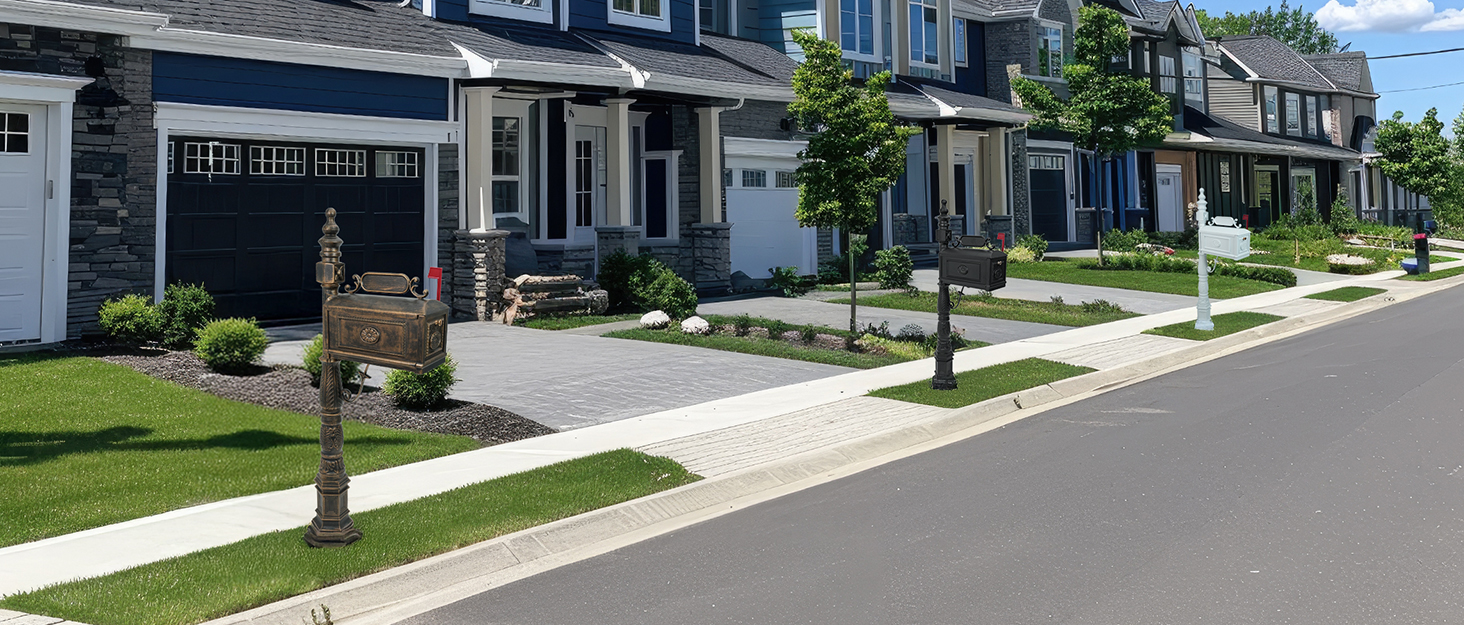
📬 Elevate your curb game with timeless style & rock-solid durability!
The Polar Aurora Barcelona Decorative Post Mailbox combines a large 18.3 x 8.3 x 9 inch rust-free cast aluminum body with a classic bronze finish and sturdy pedestal mount. Designed for easy 15-minute assembly, it includes a post, mounting bracket, and red flag. Its advanced electrostatic powder coating offers superior weather resistance, making it a durable and elegant addition to any home entryway.


| ASIN | B0792QCDM3 |
| Access Location | Front |
| Best Sellers Rank | #26,953 in Tools & Home Improvement ( See Top 100 in Tools & Home Improvement ) #31 in Post-Mount Mailboxes |
| Brand | Polar Aurora |
| Brand Name | Polar Aurora |
| Color | Bronze |
| Customer Reviews | 4.7 out of 5 stars 1,577 Reviews |
| Included Components | flag, post |
| Item Dimensions D x W x H | 18.3"D x 8.3"W x 9"H |
| Manufacturer | Polar Aurora |
| Material | Aluminum |
| Material Type | Aluminum |
| Mounting Type | Pedestal Mount |
| Product Dimensions | 18.3"D x 8.3"W x 9"H |
| Style | Traditional |
| Style Name | Traditional |
J**N
Beautiful mailbox but the cement post installation is a bit tricky.
First of all this is a beautiful mailbox. The nicest in my entire development by far. I would highly recommend the white over black because the black looks to not hold its color as long as the white. Second the price is better by more than 50 % over competitors in the Naples Florida market. Similar mailbox with installation included is about $600. The kicker is the installation. The box is easy to put together but the installation into a cement base is more problematic. The seller provides absolutely no guidance on installation issues. It provides four 4 inch sleeve anchors that are not very sturdy. On line you will find three different approaches. One uses a presetting of 10 inch j bolts into quickset cement. This is risky because the bolts are 1/2 inch that barely fit through the base holes. If you do not get precise alignment the bolts will not fit through the holes. The second approach is to use wedge anchors inserted into drilled holes in the cement base. The anchors work well but I did not like the look of the nuts being screwed down on the bolt threads. The third approach is lag anchor bolts anchored into the cement into short or long lag shields. I used this last approach because of the incredible sturdiness of using lag shields inserted 6 inches into the cement base. I used stainless steel lag bolt anchors with fixed head which gave it a more finished look. (See picture). To make sure the post was plumb I made a surface form of 2 by fours screwed (14 by 14 inches) together and laid on top of the hole. I anchored the form with wooden pegs and made sure the form was leveled. Also make sure the distance from the pavement and the height of the bottom of the box meets post office requirements (6 to 8 inches from street and 41 to 45 inches above the road surface). The hole was 12 inches deep and 14 inches by 14 inches wide. I used mostly regular set cement since I was planning to let the cement set up over at least a week. Amazingly I ended up using 4 bags of cement (220 pounds). Probably overkill but better more than less. Once the cement cured over an 8 day period, I set the post on the formed pad and checked to make sure it was level. Then I premarked the four holes. Make sure the front of the box is facing forward since the holes in the base are not semetrical. Since the base holes are 1/2 inches wide, I wanted to leave some wiggle room in case the holes were a little off. I used 4 stainless steel 3/8th inch wide anchor bolts that would be inserted into 3/8 inch lag shields. The bolts were 6 inches long. That requires a 5/8 inch hole and drill bit. I drilled the holes with a hammer drill at least 7 to 8 inches deep. Make sure you get the cement dust out of the holes. Once the holes are drilled insert the anchor bolts through the post holes and screw the lag shields (I used the long lag shield for better holding). Then lift the post up and drop the bolt and lag shield into the holes (insert the lag shield with the open end first) and let the bolts drop down to where there is about 1 to 2 inches of the bolts above the post base. Then you can screw the anchor bolts clockwise until you feel the lag shield expand and grab the side of the hole. Then screw the bolt head all the way down to the base of the post. You can do this by hand to get enough torque to get a very firm grip without running the risk of cracking the base of the post by over tightening the bolts with a machine wrench. Once accomplished the post is going to stay there for a long time. Note the top of the box has a plate for address numbers. It will only handle 2 inch numbers. The only place I could find numbers to fit was on Amazon. Even if you decide not to mess with installation you can probably get a handyman to install it for you. Locally I could have found a company to do it for about $180. The installation process was challenging and fun so I am glad I went through the process.
H**T
Durable, good design and appearance.
The mailbox post is incredibly sturdy and made of high-quality material and feels durable enough to withstand harsh weather conditions. Good Design and Appearance. I highly recommend it to anyone looking for a reliable, attractive, and easy to install. It offers a perfect combination of functionality, design, and durability.
C**Y
Heavy duty mailbox, elegant look
Heavy duty mailbox! I would say definitely a two person job and be prepared to poor a small cement pad to anchor it down to. Beautiful classic look, door closes perfectly once adjusted. It does have a loud snap it you just let the door slam but I close it verses letting it go metal material so it’s very heavy when delivered. Standard size but I would say the look goes above and beyond standard.
D**D
Solid
Solid, easily put together and seems to be well-made, hopefully will last for a long time!
R**H
Beautiful mailbox, good customer service ***FULL INSTALLATION GUIDE BELOW***
First the negative (minor issue): We ordered the mailbox in black, but we received a black post with a bronze mailbox. I emailed the seller who promptly agreed to send us a black mailbox and provided a return shipping label for the bronze box. Problem solved. Now the positive: The mailbox is beautiful and is a huge upgrade in appearance and curb appeal over the mailbox installed by the previous owners of our home (plastic step 2 mailbox stuck in a 5 gallon bucket half buried in the ground and full of rocks). We couldn't be happier with it. NOW FOR A LONG AND EXTREMELY DETAILED INSTALLATION GUIDE...if you are an experienced DIYer and don't need it you can stop reading here, but if you like how my installation looks in the photos and want to know exactly how I did it then read on. To install, (all done with my 13 year old son's help): We pulled the 5 gallon bucket out of the ground, which gave us a pre-made 12" x 12" x 12" hole. We expanded it to 16" x 16" x 16", which turned out to be overkill, but now I know the new mailbox is rock solid. Before pouring concrete: There is a roughly 13" x 13" x 1/2" piece of wood in the packaging with the post. To get your anchors set perfectly in the concrete, set the post on top of this piece of wood and mark the 4 anchor holes on the wood with a pencil. Make sure to mark the FRONT anchor bolt hole on top of the wood. The holes are not perfectly symmetrical in the post base, so if you don't have the front marked and put the bolts into the concrete in the wrong direction you won't be able to get the post onto the anchors with the front facing the street (unless you want to spend time really reaming out the holes in the base to make them fit). Next, drill out the 4 holes in the wood with a 1/2" drill bit. For anchors, I used 1/2"x10" zinc plated anchor/"L" bolts (4) with matching zinc plated nuts (8) and washers (8), and zinc plated acorn nuts (4) for the final finishing touch. These are readily available at any hardware store and cost about $12-15 total. Run 1 nut down the threads on each bolt, then place a washer on top of the nut. At this point, put all 4 anchor bolts through the bottom of the piece of wood so that the washer and nut are on the bottom. Next, on top of the wood place a washer onto each bolt followed by another nut. At this point, adjust the nuts on the bottom side of the wood so that approximately 1/2"-3/4" of the bolt sticks out of the top of the board. Now tighten down the nuts on the top so that the bolts are firmly anchored to the board with no wiggle at all (this is important). You will end up setting the bottom washer and nut into the concrete, where they will stay for eternity, and this makes sure that the angle and placement of your bolts doesn't change when you set them in the concrete and will line up perfectly with the holes in the post base. Time to mix and pour the concrete. We mixed the concrete by hand in a wheel barrow and filled the hole to just below (maybe 1"?) ground level. In the end we used 2 1/2 x 80lb bags of concrete. Like I said above, complete overkill, but concrete is cheap ($13 for 3 bags). At this point, I used a 12" round concrete form ($12) to give the slab a nice finished appearance. I cut off a 3" high piece of the form with a razor knife, and set it approximately 1" into the top of the concrete in the hole, so that 2" of the form was sticking up above the poured concrete. I used a level to make sure the concrete form was level front to back and side to side, then filled the form to the top with concrete and used a piece of 2x4 to smooth and level the concrete in the form. Next we set the anchor bolts in the concrete, being careful to center them in the 12" form as perfectly as possible. Make sure the the FRONT anchor bolt you marked on the wood is facing in the direction you want the mailbox to face when fully installed. As you press the anchors down into the concrete using the wood form, gently wiggle and twist to allow any air in the concrete to rise to the top and the concrete to fully encase the bolts. Stop once the wood reaches the top of the form. At this point check with your level to ensure the wood piece is set level front to back and side to side. If you were careful placing it down into the concrete and didn't disturb the form it should be just about perfect but you can still gently adjust if necessary. Once you are satisfied that everything is set where you want it, you are done for the day. Let the concrete set for 24-48 hours before completing installation. Now that the concrete has set, remove the nuts and washers from the top of the board. Remove the board and toss it in the trash. This will take a little shimmying of the board, but it should come off easily. The bottom washer and nut should be set just into the top of the concrete. Leave them there, even if the washer isn't fully encased in the concrete, they won't hurt anything and will ensure that everything is level in the end. Set the post onto the anchor bolts and lock it down with the washer and nut you removed from the board earlier. Tighten firmly, but don't overdo it. Overtightening can cause the base to crack, so tighten just to the point that the post can't move. Finally, put your acorn nuts on top of the anchors to hide the threads and make sure no one hurts themselves on the exposed bolts (looks nicer too). From here just follow the directions included with the mailbox to attach it to the post and you are all set. We used left over dirt from digging out the hole to cover over the concrete so that only the 12" circle shows under the mailbox. I think this gave it a very nice and professional looking finish. One final note: if for some reason the mailbox is at all out of level when you are finished, it can be leveled by using additional washers as shims under the base of the post. It's kind of a pain since you'll have to take the post off the concrete, but not a big deal and you'll be happier with the finished installation if everything looks nice and straight. I didn't have this problem, but it could happen. GOOD LUCK!
W**R
Good but not perfect
Looks and functions as expected. Not manufactured very precisely so I had to file down inside door so that it would close properly withput being pushed manually. Has spring mechanism that pulls door closed. But door would drag on side of box as the box opening isn't perfectly aligned. If it doesn't close fully the mail gets wet. Filed inside edge of door and hit with a dusting of black paint and she works fine. Also added a dab of clear silicone to contact point and propped open until it cured. Now spring slams it shut and there's a little cushion so it doesn't bang together. Very satisfied and it looks great. Made a thin wooden template, drilled holes to match box and attached L bolt anchors to it. Poured overly soupy concrete in a hole and placed template with the L bolts on top, positioned properly leveled and let it setup. Once it cured a couple days I removed nuts and slipped off template and slid mailbox onto the anchors and reinstalled the nuts and she good. Now if a car takes out the box and post I just unbolt and replace with a new unit. Bolts are never perfectly straight but Once setup you can bang them around a bit so that they are perfect and you could also drill out the holes on post a bit to give a little more wiggle room. Once snugged down it won't move.
M**G
Beautiful, sturdy, stately.
So, within the last 2 weeks of snowy weather. My old unibomber shack in the woods mailbox was ran down in cold blood. So starts the "saga of the mailbox". I wasn't heartbroken. The mailbox was on the short list to be replaced, I was actually shopping them last fall. More than likely, a delivery driver from my house backed into it. So, after finding our mail laid on the snow, by our kind postal worker who technically didn't even have to leave it, my search started in earnest. For 12 years I have lived with a pretty mailbox out at the road, and it recieved Mail well. No door, not watertight, red flag broken off, a birds nest, a wasp nest... pretty much had seen a full life. I wanted a "nice" mailbox. A mailbox fitting of my shack. One that people would say, woow, he spent way to much on that mailbox for THAT house. And I was not disappointed. Cast in aluminum, and holding all of the standards the former was lacking, I ordered. After being "out for delivery" for 3 days, fed ex finally managed to lay my new mailbox up against the old one out at the road. So I loaded her into my truck and brought her up to the house, like a farmer and his prize pig after the fair. A couple of times, while unboxing, I couldn't help to feel a little bit like the dad from a Christmas story unboxing his electric sex lamp. She was beautiful. No damage or nicks, everything the exquisite amazon ad said she would be. I talked with my neighbor. A union man. About the best way to anchor her in concrete, I'm envisioning a semi truck stopping, compact car crumbling beast. With rebar, stainless anchors, grout filled. A man's mailbox set. I thought about the mail lady's face, as she opened the vault door of the box, like a mummies crypt door. Then her looking up to my shack, thinking while in awe, "jackaxx". The date was set. We will do it Saturday. Today it is in the mid 20's here. No digging. No steel reinforcing. No giggle thinking about the first unfortunate soul traipsing to my door to sheepishly apologize for totaling their tank on my mailbox while asking for medical assistance. No. None of that. Just flurries. And ice. An open schedule. And dissatisfaction. So I will sit in my shack. And dream of the day. And it will come. It will come soon.
R**.
Nice looking
Awesome item. Built to stand the test of time. Spring loaded door may give mail carrier a little trouble. Definitely closes quick and fast like a mouse trap. Heavy duty metal
Trustpilot
Hace 5 días
Hace 2 meses