We remain fully operational. Our teams are working around the clock to ensure your deliveries continue safely.

Descargar la aplicación


Servicios al cliente
Sobre nosotros
Copyright © 2025 Desertcart Holdings Limited
Descargar la aplicación


Buy anything from 5,000+ international stores. One checkout price. No surprise fees. Join 2M+ shoppers on Desertcart.
Desertcart purchases this item on your behalf and handles shipping, customs, and support to Peru.
🔧 Elevate your painting game—stack smarter, finish faster!
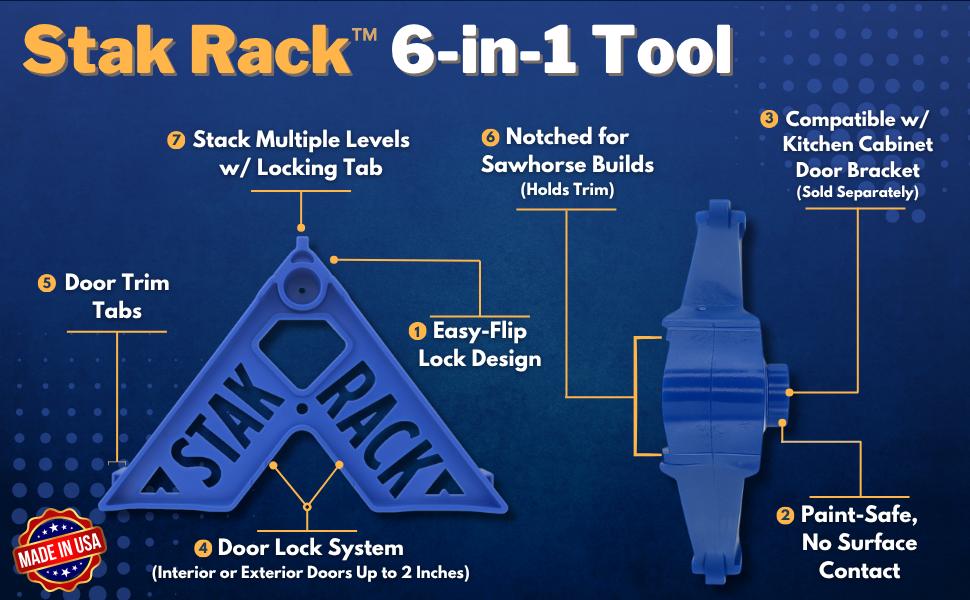
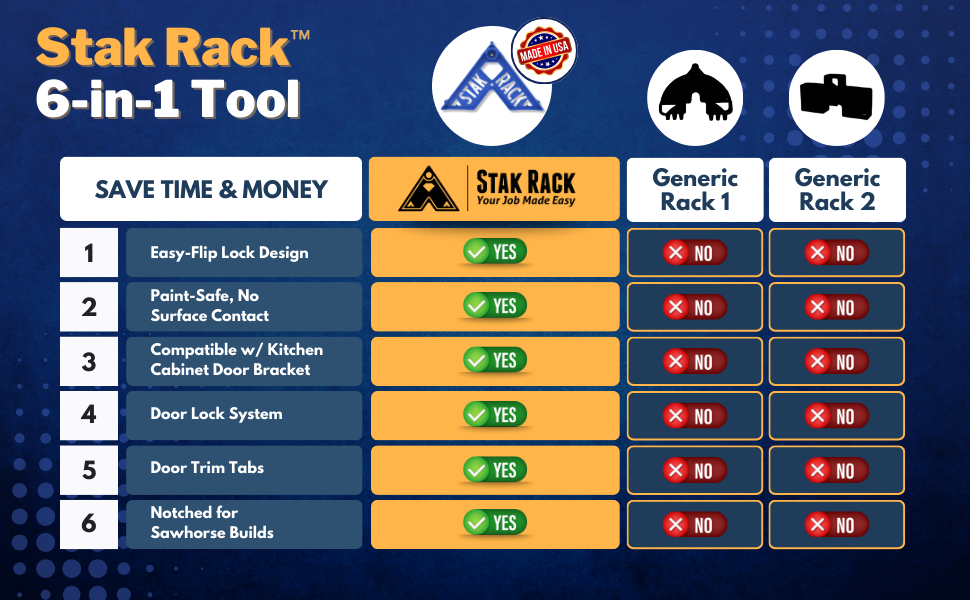
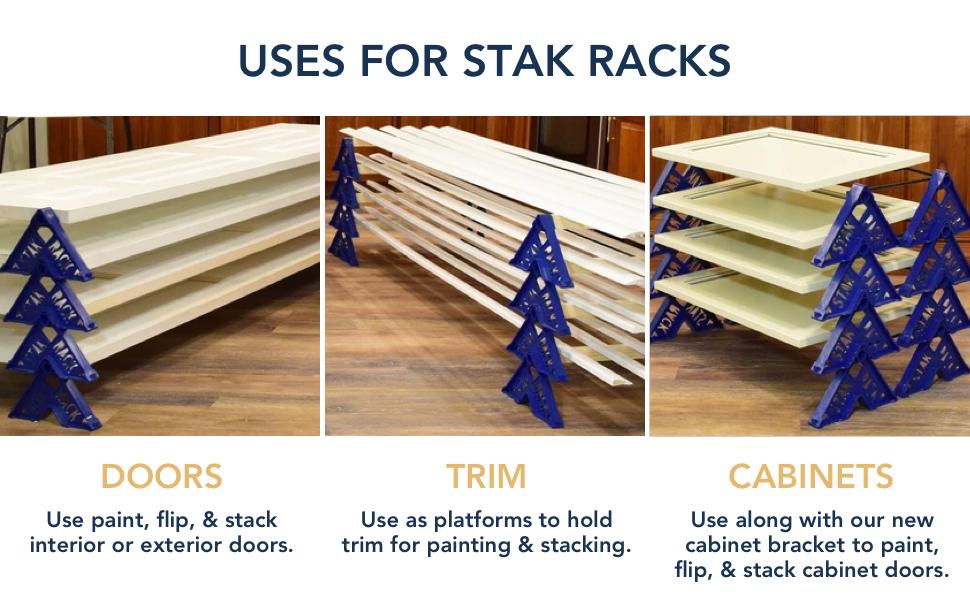
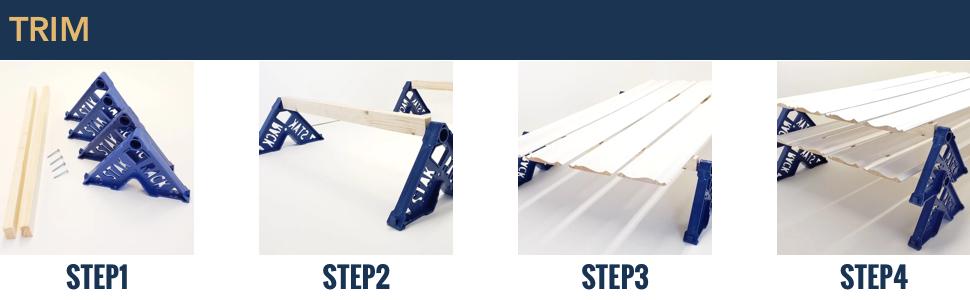
The Stak Rack 6-in-1 Painter's Accessory Tool is a heavy-duty, injection molded polymer stand designed for painting interior and exterior doors, trim, and kitchen cabinet doors up to 2" thick. Featuring a unique triangular easy-lock stacking design, it enables faster painting and drying with no surface contact to protect your work. Its space-saving, stackable system supports up to 160 pounds per rack, making it perfect for contractors and homeowners seeking efficiency and flawless finishes. Made in the USA and compatible with optional accessories, it’s built to last and streamline your painting projects.


| Finish Type | Glossy |
| Shape | Triangular |
| Base Type | Stand |
| Assembly Required | Yes |
| Load Capacity | 160 Pounds |
| Special Feature | Heavy Duty |
| Manufacturer | Vurn Innovation LLC |
| UPC | 866048000217 |
| Part Number | SR4005 |
| Product Dimensions | 1.5 x 10.5 x 7 inches |
| Is Discontinued By Manufacturer | No |
| Size | Stak Rack (Pack of 12) |
| Finish | Glossy |
| Installation Method | Freestanding |
| Item Package Quantity | 1 |
| Number Of Pieces | 12 |
| Maximum Weight Capacity | 160 Pounds |
| Mounting Type | Door Mount |
| Special Features | Heavy Duty |
| Included Components | 12 Individual Stak Racks, Fasteners |
| Batteries Included? | No |
| Batteries Required? | No |
Trustpilot
Hace 5 días
Hace 3 semanas