💅 Elevate Your Nail Game with Ease!
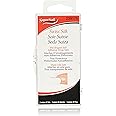
SuperNailSwiss Silk Wrap Self-Adhesive Tabs come in a convenient 40 count pack, designed for effortless application and portability. With compact dimensions of 2.0" L x 4.0" W x 5.0" H and a lightweight design of just 0.1 lbs, these tabs are perfect for on-the-go beauty enthusiasts. Proudly made in the USA, they ensure quality and reliability for your nail care routine.
C**T
A Guitar-Player's Method of Strengthening His Fingernails
Much of the time I play my guitar, I pluck the strings with my fingers instead of a pick. And my nails, trimmed to the right length and shape, contribute greatly to the tone I get. If I cut a nail too short and pluck a string with just skin, the note sounds dull, so keeping them intact is critical. My nails break all too easily doing everyday things, but with this product and nail-glue, I can strengthen them significantly.I've experimented with a lot of products and techniques, and below is the method that works well for me. You'll still want to be careful with your fingernails, but this can save them from breaking when accidents do happen. Be gentle when tucking-in a shirt, sliding your hand in your pocket, and drying your hands with a towel. You don't want to tear a patch loose or crack one. And when you push that button to make the light turn green, use a finger on your fretting-hand, so you don't split a nail. Develop good habits.The other products I use are IBD brush-on nail-glue (same exact product as their "nail-gel"), "Hurry Up" nail-glue dryer, emery files with 120 grit (coarse) on one side and 240 grit (medium) on the other, 320 (fine) files, 600 grit (very fine) sandpaper or file, a large (toenail-size) nail clipper, scissors, lighter-fluid, and a paper towel.These tabs come pre-shaped on the end that fits over the nail-bed side of your nail. They're all on a single sheet of backing-paper, and they have these little secondary tabs you can get hold of with a fingernail to pull them off. The tabs range from pinky-width to thumb-width. When you start using them, you'll naturally pick the ones that match your nails' widths, but when those are gone, you'll still have 90% of the tabs left. I've found that if you use two tabs that are narrower than your fingernail and overlap them, you can still get a smooth, seamless surface on the final product. If you use a tab that's wider than your nail, you'll need to trim it to width with scissors.Here's my technique for doing a nail:>Wash hands.>Roughen surface of nail with the 120 emery file. This will give the glue more to adhere to.>Clean surface of nail with lighter-fluid or 92% or so alcohol, to make sure there's no oil on it.>Cover the nail with one or two tabs. Make sure a tab isn't overshooting the nail and lying over skin, or you'll end up with a mess.>With your scissors, cut the tab's excess length. Make the cut about 1/8" longer than what will be the nail's final length.>Coat the entire nail with nail-glue. These tabs are wonderfully absorbent and make for a strong reinforcement, so you'll need two to four brush-fulls to do the first coating, depending on the size of the nail. With the brush-on glue (the brush is attached to the underside of the cap), brush it on from one side to the other, overlapping each brush-stroke a bit with the next, and reloading the brush each time it runs low on glue.>Place a paper towel on your lap and spray the glue-dryer on the nail, over the towel. Three short bursts should cover it. When you can no longer smell the dryer evaporating off the nail, it's dry and ready for another coat of glue. This type of glue is unique because it sticks strongly to itself. Each coat dissolves the surface of the one beneath it, welding itself on.>Coat the nail again. You won't need as much glue this time. Go back the other way, across the nail again. Follow up with the dryer.>Apply and dry a third coat just like you did the second, but in the reverse direction.>With the nail-clipper, cut the nail just a bit longer than what will be its final length.>Before you use an emery file, remove its sharp edges by rubbing them against another file's edges, so they don't cut into your skin.>File the surface of the nail smooth and free of brush-marks with the coarse file.>Now repeat all the above steps: apply a second tab(s) followed by three coats of nail-glue, drying each coat before applying the next.>You may want to stop here, but I like three layers. They make for a stronger nail and a nicer tone.>File the nail's surface smooth, first with the 120, then the 240, then 320, then the 600-grit sandpaper (or file).>File the nail tip to length and shape, beginning with the coarse file and working down to the 600-grit. Don't push too hard with the file; you don't want to break the nail. I get the fullest tone by filing just a bit beyond my fingertips, so I strike the string with both nail and skin.P.S., I used to use fiberglass tape, but found it to be a major, major pain. I won't bore you with the details, but this product is far superior in both its functionality and its ease of use.And in case you're wondering about using just the glue with no wraps, I tried applying six coats to a weak nail, and it cracked in just a day.
S**S
FANTASTIC!!!
I had an unfortunate accident several months ago, I have balance issues and jammed my thumb into a door that I had fallen against and I had a deep crack all the way to the cuticle. I've been growing my nails out long and I've had some serious trouble with the thumbnail always cracking and snapping right at the crack, so I grabbed some of these and extremely glad I did!!You don't necessarily need a specific brand of nail glue, I used Kiss nail glue and it works perfectly! Just decide on what size silk you want to use, cut it to size, position it to fit your nail, brush on the glue and let it dry. Buff and you're done. I have horrible issues with the corners snapping all the time, I've fixed numerous corners with these and they're holding up beautifully and no more snags, cracks and snapping of my thumbnail.If you want something good to fix your nails, this is it, you're making a mistake by not getting these. The silks stretch if you cut it too small, and they're not self-adhesive like you would think, it's static I believe because if I position a silk wrong, I can lift it off and reposition with no issue whatsoever. The beautiful part is they disappear completely, no one but you knows you have a silk wrap on your nail!! I've even used these with acrylic and still, they look fantastic.Get these silks, you won't be disappointed!!!
C**G
Best solution so far
These wraps are not 5-star easy to use, but better than other things I've tried so they rank high on my list. The tabs themselves are generously sized, more so than most people need even to cover the full nail, but you can cut off portions to do the job you need. Getting the silk off the adhesive backing is easy when using the tab provided, but not so easy if you cut off just a bit for a partial repair and don't have the tab available. Still, it's possible (I find it easier with tweezers) and then the little thin patch applies to the nail nicely. Although the adhesive isn't super sticky, the patch stays nicely in place (and becomes clear) when painted over with nail resin. After that dries, I put on my polish and I can't even tell the repair has been made, and this is with clear polish, I'm sure it would be even less so with colored polish. My patches only stay on well for about a week. I wish it were longer, but even that is a help.I have a ridge running up one of my nails that is quite prominent and annoying. If I try to file it down, the tip develops a crack in that area and catches on things until it tears down to the quick. I've tried many things to repair it until it grows out, but the problem always seems to reoccur and the repairs have always been rather messy looking. This silk wrap is by far the best looking solution. It smoothes the ridge so its less obvious and since I fold the tab over the nail tip, that is protected from catching on things and tearing. The application is not super easy, but worth it, and given how large the tabs are I'll have patches for as long as I need them.
V**O
Sturdy and Strong
Supposedly you can use a nail file to cut the ends off, but I found them to be a bit stringy at the ends using that process. Maybe there’s a better way to remove the excess.
B**Y
Amazing!
I saw a woman on social media use these to fix a broken nail. I figured they were cheap enough to try out. I cannot say enough about them. They absolutely work and they’re super easy to use. I would highly recommend anyone looking to fix a broken natural nail.
Trustpilot
Hace 2 semanas
Hace 2 días