Sobre nosotros
Servicios al cliente
Atención al cliente
Acceso Regional
Legales y políticas
Obtén la aplicación

Apunta tu cámara para descargar la aplicación
Copyright © 2024 Desertcart Holdings Limited
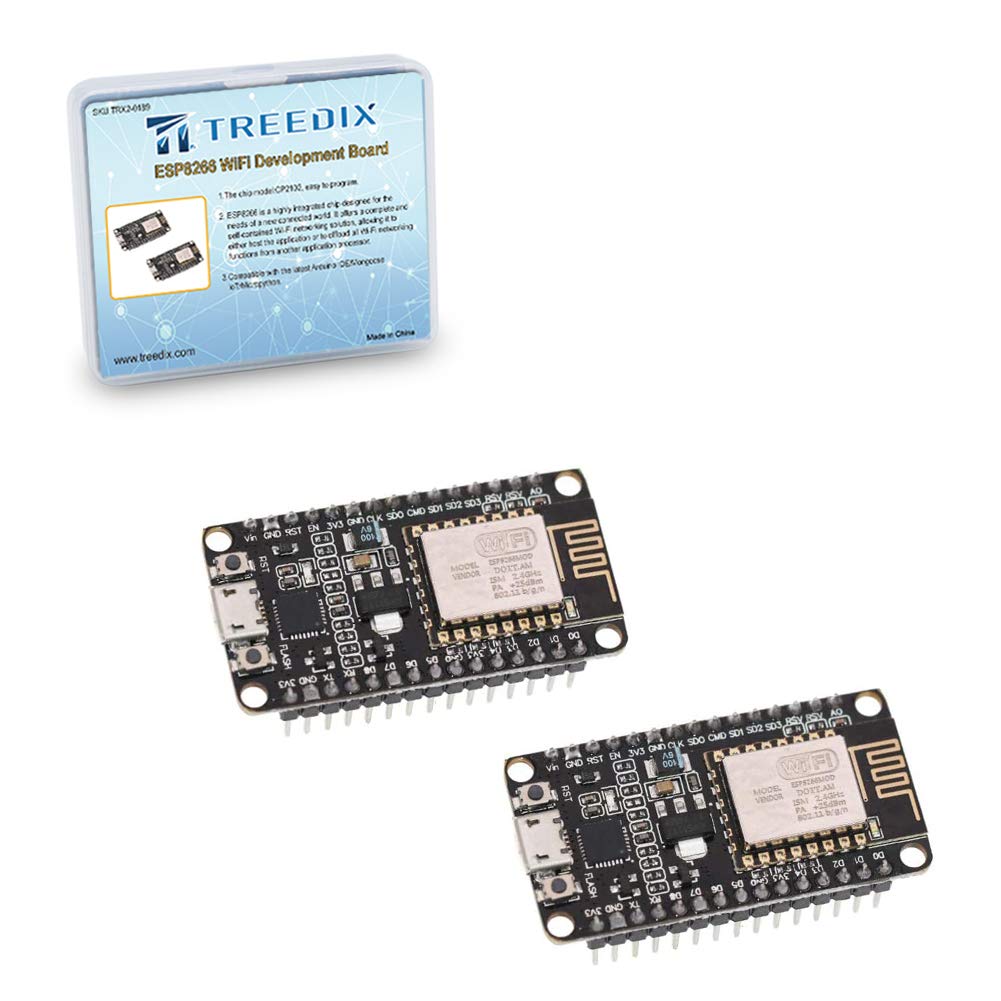


Instruction Open-source, Interactive, Programmable, Low cost, Simple, Smart, WI-FI enabled Arduino-like hardware IO Integrated TR switch, balun, LNA, power amplifier and matching network Integrated PLL, regulators, DCXO and power management units Onboard USB to serial chip to easily program and upload codes from the Arduino IDE Embeds logic level converter circuits Has onboard 3.3V regulator to ensure enough power to function as your go-to WiFi chip! Easy access to the GPIO pins for easy prototyping ESP-12E Processor Easy to use breadboard friendly form fact Steps of How to use: 1. Download the Arduino IDE, the latest version. 2. Install the IDE. 3. Set up your Arduino IDE as: Go to File->Preferences and copy the URL below to get the ESP board manager extensions: http://arduino.esp8266.com/stable/package_esp8266com_index.json Placing the “http://” before the URL and let the Arduino IDE use it...otherwise it gives you a protocol error. 4. Go to Tools > Board > Board Manager> Type "esp8266" and download the Community esp8266 and install. 5. Set up your chip: Tools -> Board -> NodeMCU 1.0 (ESP-12E Module) Tools -> Flash Size -> 4M (3M SPIFFS) Tools -> CPU Frequency -> 80 Mhz Tools -> Upload Speed -> 921600 Tools-->Port--> (whatever it is) 6. Download and run the 32 bit flasher exe at Github(Search for nodemcu/nodemcu-flasher/tree/master/ at Github) github.com/nodemcu/nodemcu-flasher/tree/master/Win32/Release Or download and run the 64 bit flasher exe at: github.com/nodemcu/nodemcu-flasher/tree/master/Win64/Release 7. In Arduino IDE, look for the old fashioned Blink program. Load, compile and upload. 8. Go to FILE> EXAMPLES> ESP8266> BLINK, it will start blinking. Package includes: 2 x ESP8266 NodeMCU LUA CP2102 WiFi Development Board
Trustpilot
Hace 3 semanas
Hace 2 meses