We remain fully operational. Our teams are working around the clock to ensure your deliveries continue safely.

Descargar la aplicación


Servicios al cliente
Sobre nosotros
Copyright © 2025 Desertcart Holdings Limited
Descargar la aplicación

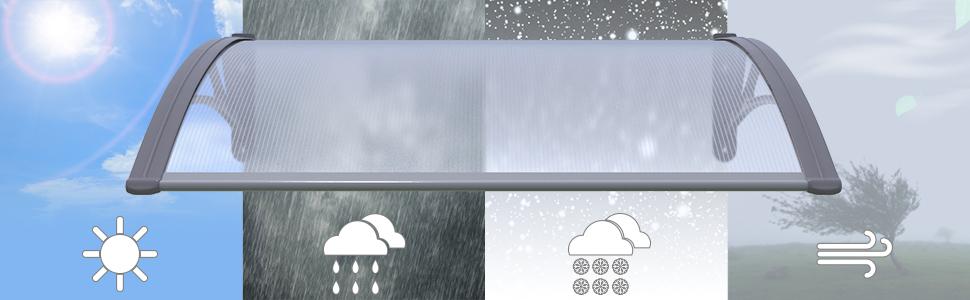
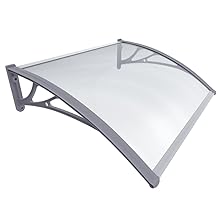
🏡 Elevate your doorstep style with weatherproof confidence!
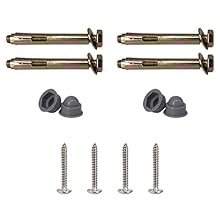
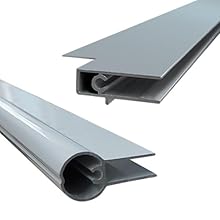
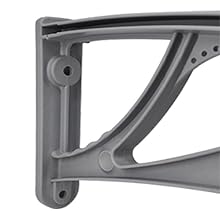
The Door Canopy 100x80cm combines a sturdy 6mm polycarbonate roof with a rust-resistant aluminum frame, offering reliable protection against rain, snow, sun, and wind. Lightweight yet durable, it installs easily with included hardware and enhances your home's exterior with a sleek, modern look. Tested to endure strong winds, this canopy is a practical and stylish upgrade for any entrance or outdoor space.


| ASIN | B089149R35 |
| Best Sellers Rank | 6,442 in Home & Kitchen ( See Top 100 in Home & Kitchen ) 1 in Window Awnings & Canopies |
| Customer Reviews | 4.4 4.4 out of 5 stars (4,986) |
| Date First Available | 20 May 2020 |
| Item display length | 100 centimetres |
| Item display width | 80 centimetres |
| Item model number | 4442184744983 |
| Manufacturer | VOUNOT |
| Material type | Polycarbonate |
| Part number | 4442184744983 |
| Product Dimensions | 80 x 100 x 23 cm; 3.24 kg |
I**H
A good easy to install, fiddly to assemble, canopy great when fitted
This canopy is good value despite being all plastic construction the support frame is very rigid and light. Assembly is easy but here is the only problem I found especially if you don`t have an assistant to help you. I put up the centre support and assembled each of the end ones onto the perspex roof and secured them using the supplied screws in the ends, the plan was then to slide eachg side onto the already mounted centre support and secure in the holes I had already drilled, this was when the problem began. I bent the roofing material into the support but everytime I went to move the outer end it would pop back out again and again before I could secure the first bolt, so I took down the centre support assembled the whole canopy on the ground and drilled in 4 stainless steel self tapping screws (see photos) through the centre support to joint the two half together. After doing this the whole canopy was one piece and fairly strong, but a little bendy. I put the whole thing back up using the centre support first then each end in turn it was very easy once the canopy was in one and wasn`t constantly popping apart. Also the additional two screws I think will give added procetion to the joint in even the strongest of winds. The anchor bolts that come with it are sturdy but I was fixing into a timber structure so opted for coach bolts instead but the supplied fixings look like quality anchor bolts. As for strength well winter is coming and so will the winds I shall have to see how it fairs, that being said I think it will stand a pounding by strong winds - will let you know next summer. All in all for the price a sturdy, well made peice of kit. It is December now and we have had some 70mph plus gale force winds and the canopy has with stood them no problem at all.
W**E
Looks Great.
Very nice canopy. Great price, I would highly recomend.
M**R
Decent canopy, buy better bolts
Decent canopy for the price. Could be assembled and fitted by one person if needed, however, using the bolts supplied is a fast track to frustration. I'm experienced in DIY but don't consider the fixing bolts to be fit for purpose. Do yourself a favour and buy decent shield anchor bolts and you'll be fine. Fitted two canopies to provide a bike shelter down the side of the house.
K**J
Main Door Canopy
Lovely Canopy, bought it to refrain moss falling on main door & step. Was very easy to install and looks very sturdy & amazing!!!!
H**O
Patio Door canopy that is very good quality and reasonably priced.
I am very impressed with this door canopy as it covers my patio doors and it was relatively easy to assemble too. I paid just under £60 and I believe it is very good value for money. It is very sturdy once installed properly on the wall with provided anchors. I used my Bosch GBH 2 26F SDS drill machine and Bosch Expert SDS 10mm bit and it was easy to drill into bricks. I did have a piece of wooden batten length leftover from my Trellis so I marked the holes on wood while the assembled canopy stayed on ground and then drilled through the wooden batten to create a template. Once all the holes lined up on Batten, it was easy to mark up the exact location of 6 holes needed to mount it on the wall. Used a mallet to drive the anchors in the wall starting from the middle bar of the canopy. I used my Amazon Umi Spanner rachet set to tighten the bolts. After that just put those plastic caps provided to hide the bolts. Job done in an hour not including the hour for assembly. So for two hours of DIY, I have a very stylish and sturdy canopy sheltering my patio doors from rain and snow, what more you want. I would definitely buy more for my windows in few weeks time.
K**L
Porch construction seems ok? Fixings rubbish!
I put the porch canopy together fairly easily, yes its a little fiddly getting the polycarbonate roof to bend to the slot into the curved side support's, easier with a helper, but once constructed seems to be strong… seems to be, as not yet fitted/tested… the low stars were given for the poor fixings, which have caused me no end of trouble!!! Unfortunately I didn’t spot this prior to attempting the fitting…, you will note (in the items pictures) the bolts expand from the far end, i.e. the bolts screw into the end ‘nut’ which is drawn up, expanding the tube shaft as it tightens… great in theory,… I drilled a hole into my wall the length of the bolt sleeve to sink it flush, the fixing bolt is fractionally longer, and there is the problem. The bolt is about 2-3cm too short when you take in the thickness of the canopy support arms, so the bolt will not reach the nut, so will not tighten. As i had started, i tried tightening up the bolts, without the canopy in place, to draw the nut forward, but could not bring it forward enough for the bolt to reach the nut when the canopy supports are in place. Trying to bring the nut far enough forward, snapped one of the bolts, not just stripped the thread, actually snapped the bolt! Now i have the expansions shafts stuck in my wall, with bolts that will not tighten! I can only get around my issue by hopefully finding longer bolts with the same thread, and using a standard large wall plug for the broken one… or drilling 4 new 10mm holes, with 4 new fixings? My advice to you, is buy suitable fixings that are long enough to also take the thickness of the support arms. Construction and fitting it will be a lot easier with two people and two steps. Offer up the constructed canopy to mark the holes for drilling. A spirit level is useful. The instructions are basic diagrams only, and do not give much advice/help on the fitting of the canopy, so i hope the above helps and saves you the headache i now have!
A**M
Inmiddels hangt het boven mijn voordeur voor enkele jaren en nog steeds prima. Goed product
A**I
ممتازه
Z**I
Gli utenti devono sapere che questa è una soluzione facile, veloce, durevole e semplicemente efficace contro la pioggia o altre precipitazioni in prossimità di finestre e portefinestre esposte e che necessitano di una soluzione non invasiva.Sei punti di ancoraggio, assicurano un 'ottima tenuta.Presa col black friday, l' ho pagata un terzo in meno.
V**I
The canopy is made from a durable plastic, hopefully it will last in the middle eastern sun long. The depth of the canopy is only 80cm which is not enough if your door is higher than 2m, could be at least 1m or even 1.2m. positives: easy to install, good instruction, looks good and feels durable
H**.
Habe heute die 2m Variante verbaut. Also 3 Träger müssen verschraubt werden. Habe mit dem mittleren angefangen. Die mitgelieferten Schrauben sind völlig ok. 10mm Löcher müssen gebohrt werden. Bei uns in den Klinker. Dieser ist immer etwas uneben. Aber man kann das ganze am Schluss mit dünnen Blechstreifen etwas ausrichten bzw. korrigieren. Dazu am besten die untere Schraube noch nicht fest ziehen! Dann habe ich das obere Profil als Abstandshalter genutzt, um die Löcher des 2. Trägers anzuzeichnen. Dazu kann man auch gut eine Wasserwaage oben auf das Profil legen, um die passende Höhe zu haben. 2. Träger Löcher gebohrt. Profile auf die 1. Platte geschoben. Dann habe ich an dem montierten Träger erst das untere Profil mit der Platte angesetzt und leicht eingeschoben. Danach langsam nach oben unter Biegung der Platte vorgearbeitet bis die Platte komplett drin saß. Dann habe ich die seitlichen Schrauben schonmal etwas in die Profile geschraubt, so das diese nicht mehr rausrutschen konnten. Danach den 2. Träger aufgeschoben und diesen verschraubt. Das gleiche Spiel dann mit dem 3. Träger und der 2. Platte. Unser Klinker war natürlich nicht ganz eben. Von Vorne per Auge geschaut, rechte Seite musste etwas höher. Verschieden starke Blechstreifen oberhalb der unteren Schraube des Trägers untergeschoben bis es von vorn gerade aussah. Fertig. Montage hat allein ca. 1,5 Std gedauert. War insgesamt kein Problem. Es gibt sicher schönere und stabilere Vordächer, aber für das Geld ist das Teil mehr als ok. Die Träger sind übrigens aus Kunststoff, die machen einen richtig stabilen eindruck und sind sehr formstabil. Uns gefällts.
Trustpilot
Hace 2 meses
Hace 2 semanas