Desert Online General Trading LLC
Dubai, United Arab Emirates
Desert Online General Trading LLC
Dubai, United Arab Emirates
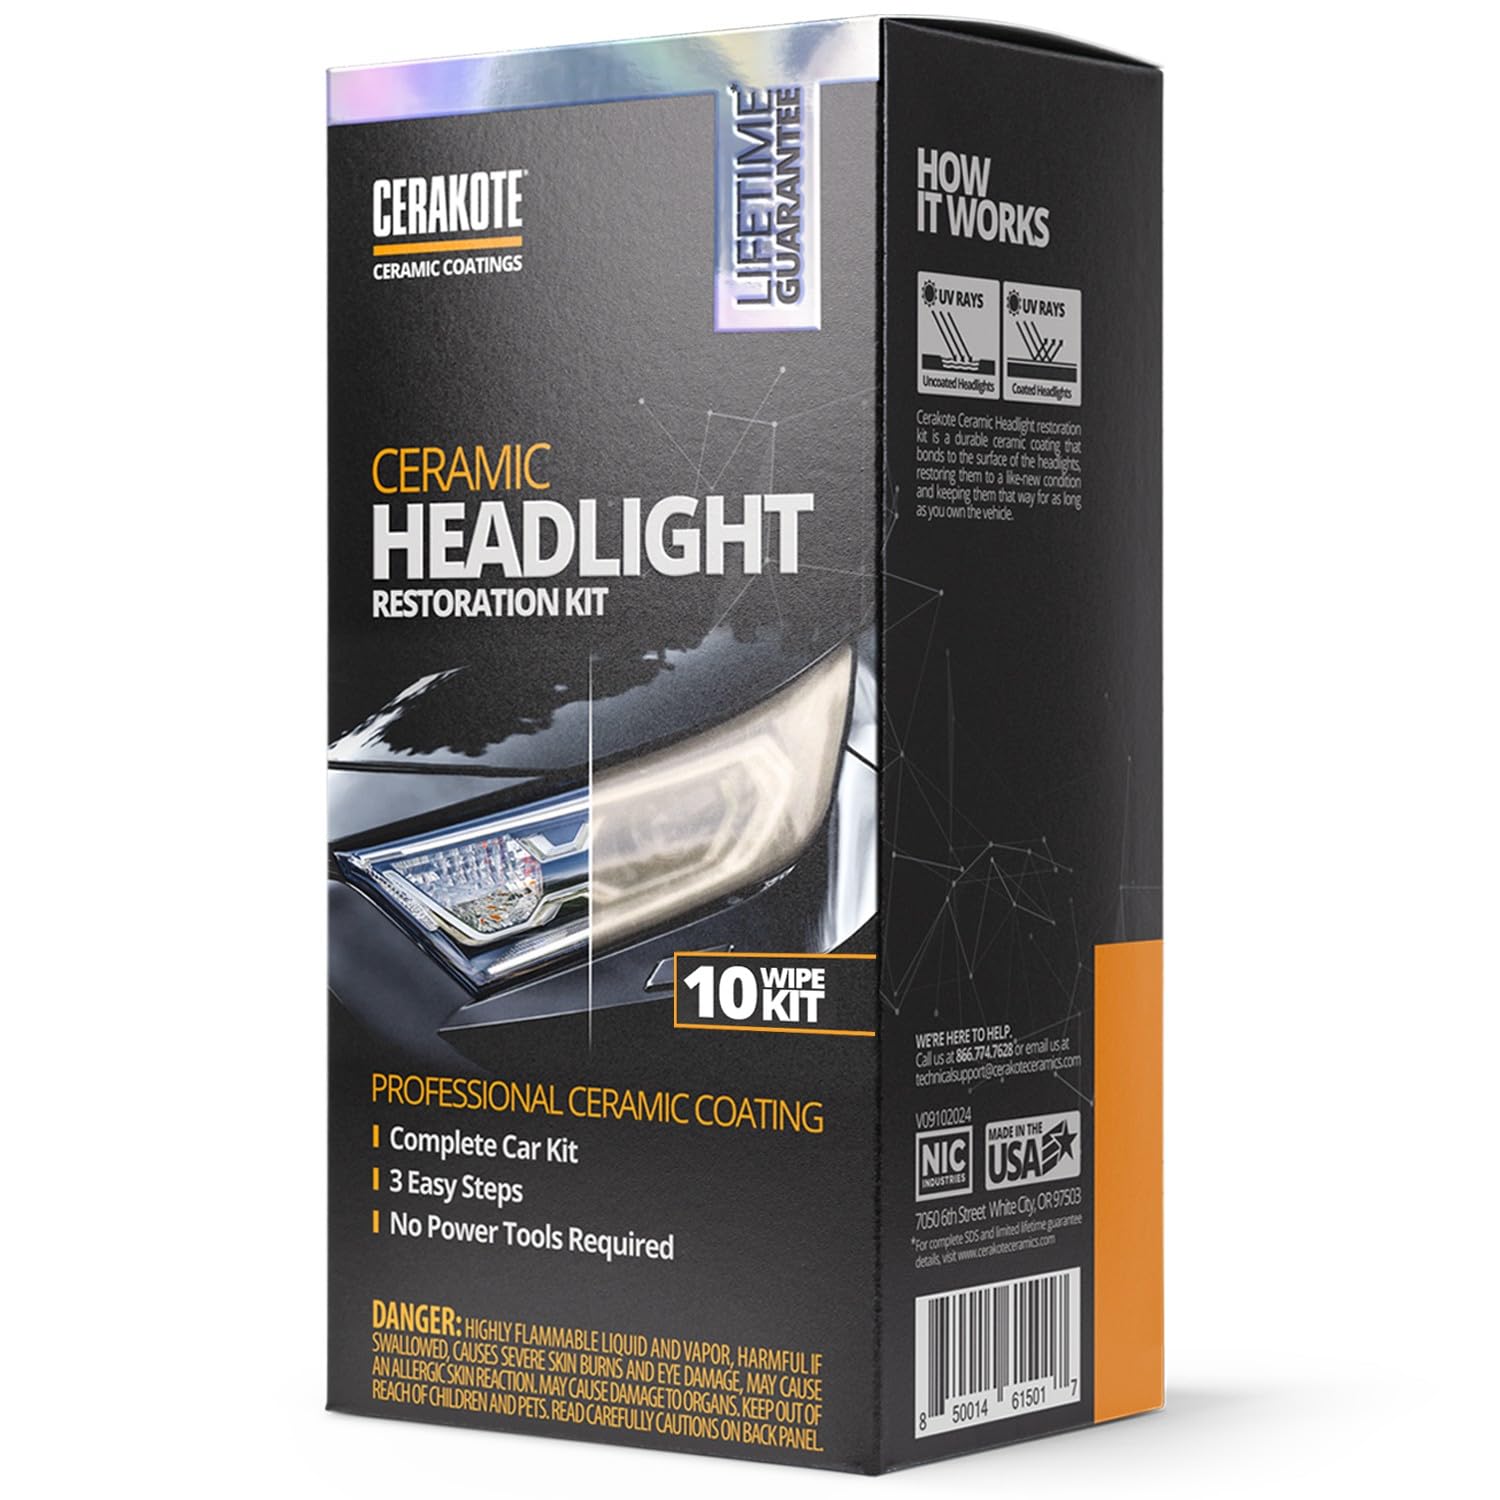


✨ See and be seen—headlights restored to showroom shine, guaranteed! 🛡️
The CERAKOTE® Ceramic Headlight Restoration Kit is a professional-grade, easy-to-use solution that removes oxidation and applies a durable ceramic coating to restore headlights to like-new clarity. This 10-wipe kit requires no power tools and provides UV protection that lasts as long as you own your vehicle, ensuring long-term corrosion resistance and enhanced visibility for cars and trucks alike.


| Brand | CERAKOTE |
| Color | Clear |
| Specific Uses For Product | Brake Lights, Fog Lights, Head Lights, Third Brake Lights |
| Vehicle Service Type | Car, Truck |
| Year | 2024 |
| Special Feature | Corrosion Resistant |
| Wattage | 50 watts |
| Lens Color | Clear |
| Lens Material | Polycarbonate |
| Item dimensions L x W x H | 4 x 3 x 8 inches |
| UPC | 850014615017 |
| Unit Count | 1.0 Count |
| Assembly Required | No |
| Automotive Fit Type | Universal Fit |
| Manufacturer | CERAKOTE |
| Set Name | 10 Wipe Kit |
| Model | CERAKOTE® Ceramic Headlight |
| Item Weight | 4.8 ounces |
| Product Dimensions | 4 x 3 x 8 inches |
| Item model number | AH-HLKITV |
| Exterior | Polished |
| Manufacturer Part Number | AH-HLKITV |
| Special Features | Corrosion Resistant |
Trustpilot
Hace 1 mes
Hace 4 días