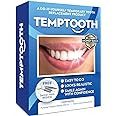
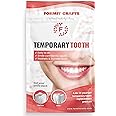
🦷 Transform your smile in minutes with Temptooth!
Temptooth is a trusted, patented temporary tooth replacement kit designed for individuals seeking a quick and natural-looking solution for missing teeth. The kit includes moldable polymer beads that can create up to 10 replacement teeth, complete with FDA-approved materials and detailed instructions, ensuring a safe and effective DIY experience.
R**G
I made a 3-tooth bridge with this product.
Absolute lifesaver. My temporary bridge fell out and I can't afford getting permanents. So I made my own bridge with Temp Tooth, eventhough the product is not sold for that purpose, as you can see from my photos, I brilliantly crafted my own bridge thanks to this product. It helps that I have the 2 stub teeth, but basically I used 14 beads for each tooth. I did one tooth at a time starting with the stub and worked my way across. The key to making a perfect bridge with this product is don't try to shape the tooth perfectly in your mouth, because you're going to do the shaping with a straight razor blade. Just get it to fit and get it the right size. The size and fit is the most important. Once you make the first tooth, put it in the freezer for about 30 seconds. That causes it to expand and solidify. Step 2, put the tooth you just made back in your mouth. If you did it right, it should go on the stub perfectly. Step 3, do the same thing for the other stub. Now you should have two false teeth that fit perfectly over your stubs. Now the fun part: creating the middle tooth and making the bridge. All you have to do is put the 2 false teeth in your mouth and hold them in place with your bottom teeth, then make the middle tooth and shape it between the outer 2 teeth. When you're doing this, make sure the middle one is somewhat hot so that it will stick to the 2 outer teeth. Also, make sure the teeth are in relative proportions to regular teeth. Remember, they don't have to be perfect at this stage, because you're going to make them perfect later with the razor blade. Now, once you got the middle tooth in between the other 2 teeth, pull all three out altogether slowly and make sure they stay together because they will be loosely stuck together. Take a tweezer and grip one end of the bridge with the tweezer. Then, dip the entire bridge in boiling hot water for 2 seconds. This will cause the bridge to stick together more tightly. Take it out, blow it real quick, and then immediately put it back in your mouth so that you don't lose the shape. Use your index and thumb fingers to press the front and back part together to get a tighter grip on your stubs. Also push on the part next to your upper gums to make sure that part is firmly against your gums.Repeat this step of putting the bridge in boiling hot water 1 or 2 times to make sure the entire unit is firmly stuck together. After each time, put it back in your mouth to reshape it. Now, put the whole unit in the freezer for about 30 seconds. This will cause it to solidify and expand. When you take it out, now you have a fully functioning bridge. All you have to do now is shape it to perfection with a razor blade. Just chisel two outer grooves to create the appearance of connecting teeth. And then cut away at the bottom of the bridge to create the appearance of the bottom of each teeth. If you get confused, you can look at a picture online of some teeth to get an idea of how it should look. The most important part of your chiseling is the bite. So if you have an overbite like me, you will need to cut away at the back of the bridge to give your bottom teeth room to chew. You may also want to cut away at the back of the bridge to give your tongue some room and to make it feel natural. If you did everything right, you will notice that the bridge stays in your mouth without falling out. However you will need some fixodent to make it hold all day for talking and chewing. To change the color, I soaked it in Lipton Black Tea for about 6 hours, and it came out perfectly like my other teeth. However, as you can see from my photos, the color will go away once you brush it. Anyway, what a lifesaver. I've talked to people in person and no one ever noticed the difference. This product easily saved me $3,000 that I don't have. Whoever made this product is a GENIUS!!! Thank you.
P**A
Quickly restored my confidence at a time when I'd needed it more than ever
So here's my story, right up front: I had a dental mishap years ago involving an accident. I then went through a very long stretch of time where I was suffering through depression so debilitating and all encompassing, that I largely stopped taking care of my teeth. Although my mental health would eventually improve to the point of taking better care of myself, the damage was already done. Between the accident and the years of neglect that followed, most of my teeth are in varying stages of decay, and thus, very brittle - so much so, in fact, that one of my upper front teeth recently busted off as I bit into a sub.This was immediately devastating. After I realized what happened, I basically went into a panic. It looked horrible. I looked horrible. Making matters worse is the fact that I'm visiting someone who is very important to me - someone whom I've not been able to see in person since COVID began, and have thus been excited about for years. Furthermore, her mom actually wants to meet me for the first time. To say that I felt utterly crushed and demoralized by losing this tooth just days ahead of seeing them would be an understatement. Sadly, I can't even see the dentist about it until December.Being desperate for a way to do something - ANYTHING - to not look so utterly horrible, I eventually stumbled upon DIY teeth using heated silicone beads, of which, TempTooth appeared to be the most well known brand associated with that type of dental repaoit. Swayed by their almost suspiciously good reviews and video tutorials / testimonials, I decided to get a kit - and I cannot express how happy I am that I did.After just 20 to 25 mins, I was able to successfully craft a temporary tooth that honestly looks really amazing. So amazing, in fact, that I ended up needing to discolor and chip it a little bit, just so it wouldn't stand out too much whilst nestled between the low-quality real teeth that surround it 🤣 It took only two attempts to get it right. The few additional tweaks that I'd made in post-production were fairly simple and not time consuming.So, what about the kit itself? The package basically comes with a small vial-bottle of beads, another empty bottle-vial to keep your finished teeth in, a few small dental tools (such as a pick, tweezers, a dental mini mirror), detailed instructions, and the reputation for safety that comes with be a prominent brand (something not necessarily given on generics).While all of that is great I won't lie: I found the tools to be almost entirely useless. Although some will surely appreciate the added utility, I haven't yet found much of any. Aside from from very briefly using the tweezers, I basically just used my fingers to form and shape the beads into a tooth, literally by hand.So what about the beads themselves - what do they do? Although just little round objects in the vial, when exposed to high liquid heat, they become translucent and highly malleable. When left left cool again, the (now roughly tooth shaped) silicone hardens and becomes an opaque white hue. That the silicone becomes so incredibly malleable with heat means that screwing up a tooth is not the end of the world. Simply put the failed tooth back into very hot water again until it melts, and then try again. You can use the same beads again and again, which means thay there are no permanent consequences for mistakes. Conversely, if a tooth is just a little too long or sharp on the edges but otherwise perfect, you can simply trim or file it it down with a pair of nail clippers - no re-melting necessary.Now that a tooth is cracted, how well will it stay in place? Well, if you follow the instructions, it should be pretty sturdy. For me, in regular use, it's been great so far, and has felt reasonable secure when eating very light foods. However I would probably not feel incredibly confident about the tooth staying put for the entirety of a much larger, heavier meal filled with lots of talking, and I'm pretty sure that biting into a very sticky, gooey, chewy type of food would probably cause it to almost instantly come right off - something which could definitely be awkward in most social situations. As such, I plan on purchasing a dental adhesive gel, if only for the added peace of mind.So yeah - all in all - I'm happy to say that my first finished TempTooth looks and feels great, and it's far exceeded my (admittedly low) expectations. Because of TempTooth, I can suddenly go on my trip next week with the confidence that comes from not being deathly afraid of smiling or laughing with friends. Generic silicone beads can be purchased for much less, but if, like me, you're in a hurry and don't want to risk going with a lesser known, untested brand, you can't go wrong with getting a TempTooth kit. And although the dental tools that come with it border on being useless, the brand's reputation alone will probably make the extra cost worth it.
Trustpilot
Hace 3 semanas
Hace 2 meses